YOMANI ML/XR
OWNER MANUAL
26 unrestricted
last updated 3 May 16 document release 2.2 ymn_installing.fm
• serial
An optional interface for dial-up communications (PSTN) may also be available.
In the XR configuration, the YOMANI is normally powered from a mains adaptor
connected to the power input socket. For more information, see “Powering up
YOMANI XR” on page [xref].
Connect the appropriate cables to the YOMANI XR in this order:
1. Plug in the Ethernet cable, the serial (RS-232) cable, or both.
2. To connect the YOMANI to USB master equipment – ePOS equipment, a PC
or a Merchant Unit – plug the USB device connector of the USB cable into the
USB device socket on the YOMANI.
3. To connect the YOMANI to USB slave equipment such as a cheque reader or
biometrics device, plug the USB host connector of the USB cable into the USB
host socket on the YOMANI.
Only use the USB cable (type AWG20-28) supplied by your vendor. A cable length
of 3m maximum is recommended.
4. If you are using a mains adaptor to power your YOMANI XR:
a. plug the power cable from the adaptor in to the power input socket on the
terminal
b. guide the power cable back over the SAM-slot cover
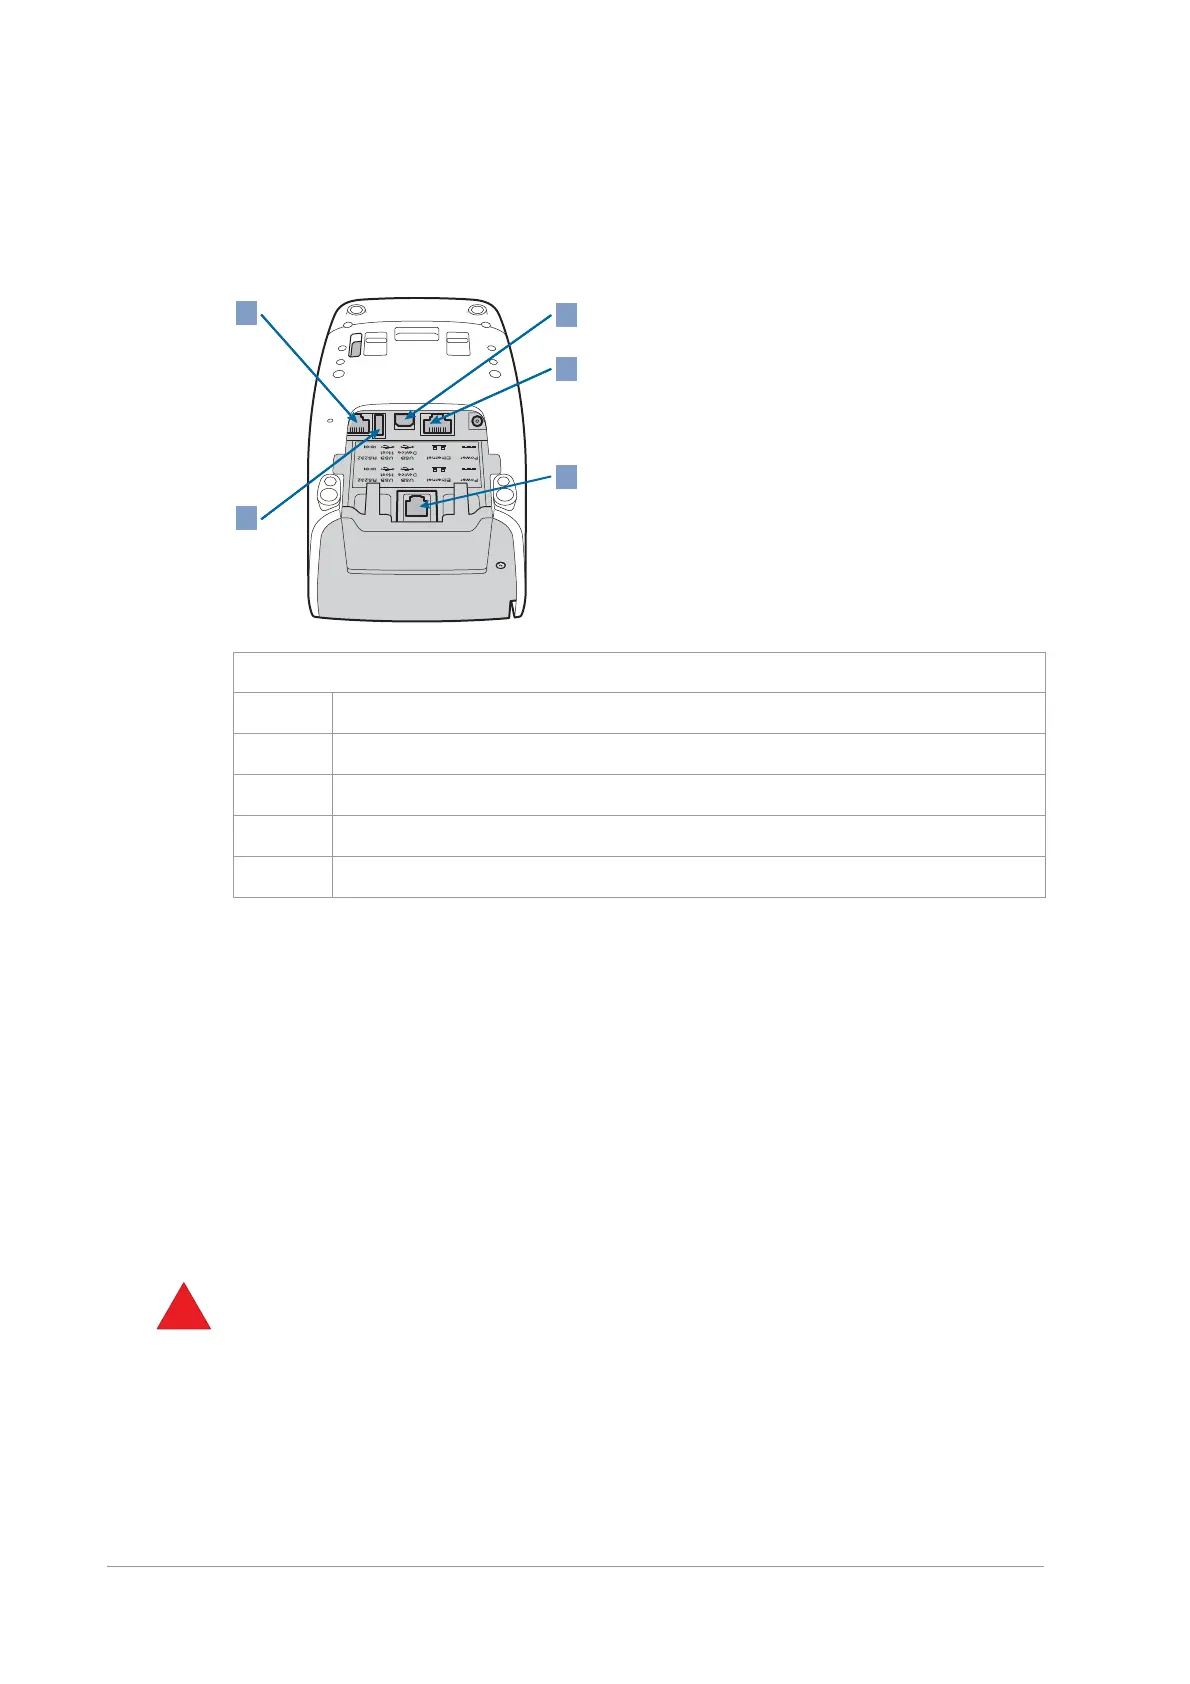
Figure 30. Communication interfaces on YOMANI XR
1 RS-232 serial
2 USB host (USB A)
3 USB device (USB B)
4 Ethernet
5 PSTN (optional)