18
blue
BOX - Translation of the original instructions
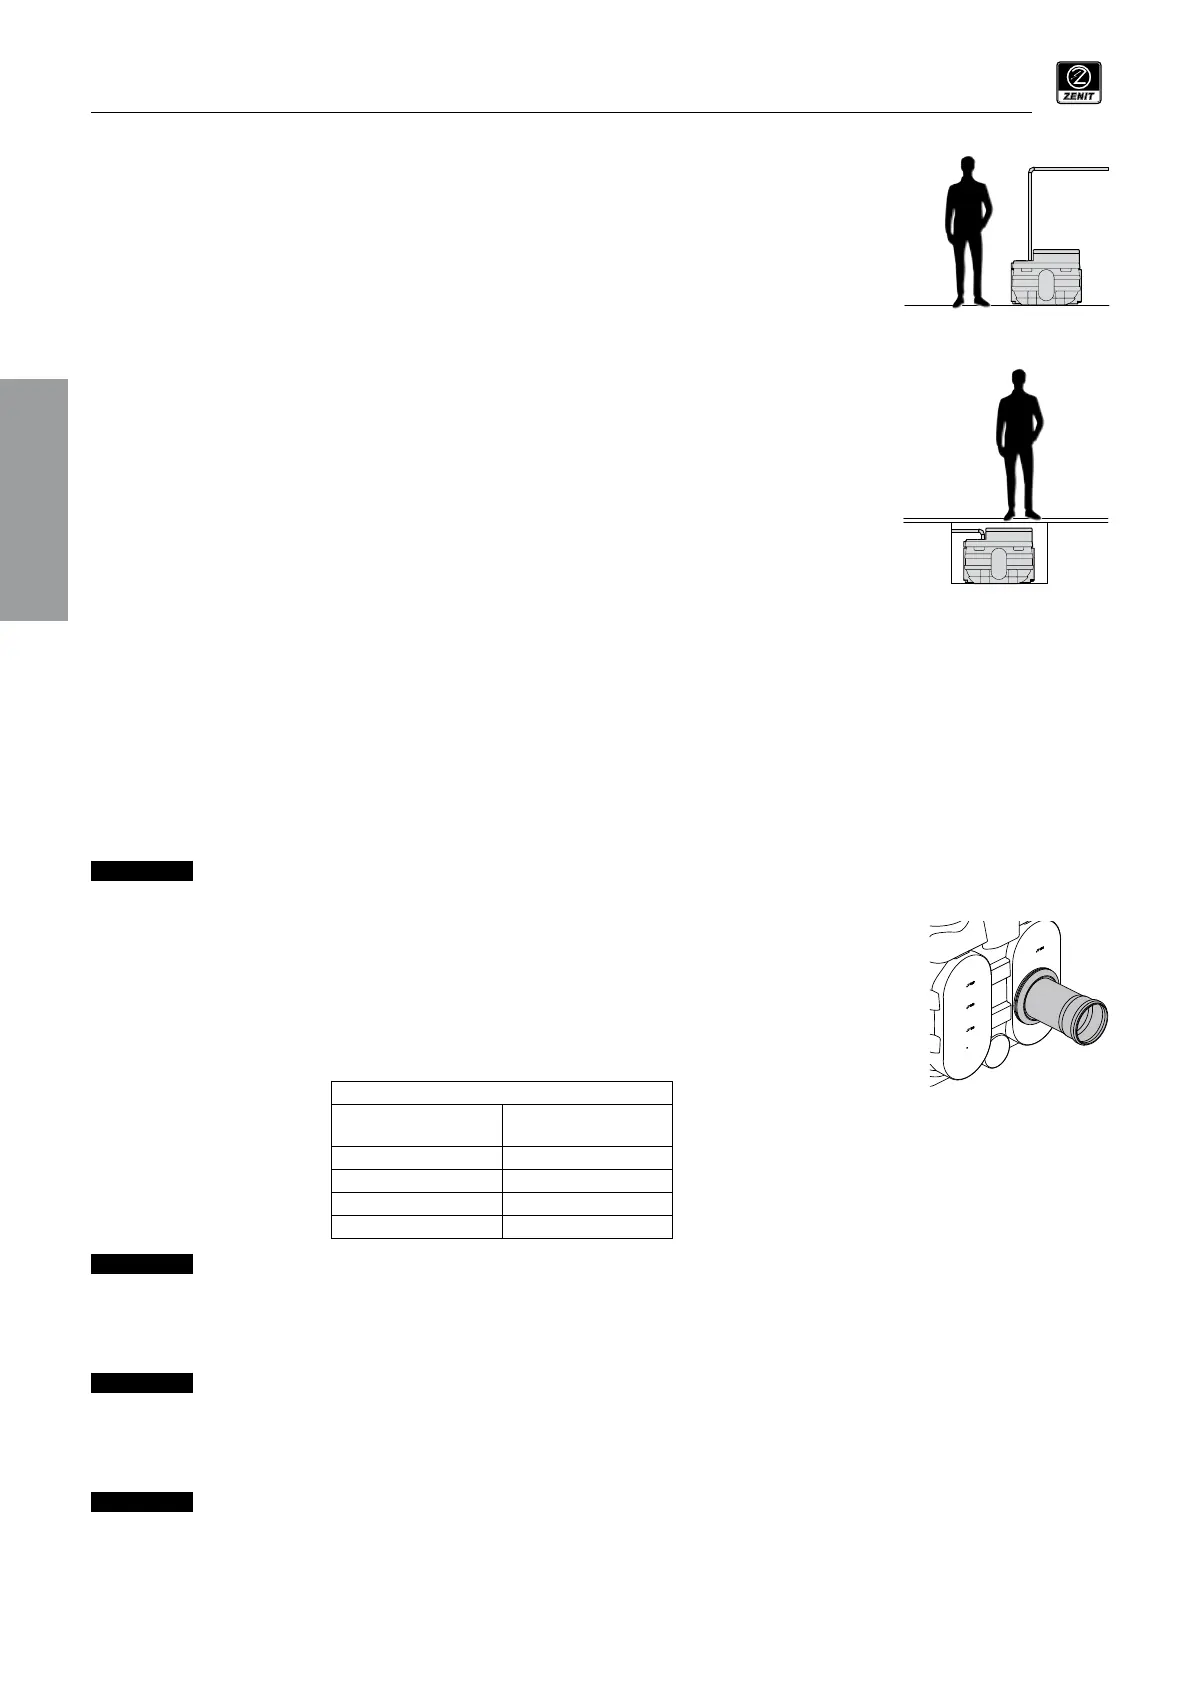
4.3 FLOOR installation (see Annex 2)
1. Ensure that the floor is level, smooth and suitable to support the weight of the full tank.
2. Position the lifting station so that there is sufficient space around it for maintenance work to be carried out.
3. Mark the position of the holes for the anchor screws. Use the designated slots present in the structure.
4. Drill holes in the floor at the marks.
5. Fix the tank to the floor using expansion plugs and appropriately sized screws.
The tightening torque of the screws must be such that the tank is not deformed in any way. If necessary, use
threadlocker or self-locking nuts to prevent screws from loosening.
In order to collect any leaks which may be caused by condensation or maintenance, make sure that the floor is
equipped with a drain connected to the sewer system by means of suitable drainage systems.
If the blueBOX is installed in an enclosed space, ensure sufficient ventilation to prevent the possible formation of hazardous mixtures.
4.4 BURIED installation (see Annex 2)
1. Make sure that the ground does not contain ground water and is not subject to flooding.
2. The lifting station must not be placed directly on the ground: once the excavation work has been carried out
created, a concrete slab at least twice the size of the base of the blueBOX must be prepared at the bottom.
3. Create side walls with adequate clearance around the tank for any maintenance work.
4. Correctly position the lifting station on the slab.
5. Mark the position of the holes for the anchor screws. Use the designated slots present in the structure.
6. Drill holes in the slab at the marks.
7. Fix the tank to the slab using expansion plugs and appropriately sized screws.
The tightening torque of the screws must be such that the tank is not deformed in any way. If necessary, use
threadlocker or self-locking nuts to prevent screws from loosening.
8. The cover of the blueBOX can be walked on but can be driven over. If necessary, an additional cover must be
provided with a metal manhole cover fixed to a concrete structure so as not to encumber the tank.
4.4.1 Extension
If an underground installation at a greater depth than standard is required, an optional extension element can be attached to the top opening of
the blueBOX, which raises the height of the cover by approximately 300 mm.
In the case of installation with a coupling device (DAC), longer guide pipes must be used.
Finding and replacing guide pipes is the responsibility of the Customer.
Installation procedure (see Annex 3)
1. Unscrew the fastening screws of the cover and remove it.
2. Remove the spacer and the guide pipes.
3. Fasten the extension element in place of the cover. Use the screws supplied.
4. Refit the spacer using new, longer guide pipes.
The tank capacity remains the same as in the standard configuration. Do not change the position of the maximum level
alarm float and the level sensor.
4.5 Inlet pipes
The blueBOX lifting stations have various inlet pipe arrangements.
The rubber gasket supplied ensures a perfect seal without the need for additional sealing products.
Installation procedure (see Annex 4)
1. Locate the most suitable inlet pipe position on the tank according to your installation.
2. Drill one or more holes in the tank using a drill fitted with a hollow cutter of the correct diameter according to the
pipe used (Table 1):
Table 1
Ø pipe (mm)
Ø hollow cutter
(mm)
50 60
75 86
90 100
110 127
Before drilling the tank, carefully check the diameters of the pipes and gaskets.
2. Place the gasket in the relevant seat
3. Insert the inlet pipe into the gasket to a depth of approximately 4-5 cm
4. Then clean the inside of the tank of any swarf or residue
Anchor all pipes so that their weight does not bear on the lifting station.
4.6 Pump installation
Pump installation varies depending on the version chosen. The possible versions are either FIXED (pump connected directly to the discharge
pipe) or with a DAC (coupling device)
DO NOT use the power cable or float to lift the pump. Always use the top handle.
EN
 Loading...