54 • Shroud Installation Instructions
SHROUD INSTALLATION INSTRUCTIONS
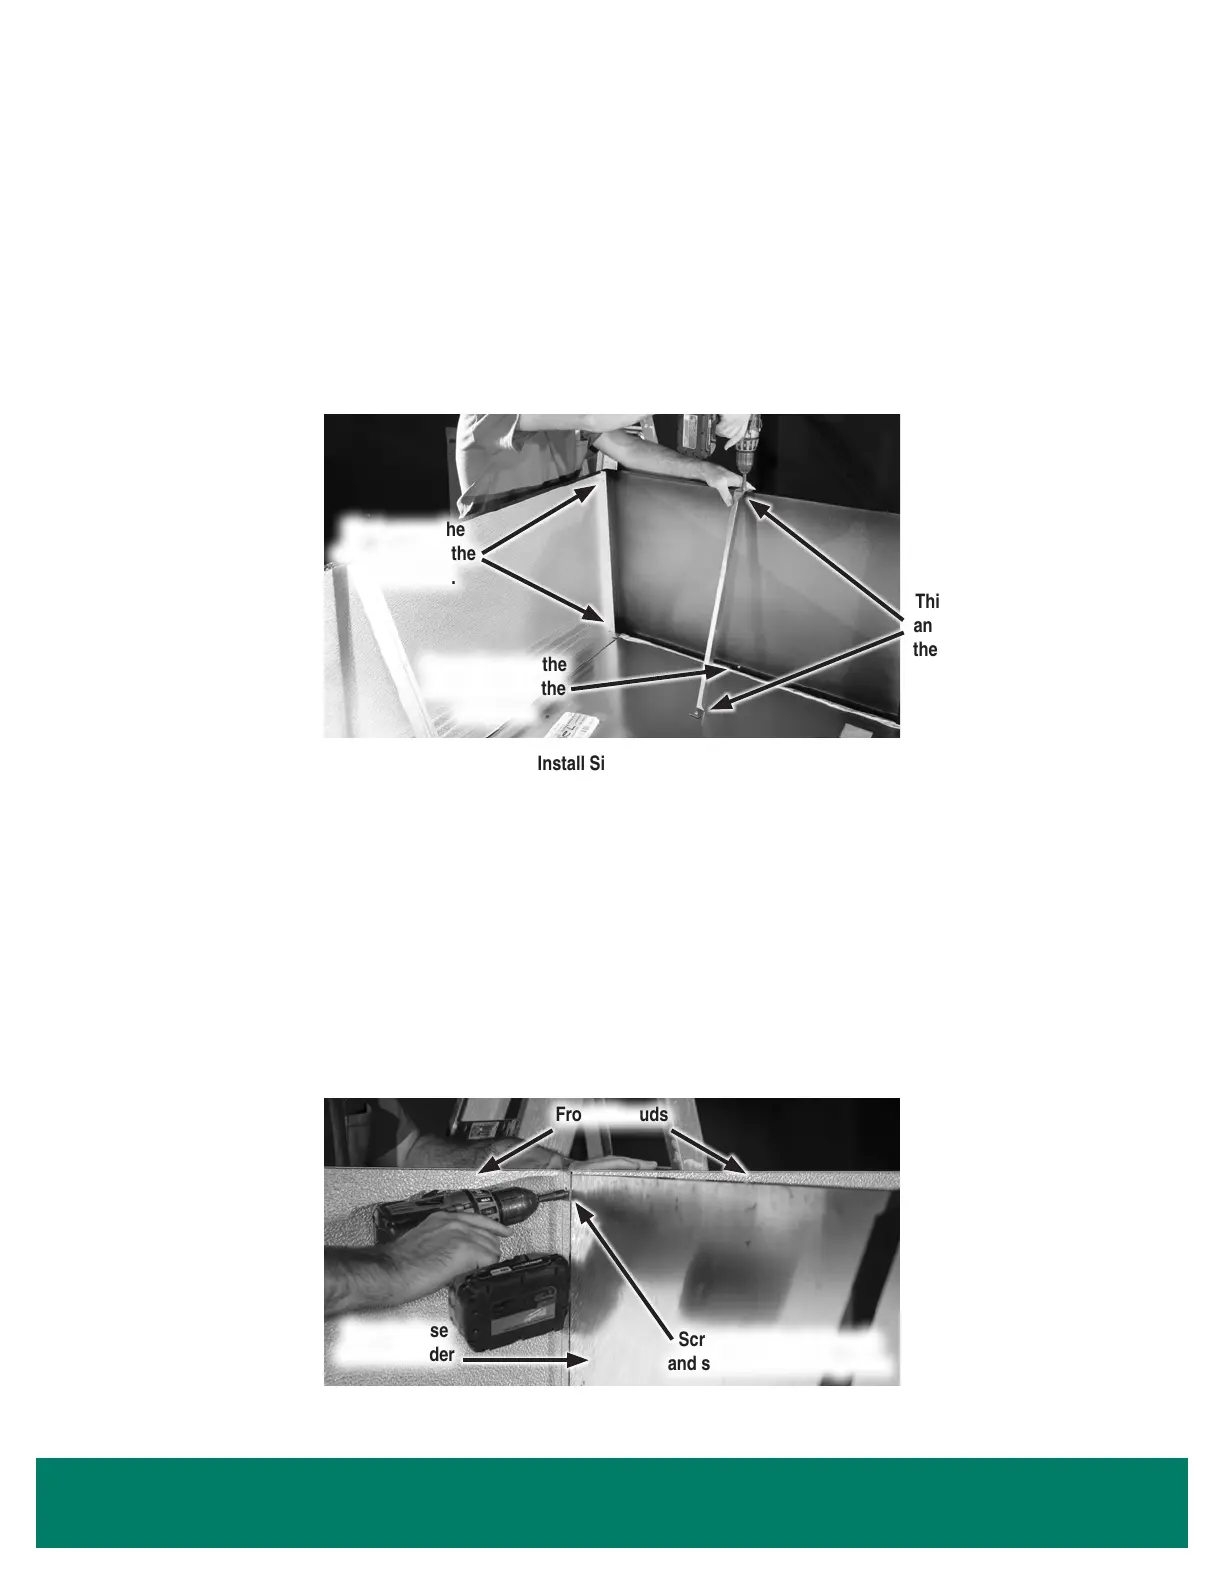
5. Position the side shrouds perpendicular to the front shroud, on top of each end panel.
6. Screw the side shrouds to the front shroud to ensure a tight t.
7. Screw the side shrouds into the end panel using self-tapping screws.
8. Install 1 angle bracket to support each side shroud. Mount the angle bracket to the holes on the top ange of the shroud, and screw the
angle bracket to the top of the case. Use a level to ensure that the shroud is upright.
Install Side Shroud
First, screw the
side shroud to the
front shroud.
Second, screw the
side shroud to the
end panel.
Third, attach an
angle bracket to
the side shroud.
Screw both front shrouds
and shroud divider together.
Install Shroud Divider Between Front Shrouds
Front Shrouds
Case-to-Case
Shroud Divider
HYBRID
™
LINEUPS
9. For a lineup of Hybrid
™
cases, a case-to-case shroud divider is necessary to block warm air discharged from one condensing unit from
entering the next condensing unit.
a. Start the lineup at the leftmost case by installing the front shroud (steps 1-4) and the leftmost side shroud (steps 5-8).
b. Install the next front shroud (steps 1-4).
c. Insert the shroud divider between the 2 front shrouds at the case joint. The ange on the shroud divider can turn toward either the rst
or second display case.
d. Screw the shroud divider and both front shrouds together using the same screws.
Highlight Merchandiser
®
- 20 1/4" Tall Standard Shroud
 Loading...