Shroud Installation Instructions • 53
Standard Shroud Assembly
SHROUD INSTALLATION INSTRUCTIONS
SINGLE CASE
1. The screws that hold the upper raceway cover will be used to hold the front shroud. Loosen the screws without removing them.
2. Slide the front shroud under those screws and tighten.
3. See the table for angle bracket quantities. Install the angle brackets to support the front shroud. Mount the angle brackets to the holes on
the top ange of the shroud.
4. Screw the angle brackets to the top of the case. Use a level at each angle bracket location to ensure that the shroud is upright, and not
tilting forward or backward.
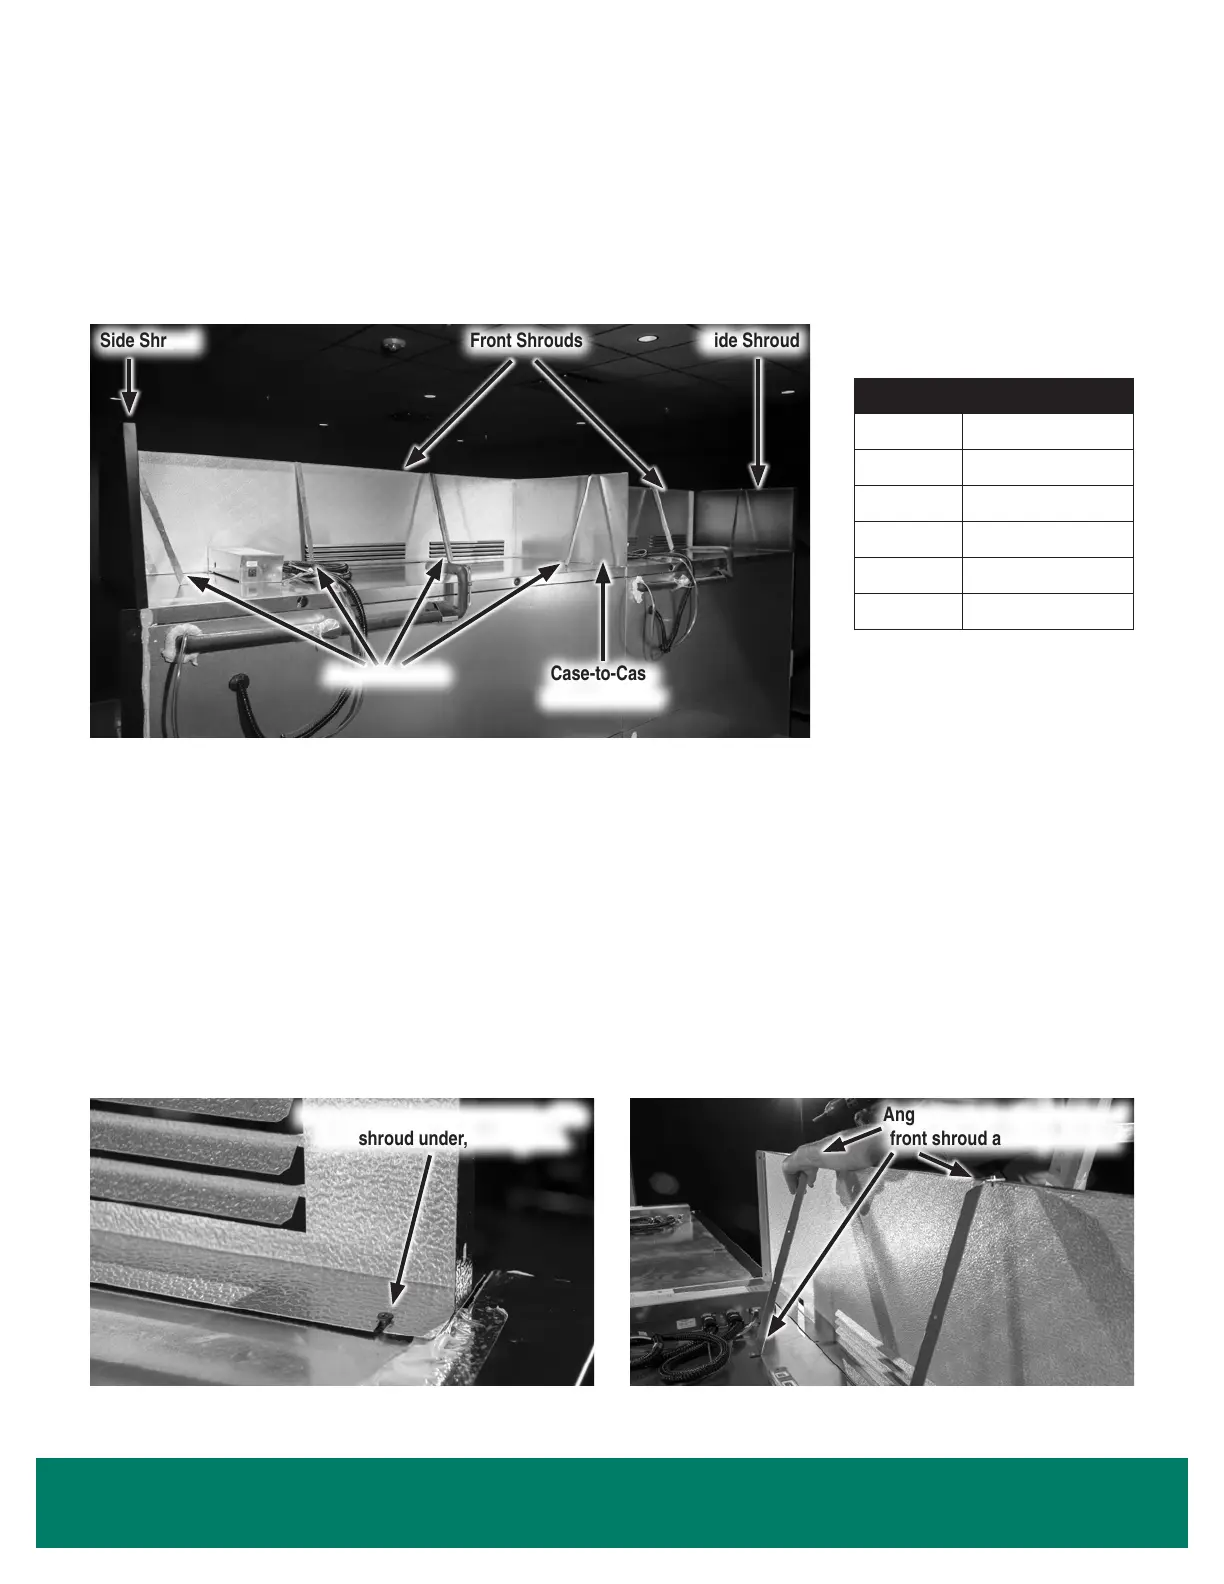
Shroud Assembled, From Behind Case (3-Door Hybrid
™
Lineup Shown)
Front ShroudsSide Shroud
Case-to-Case
Shroud Divider
Side Shroud
Angle Brackets
Attach Front Shroud Using Raceway Screws
Loosen upper raceway screws, slide
front shroud under, and tighten.
Attach Angle Brackets to Front Shroud
Angle brackets attach to top of
front shroud and top of case.
Highlight Merchandiser
®
- 20 1/4" Tall Standard Shroud
!
CAUTION! 20 1/4" TALL SHROUDS ATTACH TO THE UPPER RACEWAY COVER. DO NOT SCREW THE FRONT SHROUDS
DIRECTLY INTO THE UPPER RACEWAY AS THIS WILL CAUSE AN ELECTRICAL HAZARD.
Number of Angle Brackets for Front
Shrouds
CASE SIZE ANGLE BRACKETS
1-Door None
2-Door None
3-Door 2 Brackets
4-Door 2 Brackets
5-Door 3 Brackets
6-Door 3 Brackets

 Loading...