3. Simple driving mode (for first time users)
This chapter describes how a new user can quickly call up and drive his locomotives. It is assumed here
that these engines have already been programmed with a known address, if not see chapter "Simple
Addressing & Programming”.
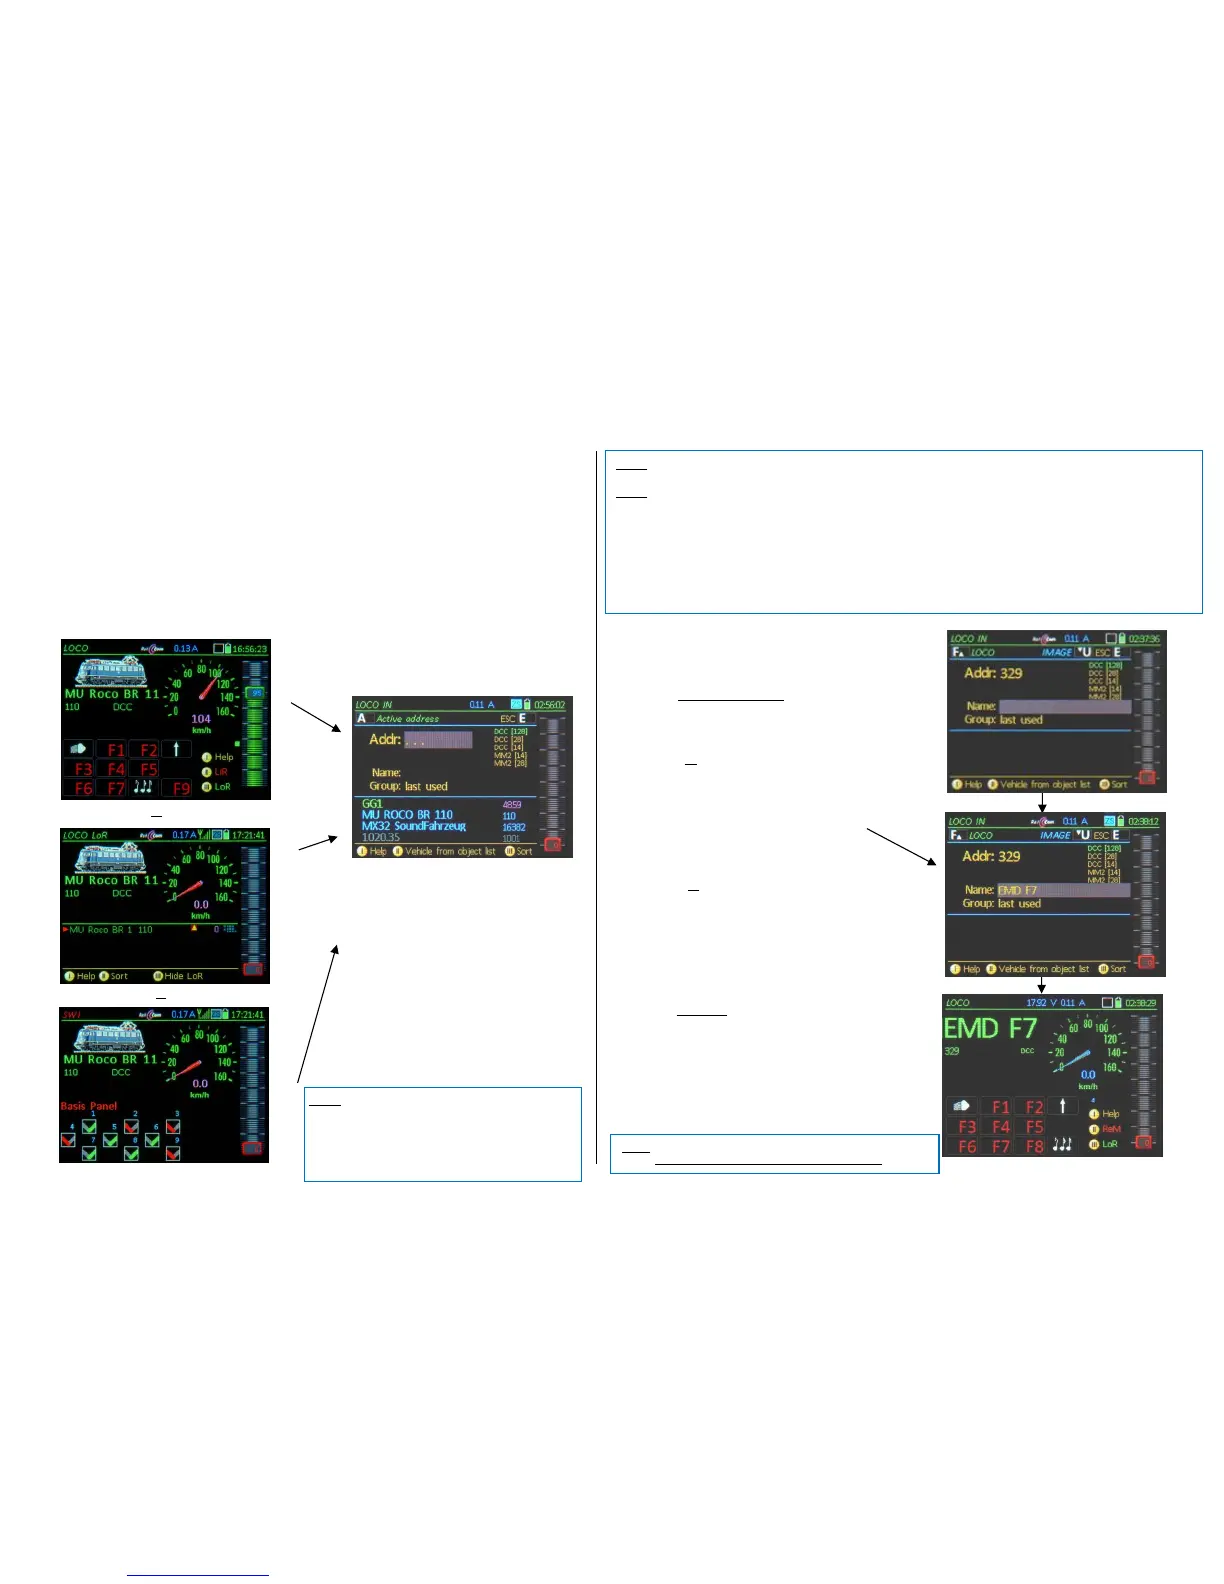
From the “normal” driving screens, either LOCO (various representations, mostly with function icons
or LoR in the lower display half) or SWI (with switch icons), the address input screen LOCO IN can be
called up anytime with the A-Key (with -Key + A from LOCO with visible LoR), to enter data of a new
vehicle and activate it with the F-key:
The LOCO IN screen appears by default only after booting up a completely new or empty controller!
After switching to LOCO IN, the desired vehicle address can
be entered (if not taken over from the object list, see left):
Numeric keypad Vehicle address
(Use C-key for deleting individual characters)
After that, either immediately
F- Key activates the new vehicle (with the
entered address, but without a name) and
switches to the LOCO mode.
or
A- Key switches to the input field “Name” (or use
the Scrolling wheel to move to the next line)
Keypad enter a Name using the (Shift) key to switch
between ABC, abc, 123 (indicated at the end of a word)
and then
F- Key activates the new vehicle (with entered
address and name) and switches to the LOCO mode.
or
right after entering a name:
A- Key switches to the input line “Group”
Rocker Switch Select a Group
(optional, has no functional significance)
F- Key Activates the new vehicle (with entered
address, name and group); controller switches to operating
mode LOCO
optional
The following is only necessary when a specific track format,
other than the standard DCC with 128 speed steps, is required.
Scrolling wheel Select from the list DCC or Motorola
(MM) format (with various speed steps)in the upper right
of the display
F- Key activates the new vehicle
with entered address and data format (possibly name and
group); controller switches to operating mode LOCO.
NOTE: (to the photos on the left): The display pictures are examples for the many possible representations in the operating
modes LOCO and SWI (with/without image, large/small image, with/without speedo, different speedo designs etc.).
NOTE: (to the pictured “MU ROCO…”): This vehicle with the address 110 is stored by default in the device and can be ac-
cessed as a template for a full GUI (graphical user interface) by typing and activating the address 110 on the LOCO IN page
(see below). It can, of course, be deleted from LoR and Object Database if desired (as any other created vehicle). See "Object
Database".
This factory stored address 110 is not the so-called “sample” address; the latter is address 16383 by default and does not ap-
pear in the Object Database, cannot be used as an operational address (because the address is outside the DCC range of
1...10239) and is only used to determine which GUI elements are to be assigned automatically when activating a new address
(= not yet in the system). These are by default: a green speedo and the function icons "light" or "sound on / off") for F0 and F8;
see chapter "CAB CONF" (in “Operating mode LOCO”).
An excerpt from the object database of the
controller is listed in the lower half of the
screen, which matches the previously en-
tered digits (of the address) or characters
(of the name). This way, if a vehicle already
exists in the controller, a quick selection
can be made from this list.
Softkey II Switches to the vehicle list of
the Object Database
Scrolling wheel Scrolls in the list
A- Key Accepts the selection and
moves the same to the upper field
(From there: activate with the F-Key)
 Loading...