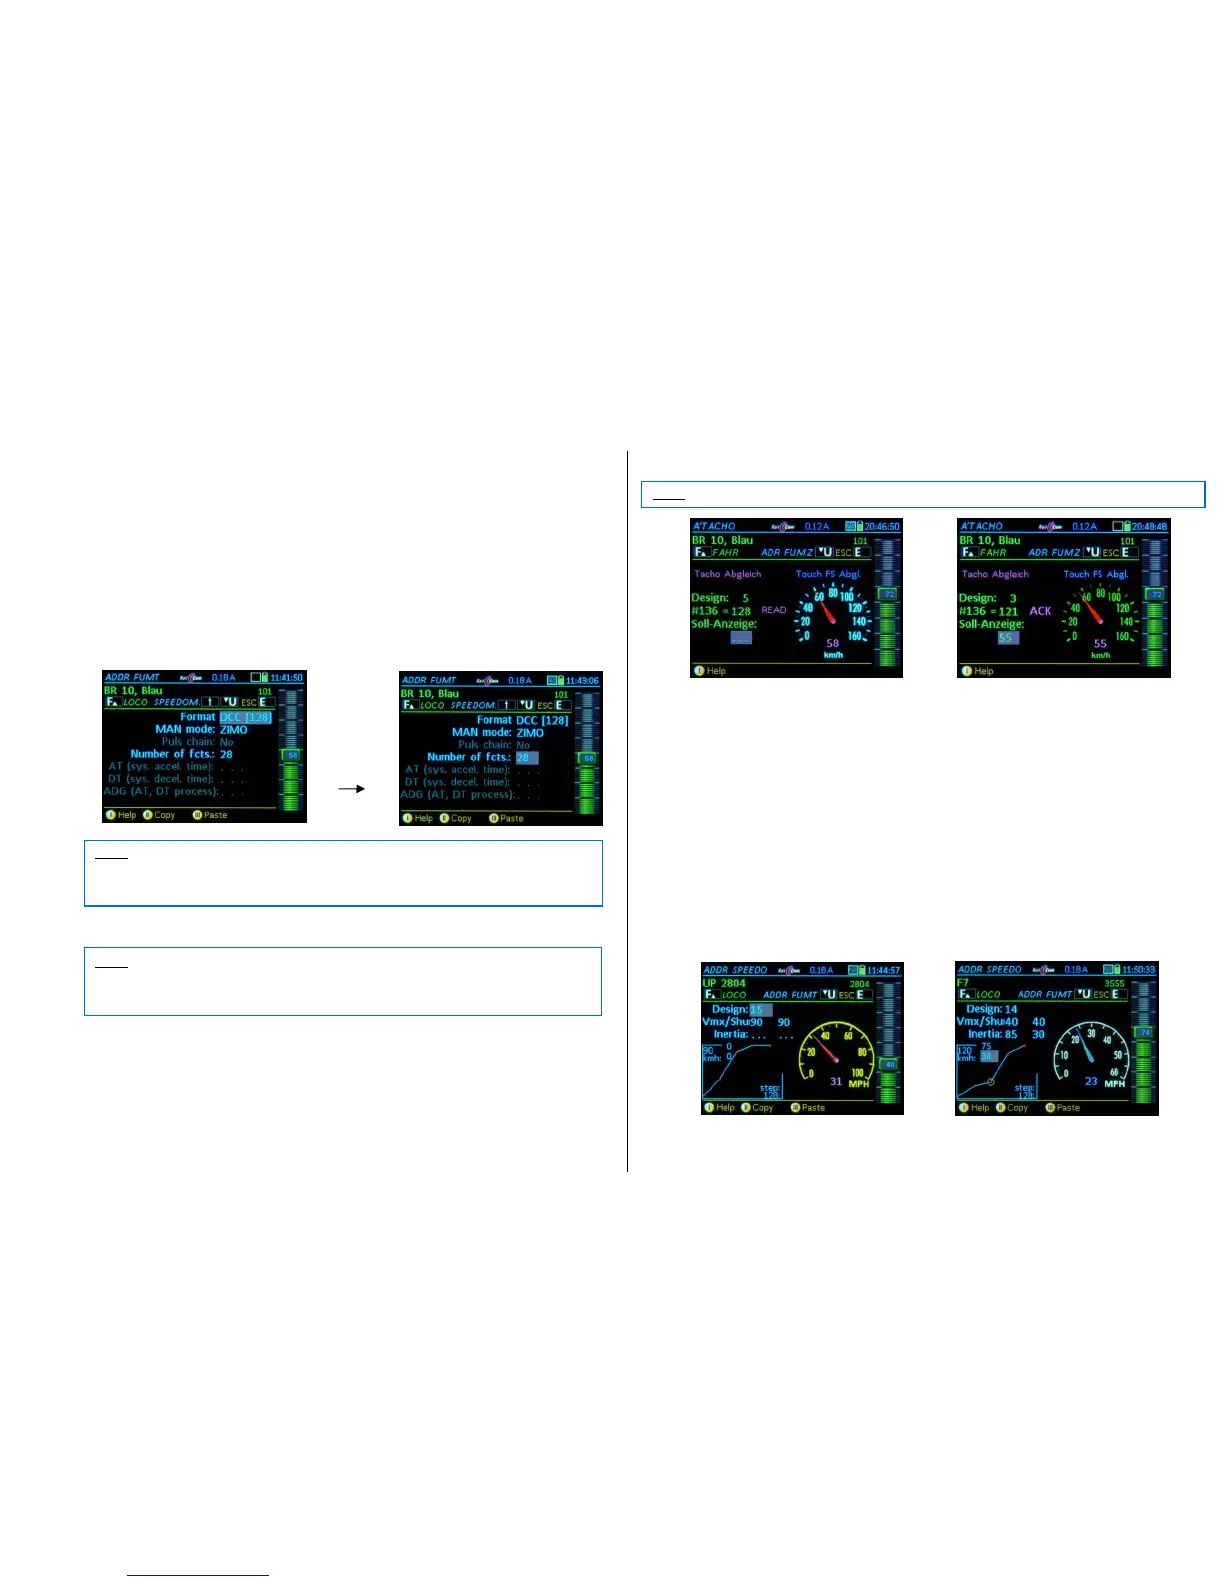
E + 1 ADDR FUMT – Various settings for engine control
Function Mode (FUM): The number of functions the command station should send,
8A: the “old” 8-function mode (ZIMO decoders before 2003 that used more than 4 functions)
8: only 8 functions are sent and displayed
12: 12 functions
20: 20 functions
28: 28 functions (all as per NMRA)
If this number of functions is defined incorrectly, only the (lower) number of F-keys will appear in the
LOCO screen.
Pulse chain: for very old LGB decoders (“serial” function switching); which operates up to 8 function
outputs by automatically switching F1 ON and OFF multiple times.
AT, BT: System-controlled acceleration times (0 … 15); these two values are often used just temporarily, in
addition to the decoder acceleration and deceleration times (CV #3, 4).
CRV: Curvature variations to AT, BT (currently not implemented)
An active shunting operation ends automatically when switching to the CV screen (OP PROG
or SERV PROG).
E + 2 ADDR SPEEDO – Speedometer settings
The speedometer can display two fundamentally different types of speeds:
1) Speedometer display based on RailCom feedback (magenta-colored pointer): the calibration of
this feedback takes place in CV # 136. By pressing E-key + 2 you get to the "RailCom speedo
adjustment" screen (right picture). There are two setting options here:
- Design: different "Speedo Dials" (different colors, representations, km/h or mph) can be se-
lected with the function keys or the scrolling wheel. Confirm with: F-Key.
- Target-Speed (only when driving): The speedometer reading can be corrected here by enter-
ing a different speed. Confirm with the A- Key.
- Tapping on the speedometer face leads to the adjustment screen for “speedometer adjust-
ment without RailCom feedback”.
2) Speedometer display without RailCom feedback (blue pointer): the speed is calculated from the
speed steps. For a meaningful display, the speed steps must be matched to the km-value for
each vehicle; using the curve diagram with the four adjustable points (see below for details).
The following points can be changed:
Design: various “speedo faces”. Confirm with the F-Key.
Vmx: defines the “maximum” speed of the speedo dial, currently 4 different Vmax. scales.
Rg: selecting “shunting” switches over to the “shunting-speedo” dial.
Trailing: The pointer movement is to trail behind the sent speed step commands (to imitate momentum);
NOT ACTIVE with RailCom speed feedback.
Speed steps to speed mapping curve: (only while driving): depending on the set speed, a red dot is
marked on the speed curve; In the upper value pair field, the current speed step is visible, in the lower
field the (corrected) speed (km/h value) can be entered. The curve is changed accordingly. This can be
repeated for the three (lower) speed points.
 Loading...