ZIPPIE Salsa M (MWD)
Approach the kerb in a 90° angle and stop the chair as
soon as the castor wheels touch the kerb.
Apply sufficient power to the motors to lift the front of the
chair up onto the kerb (step) and then apply slightly more
power and speed so that the drive wheels climb the kerb
(step) smoothly and without hesitation and the rear castor
wheels come up as well. As far as possible, keep the
joystick in the straight forward position (Fig. 4.10 - 4.11).
Note: In accordance to the ground clearance, the maximum
obstacle height possible to climb is 5 cm (10 cm with kerb
climber) for Salsa R and 7.5 cm for Salsa M.
WARNING!
The approach speed and process can vary depending on
your wheelchair performance and castor wheel choice.
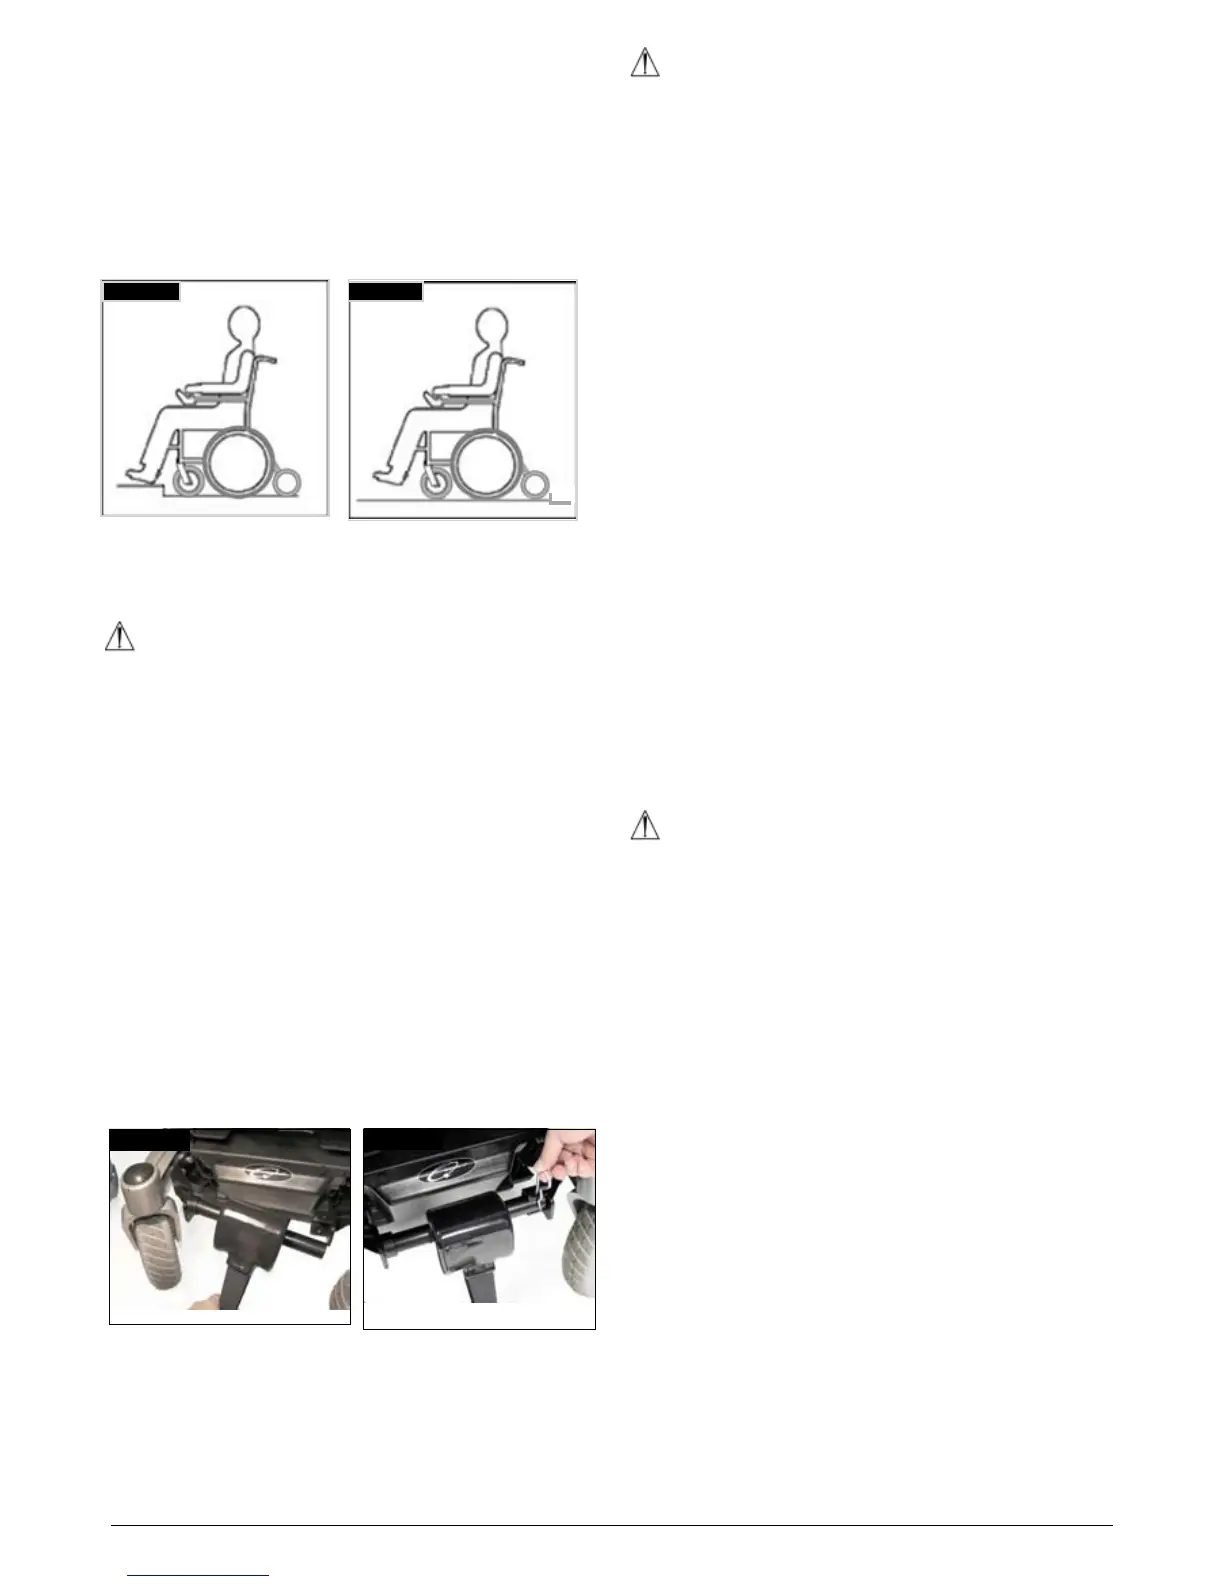
4.30.3 Kerb climber tting and removal procedure
(RWD base only)
• Locatethekerbclimberbarintothelefthandlocation
bracket and push it into the right hand receiver bracket
(Fig. 4.12 and Fig. 4.13).
• Holdthekerbclimberwithyourlefthandinthereceiver
bracket.
• Align the holes of the receiver bracket and the kerb
climber tube and plug in the locking pin from the top.
• Reversetheproceduretoremovethekerbclimber.
WARNINGS!
1. Please show the utmost consideration for the other
traffic on the road. Remember that the last thing a car or
lorry driver expects to see is a wheelchair backing off the
kerb into the road. If in any doubt, do not risk crossing the
road until you are certain that it is safe.
2. Always cross the road as quickly as possible; there may
be other traffic.
3. Do not attempt to go up or down more than a 10 cm (4”)
high kerb (Salsa only with kerb climber fitted).
4. Do not attempt to use the kerb climber on a series of
steps.
5. Do not attempt kerbs if on steep slopes or cambers.
6. Do not attempt any kerbs in the vicinity of drain covers,
uneven or gritty road surfaces.
7. You should not attempt to dismount a kerb any higher
than 5 cm (2”) in the forwards direction.
8. You should always drive towards a kerb in a perpendicular
manner (i.e. at a 90° angle) when you want to go up or
down a kerb.
9. Prior to climbing ensure your legrests will clear the kerb.
10. Take care of the anti-tips which might interfere with the
kerb or the ground when mounting or dismounting a kerb.
WARNING!
This wheelchair is designed to be repaired and assembled
by a Sunrise Medical authorised dealer and not the end
user. The end user has to disassemble and assemble the
chair only for transportation (see section 5.2).
Fig. 4.10
Fig. 4.11
Fig. 4.13
Fig. 4.12
4.31 Lap belt
The lap belt kit. (Fig. 4.14).
Fastening the lap strap:
Insert the 3 prong male buckle into the female buckle until
a click is heard (Fig. 4.15)
To fit the lap strap.
Place the strap loosely across the seat with the buckle
closed.. (Fig. 4.16)
Pass the other ends of the strap through the gap between
the backrest posts and the backrest upholstery as shown.
(Fig. 4.17)
Ensure that the adjusters & buckles can be accessed & the
strap is not twisted. Fit the eyelet over the rearmost bolt.
Fit the plain washer, sprung washer & nut. Tighten with a
13.0mm spanner. Repeat for the other side. (Fig. 4.18)
Ensure that the lap strap is tight enough to provide
comfortable support. A simple measure is to keep a hands
thickness between the body and lap strap. For safety,
check the tension on the lap strap at least once day. (Fig.
4.19)
 Loading...