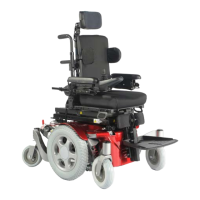
Zippie SALSA
Parts in the battery box (Fig. 12.22):
Sliding support tray for 2 x 12V batteries.•
2 x battery looms with fuse and ring terminals.•
Battery link harness with red and grey connectors.•
Battery Access
Undo the TWO securing knobs on the rear cover (Fig. •
12.17).
The TWO battery connector plugs are visible.•
Disconnect the RED plug.•
Disconnect the GREY plug (Fig. 12.18).•
Grab the rear chassis between the stabiliser wheels •
& pull backwards. The battery tray will slide out (Fig.
12.19).
Handle the batteries using the straps provided.•
Always use correct lifting techniques as batteries are •
heavy.
The two battery looms are identical. One is required to be
connected to each battery:
To disconnect the batteries, lift up the insulator sleeve •
& use 11.0mm spanner to undo the bolt. Always fit the
insulator sleeve when reinstalling (Fig. 12.20).
The red wire containing the 150A fuse connects to the •
battery Positive (+) terminal (Fig. 12.21).
The other black wire connects to the battery Negative •
(-) terminal (Fig. 12.20)
The battery terminals must be covered after connection •
with the caps provided on the cable.
Both batteries are fitted to the battery tray with the •
terminals rear-most, so that the grey connectors can
be mated with the battery link harness.
Ensure the link harness is secured in the slots provided •
in the tray.
If you are in any doubt, please contact your Sunrise •
Medical authorised dealer.
Fig. 12.17
Fig. 12.18
Fig. 12.19
Fig. 12.20
Fig. 12.21
Fig. 12.22
 Loading...