14
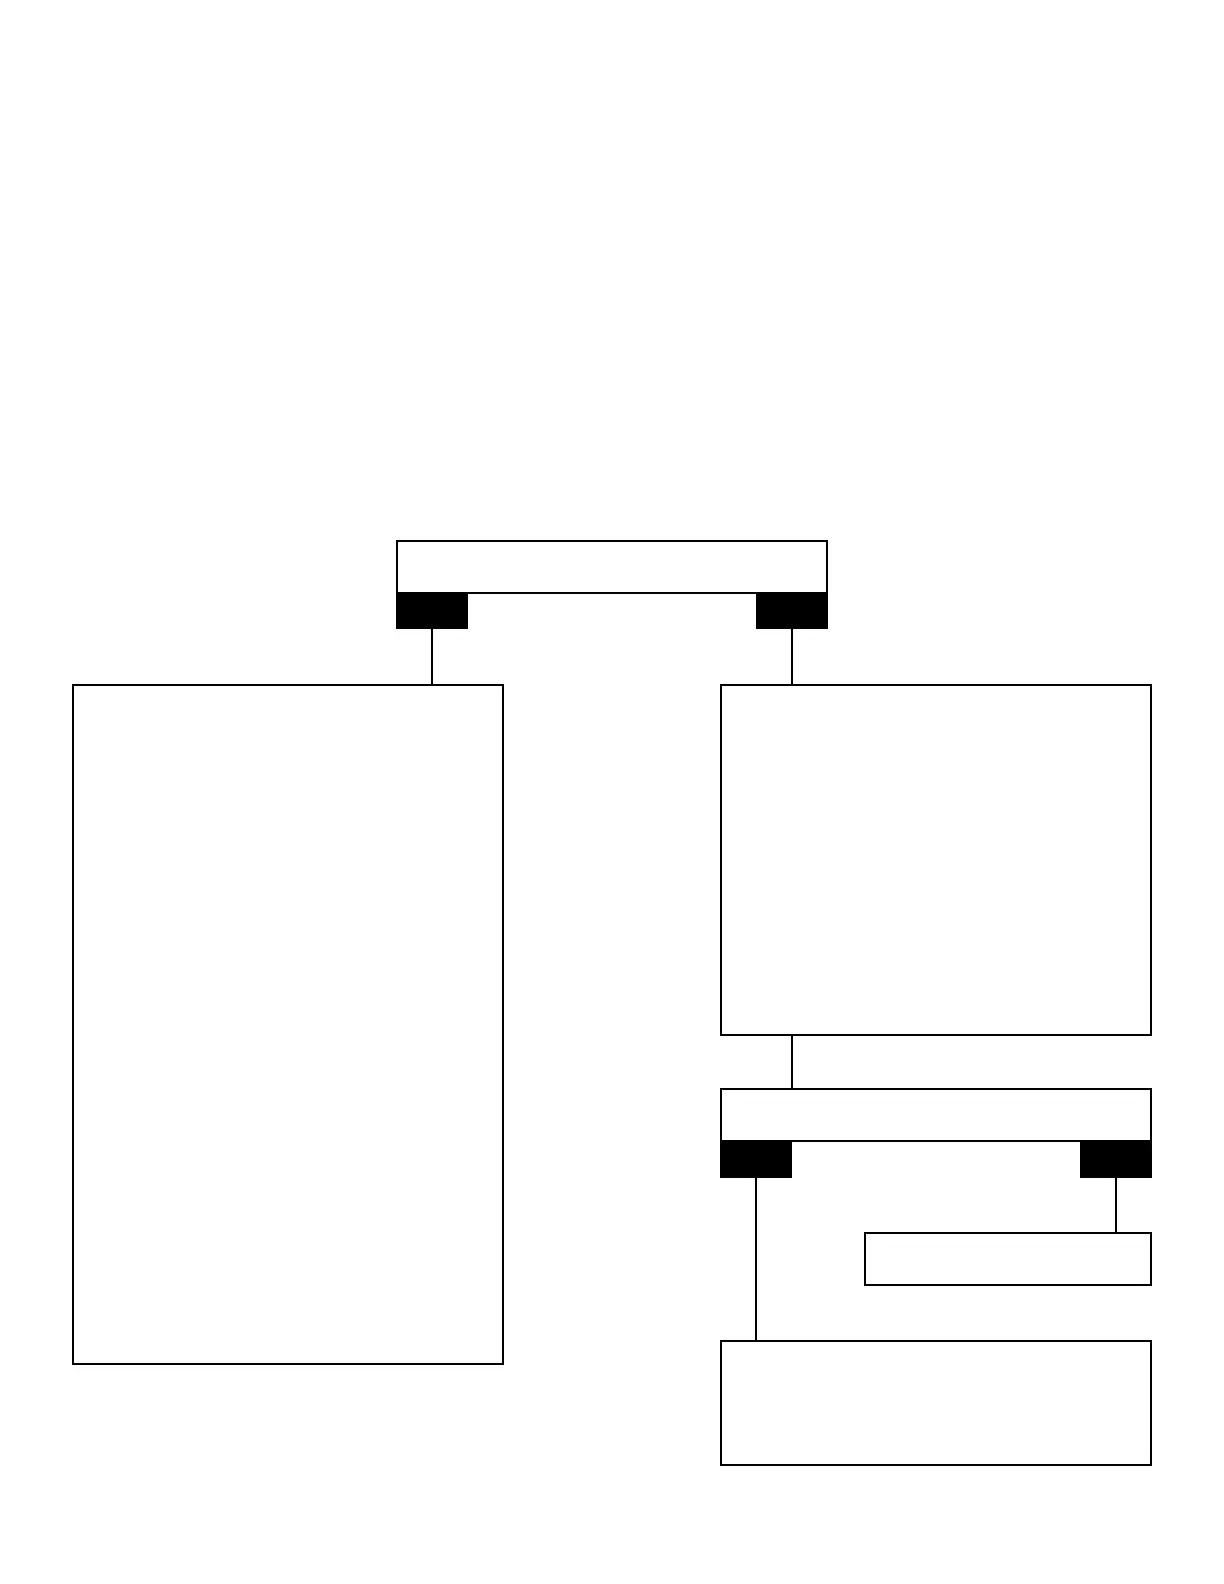
Touch Pad PCB
Check / Replace
1. Note position of Nature2 reminder light and output setting.
2. Turn off power supply.
3. Remove chlorinator from wall if needed.
4. Remove 4 screws to remove cover.
5. Disconnect ribbon wire connector from power PCB (do NOT remove touch pad PCB from cover at this time).
6. Plug ribbon wire connector from new touch pad PCB into power PCB.
7. While holding edges of touch pad PCB, turn on power supply.
8. Push buttons and check all light functions.
Areallfunctionsrestored?
YES
NO
Replace Touch Pad PCB
1. Turnoffpowersupply.
2. Disconnectribbonwireconnectorofnew
touchpadPCBandsetaside.
3. Remove4screwstoremovetouchpad
PCBfromcover.
4. AttachnewtouchpadPCBtocoverwith
4screws.
5. Attachribbonwireconnectorto
powerPCB.
6. Turnonpowersupply.
7. Usebuttonontouchpadlabeled“FastN2”
toadjustreminderlighttoprevioussetting.
8. Replacecoverwith4screws.
9. Replacechlorinatoronwall.
10. Resetoutputtoprevioussetting.
Note: If unit functions properly after replacing
touch pad, power PCB will NOT need to
be replaced.
Replacetouchpad.
Areallfunctionsrestored?
YES NO
1. Replacecoverwith4screws.
2. Replacechlorinatoronwall.
3. Resetoutputtoprevioussetting.
1. Disconnectribbonwireconnectorofnew
touchpadPCBandsetaside.
2. ReplacepowerPCB.
(seePowerPCBpg.16)
3. Attachoriginalribbonwireconnectorto
powerPCB.
4. Turnonpowersupply/pushbuttonsand
checkalllightfunctions.
5. Replacechlorinatoronwall.
6. Turnonpowersupply.