16
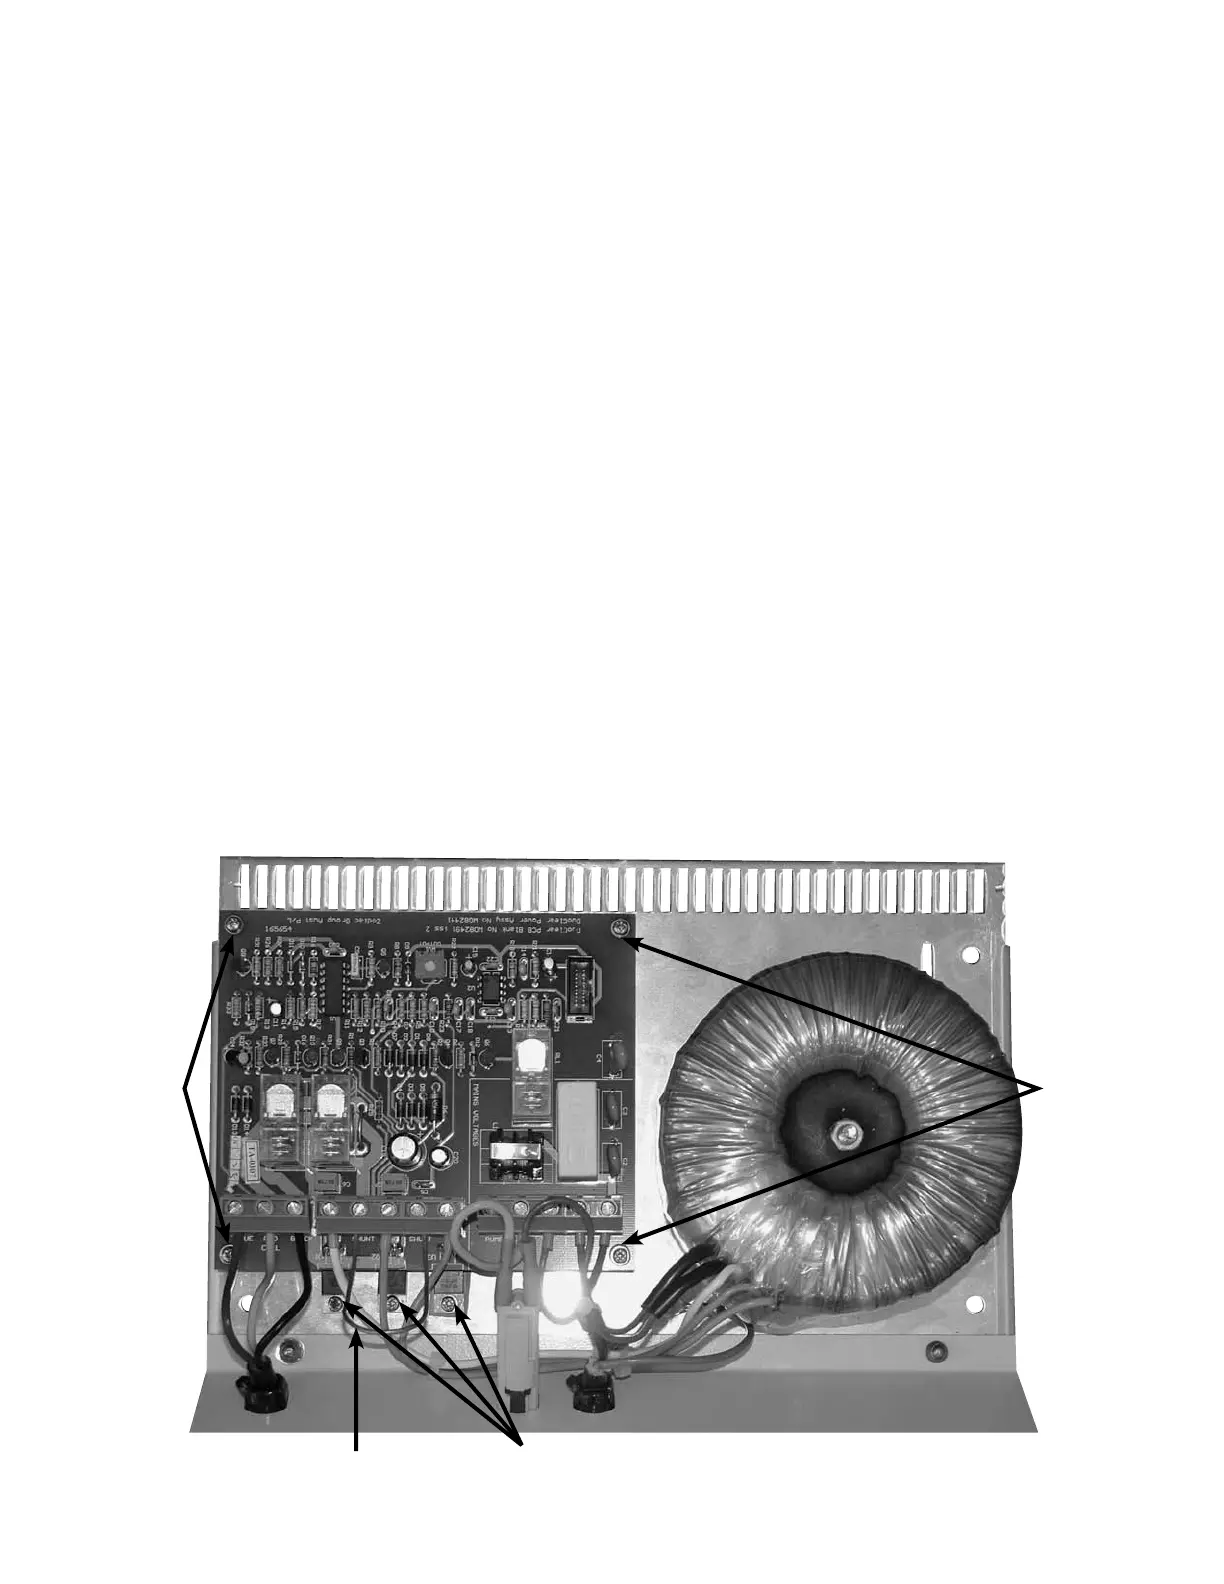
PCB Replacement for DuoClear
Replacement
1. Disconnect power supply.
2. Remove chlorinator from wall if needed.
3. Remove 4 screws to remove cover.
4. Remove ribbon wire connector from power PCB and set cover aside.
5. Remove 3 triac screws “A”, “B” and “C”. (IMPORTANT: Read pg. 17) Note that screw “C” has a special insulating
washer and pad.
6. Remove the 4 screws holding the board on.
7. Lift power PCB away without removing wires and fold forward.
8. Place new PCB in position and replace 4 screws.
9. Replace 3 triac screws “A”, “B” and “C” and tighten securely (special insulating washer and pad on screw “C” MUST
be in place).
10. Transfer wires one at a time to avoid misplacement.
11. Remove the shunt from the old board and position onto the new board. The terminals are labeled. The shunt
hangs down and should not be touching any wires.
12. Attach ribbon wire connector.
13. Attach cover with 4 screws.
14. Replace chlorinator on wall.
15. Reconnect power supply.
16. Test all functions.
IMPORTANT: See next page
concerning triac screws!
PCB
Mounts
Disconnect wires
one at a time
and reconnect
to new board.
PCB
Mounts
Shunt