18
Surface Mounting
Wall (surface) mounting is used where flush mounting is inapplicable (in concrete and
steel structures, entry barrier columns, etc.). The frame is not used.
Caution
If there is a risk of vandalism (in public garages, e.g.), use steel fixing
elements instead of the dowels and screws included in the delivery.
Be sure to insert plugs into unused bushing holes to avoid water leakage
during facade cleaning, for example. Never leave the holes open for even a
short time (one day delay between mounting and cable connection, e.g.).
Safety Warning
Eliminate the risk of accident! Wall mounting is not suitable for narrow
passages or places where people’s attention may be distracted. The
manufacturer shall not be liable for injuries incurred as a result of unsafe
mounting!
1. Select the 2N® Helios IP Safety
position with respect to the supply
cables. Where the cables are installed
inside a structure or wall, use the hole
at the intercom bottom.
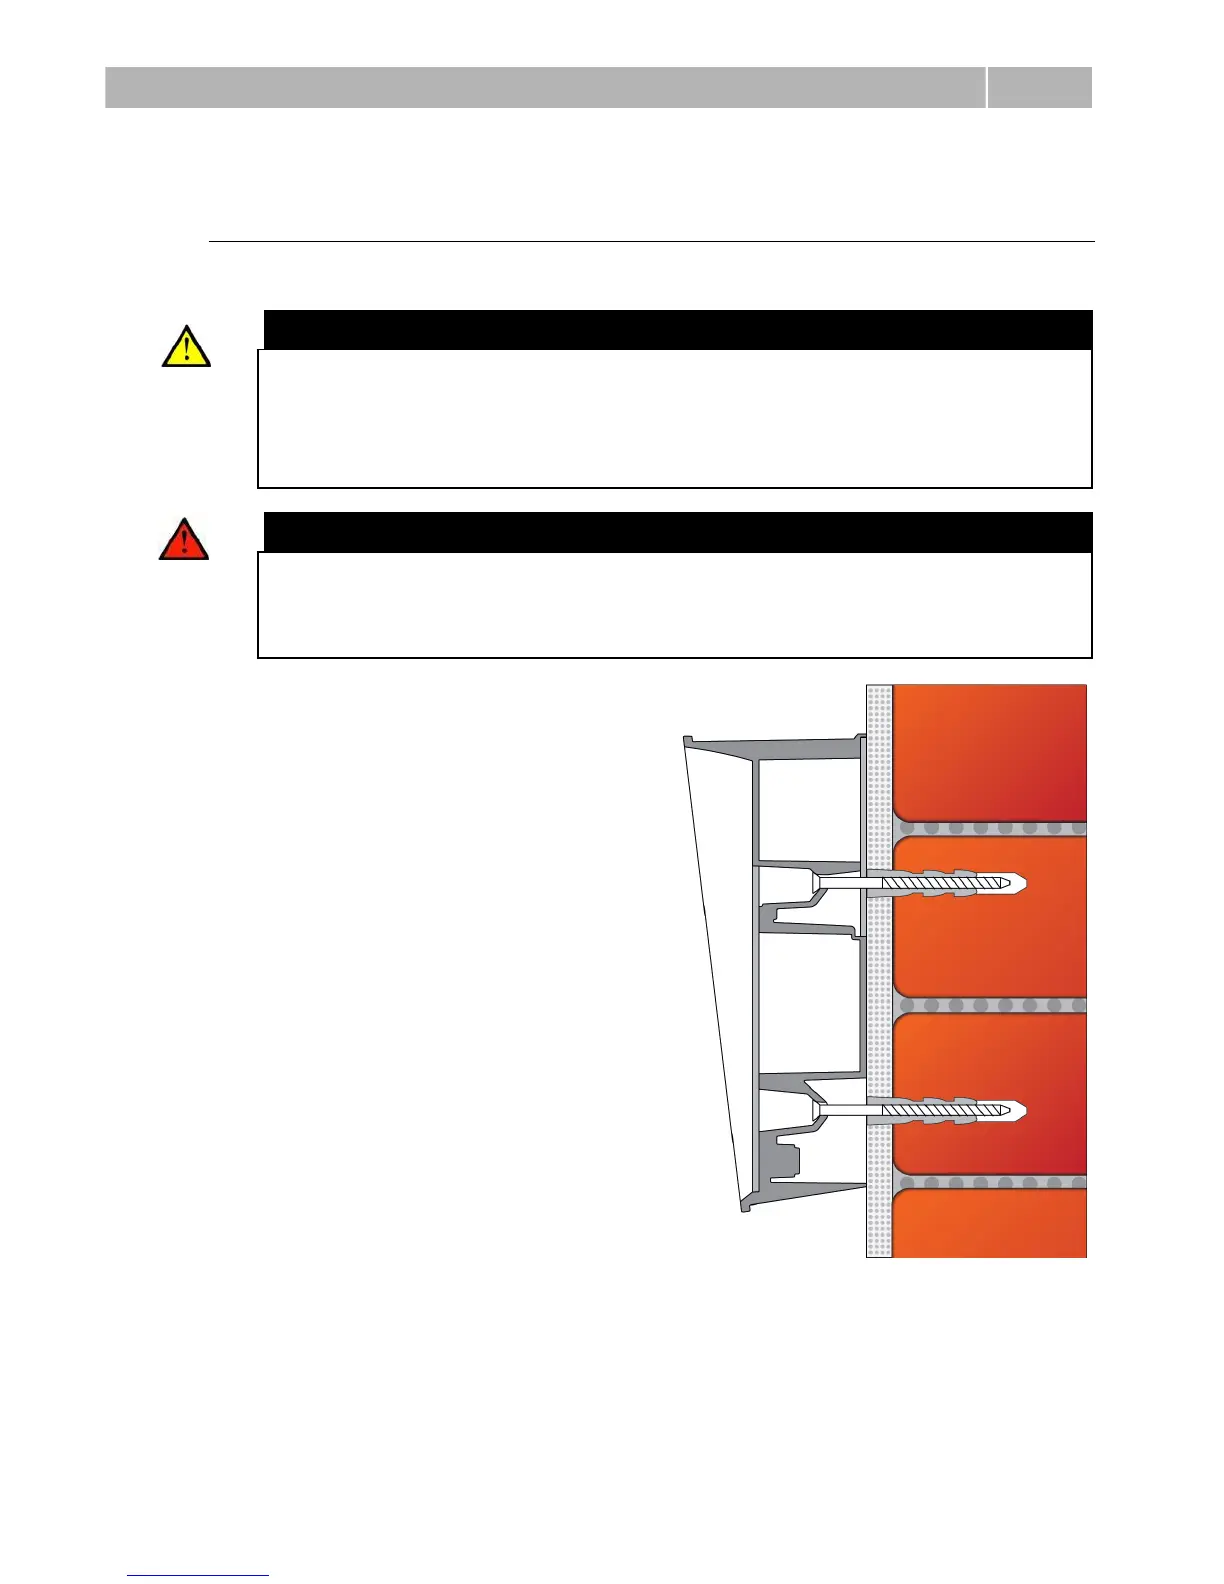
2. Drill holes of the depth of 60 mm for
dowels in the wall as shown in the
figure. Push or hammer the enclosed
dowels into the drilled holes. Use
some suitable building adhesive if the
dowels are too loose. Use fixing
elements of your own for steel
structure surface mounting (metric
screws + nuts, e.g.).
3. Remove the front panel from the
intercom.
4. 2N
®
Helios IP Safety has bushings
already mounted. Replace it with
plugs, if unused.
5. Put the intercom on the wall/structure
while introducing cables inside. Leave
some of the cables inside the unit as a
reserve. Insert the plugs in the
unused bushings and tighten the
bushing nuts carefully.
6. Do not complete mounting until you have finished electrical installation – refer to
Mounting Completion. Where cables lead along the surface, use the bushings
included in the delivery.
 Loading...