22
Use of Cable Bushings
The cable bushings included in the 2N
®
Helios IP Safety delivery are designed for the
following cables:
Big bushing: for two cables of the diameter of 5–6 mm (UTP cable), or, upon insert
replacement, for one thick cable/tube of the diameter of up to 14 mm.
Small bushing: for one cable of the diameter of 5–8 mm.
Tip
Even a LAN cable including the RJ-45 connector can go through the big
bushing. See below for instructions.
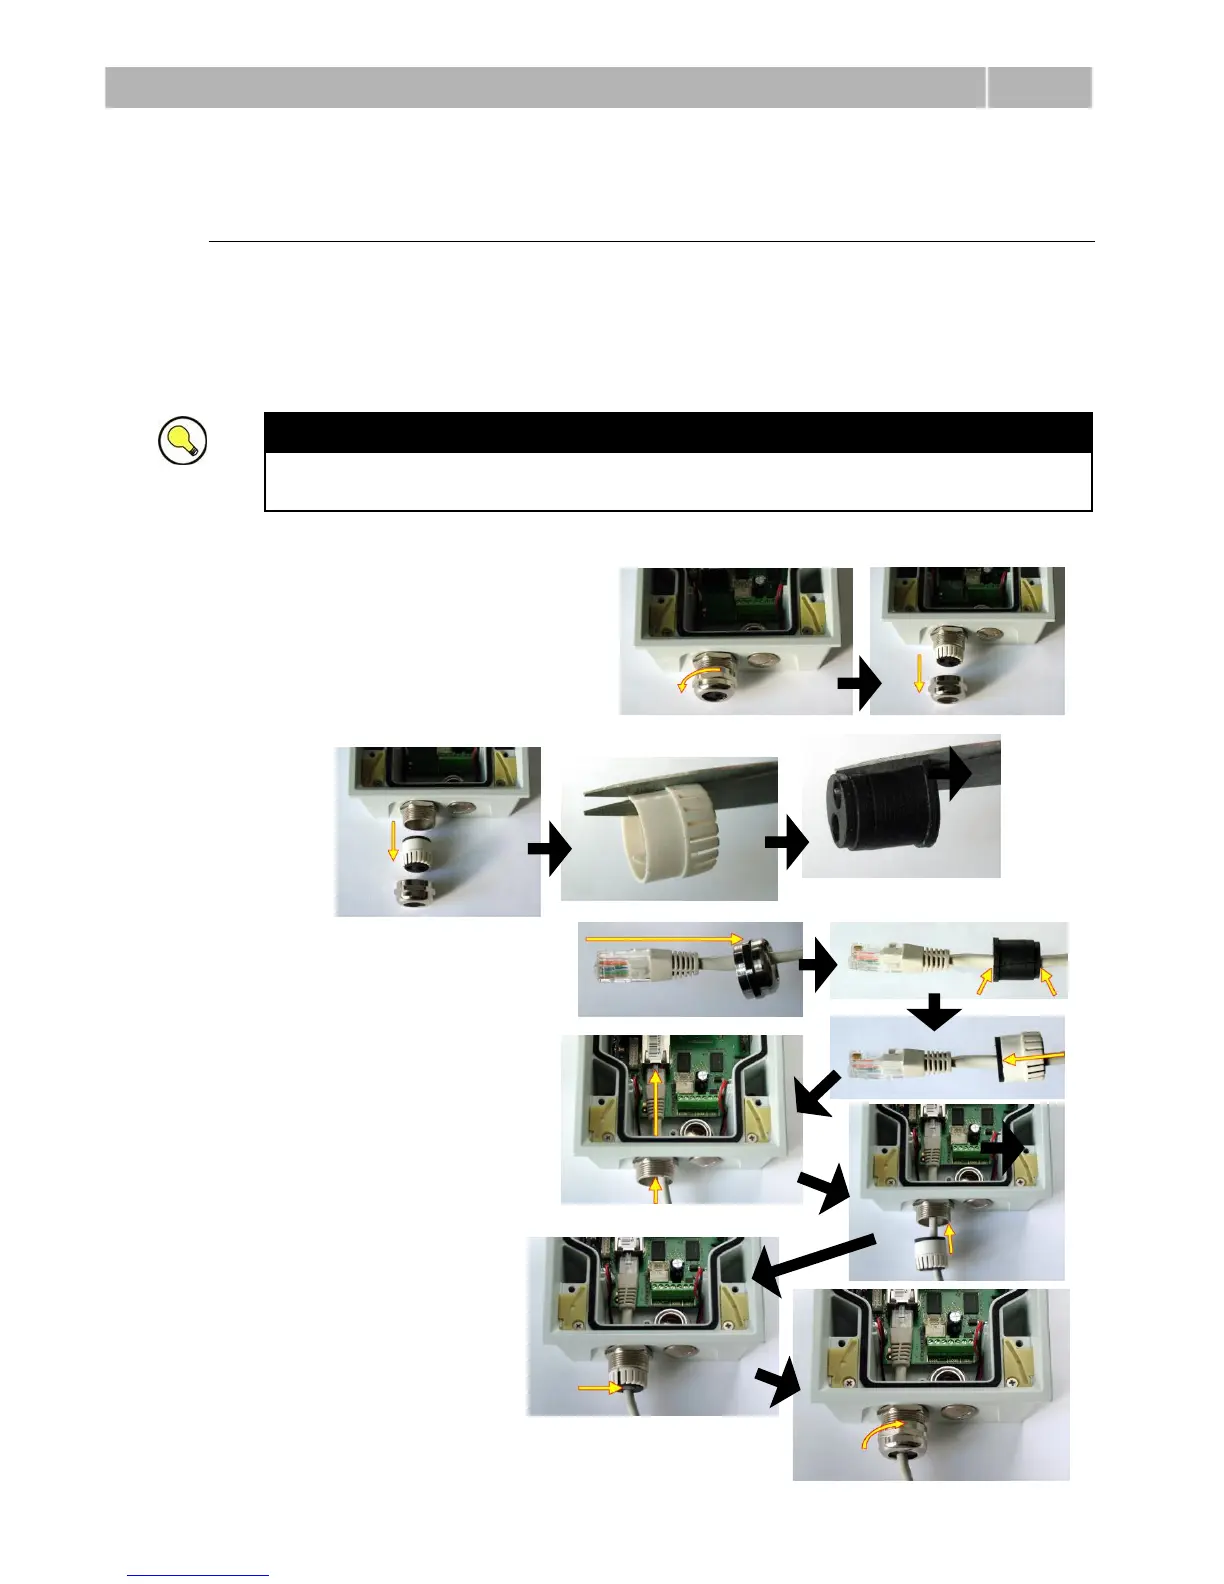
How to Pull a RJ-45 Terminated Cable through a Bushing
1. Unscrew the big bushing nut
completely.
2. Remove the sealing
including the cover from the
bushing. Cut either of the
components as shown in the
figures.
3. Put the bushing nut on
the cable and insert the
sealing.
4. Replace the cover onto
the sealing.
5. Pull the cable
connector though the
bushing body into the
intercom and clip it
into the motherboard
connector.
6. Move the sealing
including the
cover along the
cable as far as the
bushing body, or
add a plug if
necessary.
7. Replace and
tighten the nut.
 Loading...