15
2.2 Mechanical Installation
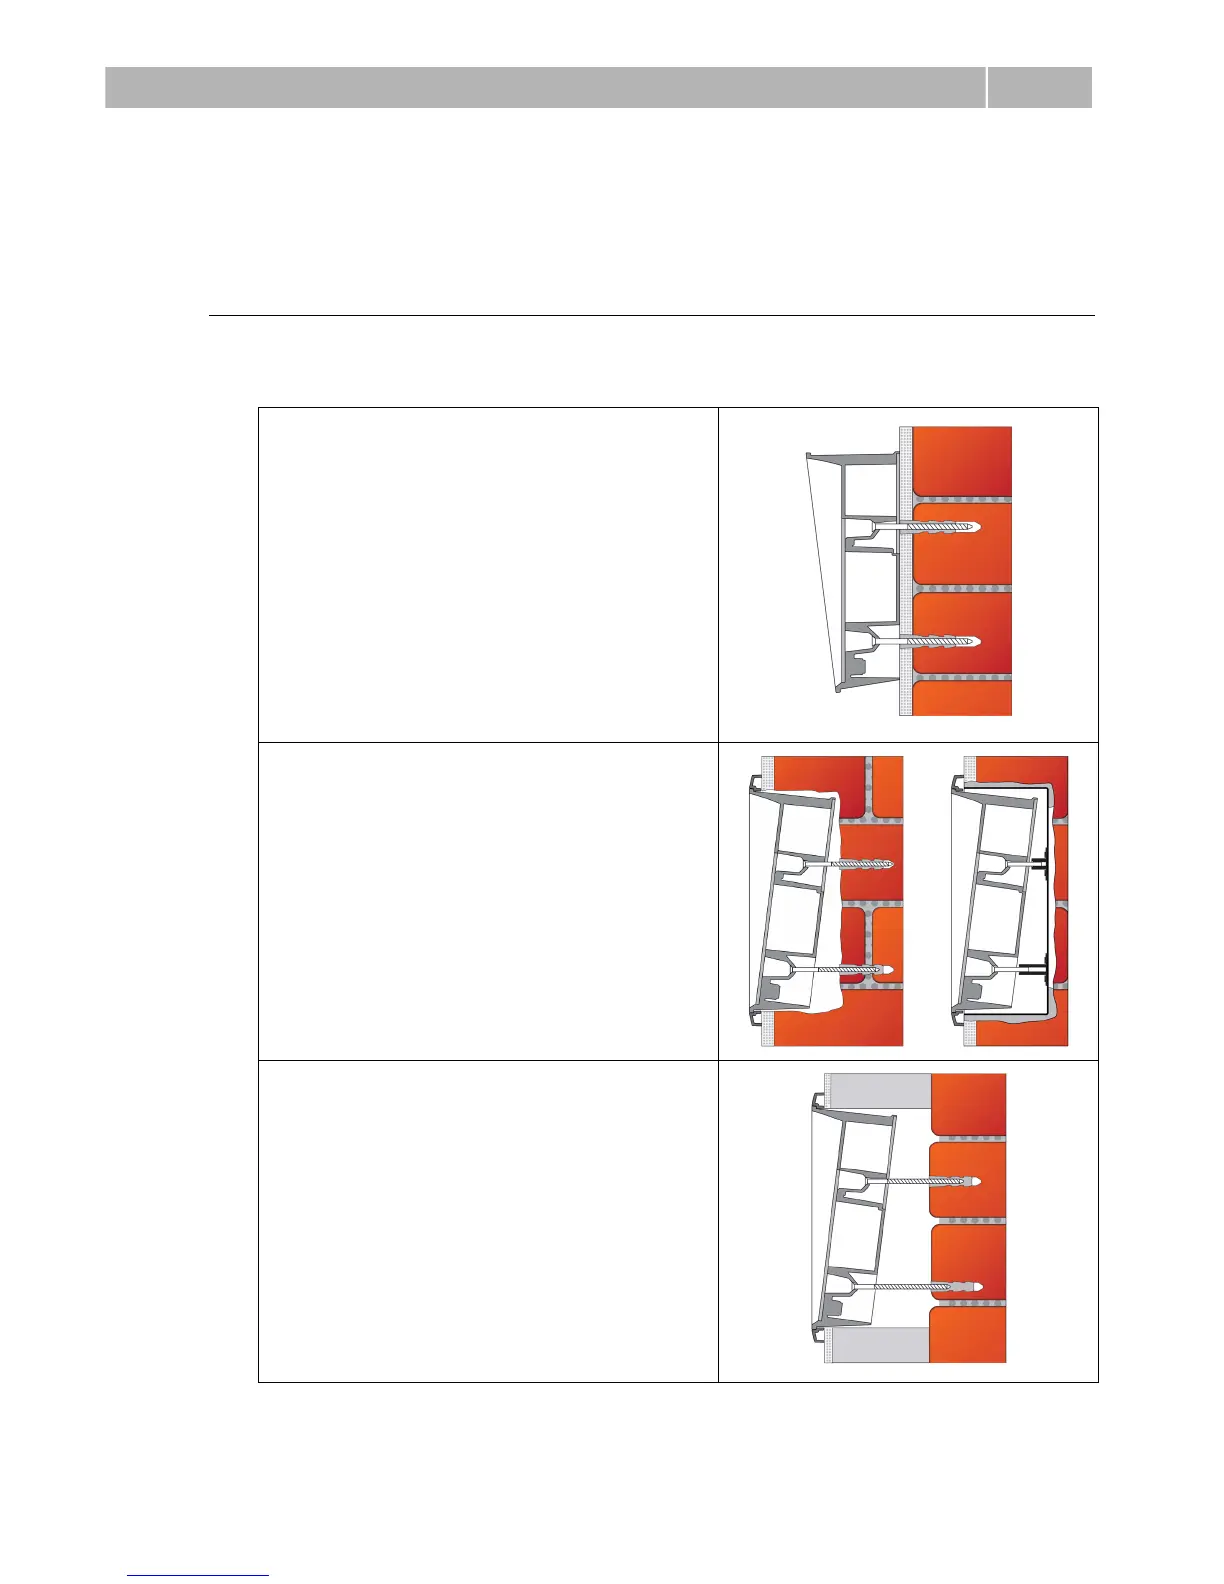
Mounting Type Overview
Refer to the table below for a list of mounting types and necessary components.
2N
®
Helios IP Safety is preferably intended for surface mounting. For recessed
mounting, it is necessary to order mounting frame or other accessories.
Surface mounting (concrete and steel
structures, entry barrier columns, etc.)
What You Need:
Just your 2N
®
Helios IP Safety unit
Recessed mounting – classic bricks
What You Need:
Frame 9152000
A precisely cut hole or, optionally, the brick
flush mounting box, Part No. 9151001
Hole: 132 x 223 x 83mm (with flush mounting
box)
Hole: 112 x 220 x 70mm (without flush
mounting box)
Recessed mounting – thermally insulated
wall
What You Need:
Frame 9152000
Longer screws (depending on the thermal
insulation thickness)
Hole: 112 x 220 x 70mm
 Loading...