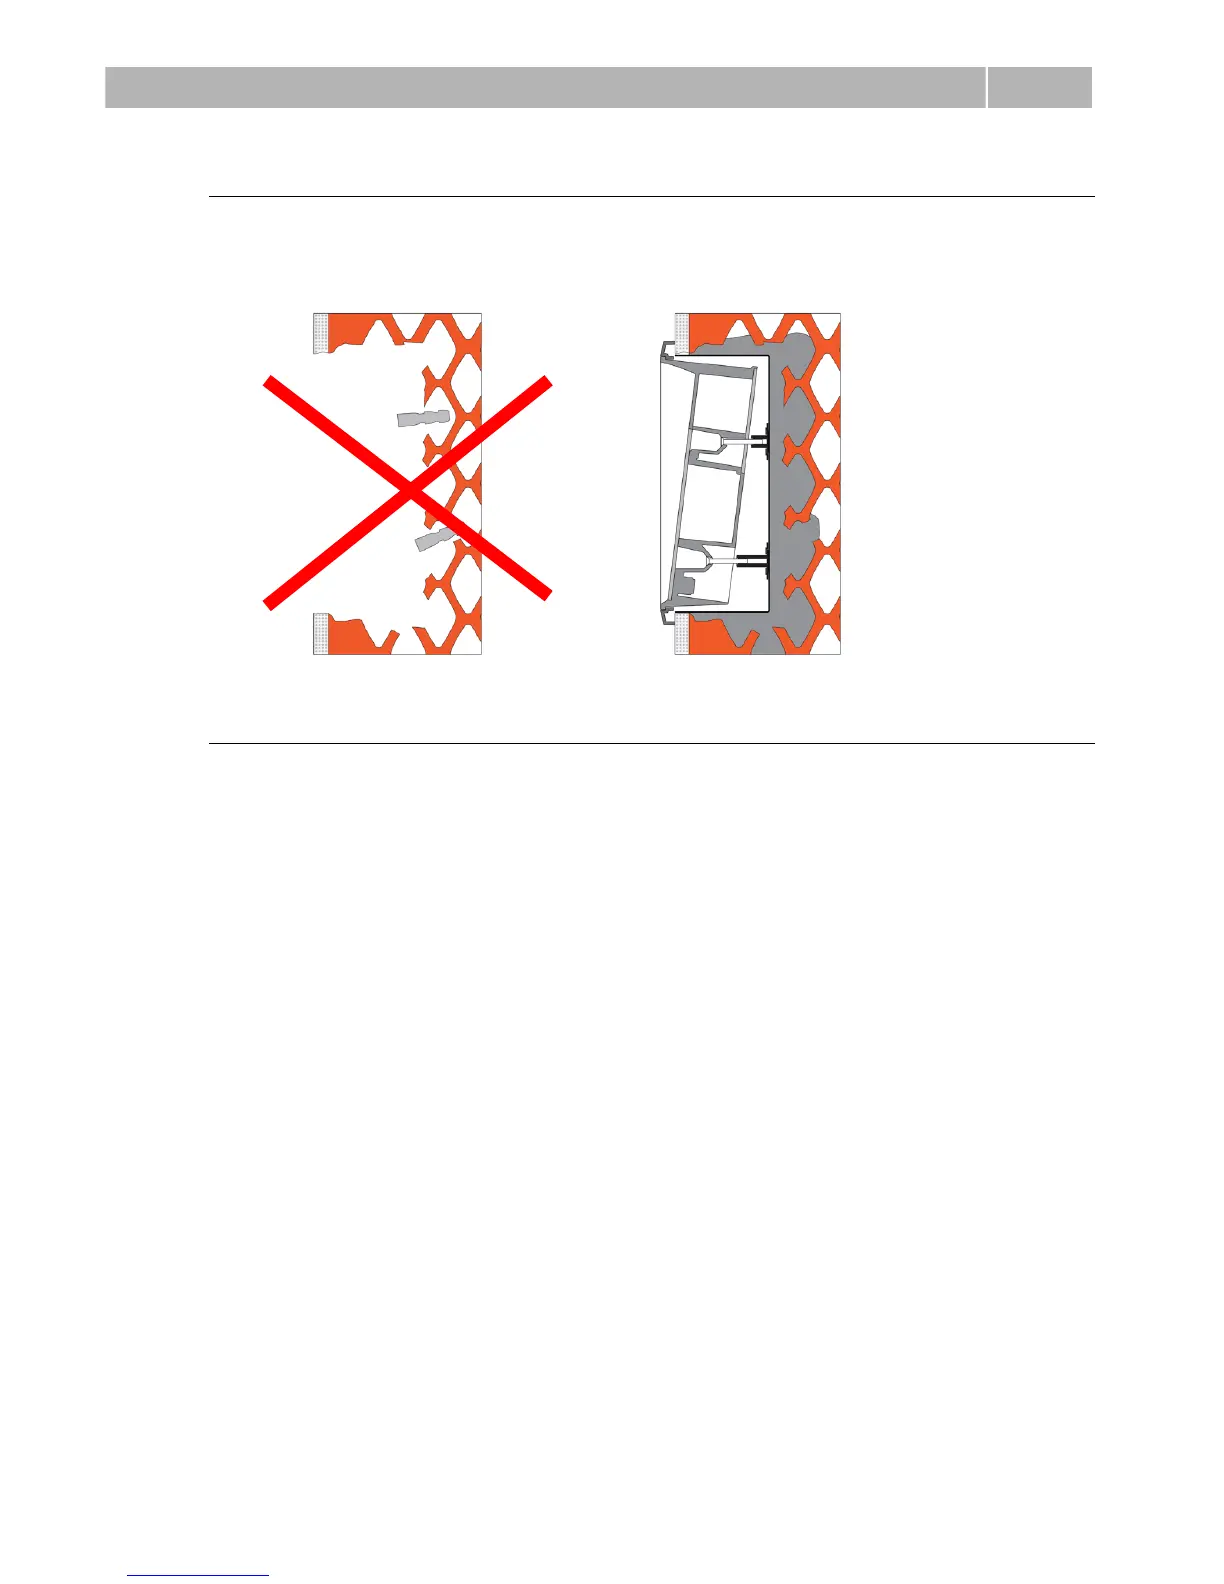
EasyManuals Logo

2N Helios IP Installation Manual

2N Helios IP
44 pages
To Next Page IconTo Next Page
To Previous Page IconTo Previous Page
Page #25 background imageLoading...
Page #25 background image
Mechanical Installation
2.2
21
Flush Mounting Hollow Bricks
Suppose you intend to install your 2N
®
Helios IP Safety unit into a wall made of hollow
bricks. Note that the external side of the bricks gets damaged by cutting and the
dowels cannot practically be fixed into the thin internal part of the bricks. Therefore,
use the brick flush mounting box and follow the instructions included therein.
Flush Mounting Plasterboard
Use the plasterboard flush mounting box and follow the instructions included therein.

Other manuals for 2N Helios IP

Questions and Answers:

Question and Answer IconNeed help?

Do you have a question about the 2N Helios IP and is the answer not in the manual?

2N Helios IP Specifications

General IconGeneral
TypeIP Intercom
ConnectivityEthernet
Tamper SwitchYes
AudioFull duplex
MicrophoneBuilt-in
SpeakerBuilt-in
CameraYes
Power SupplyPoE
Operating Temperature+60°C
Ingress ProtectionIP54
ProtocolsSIP, RTSP, ONVIF
Audio CodecG.711, G.722
InstallationSurface mount, flush mount (depending on model)

Related product manuals