Maintenance 5-3
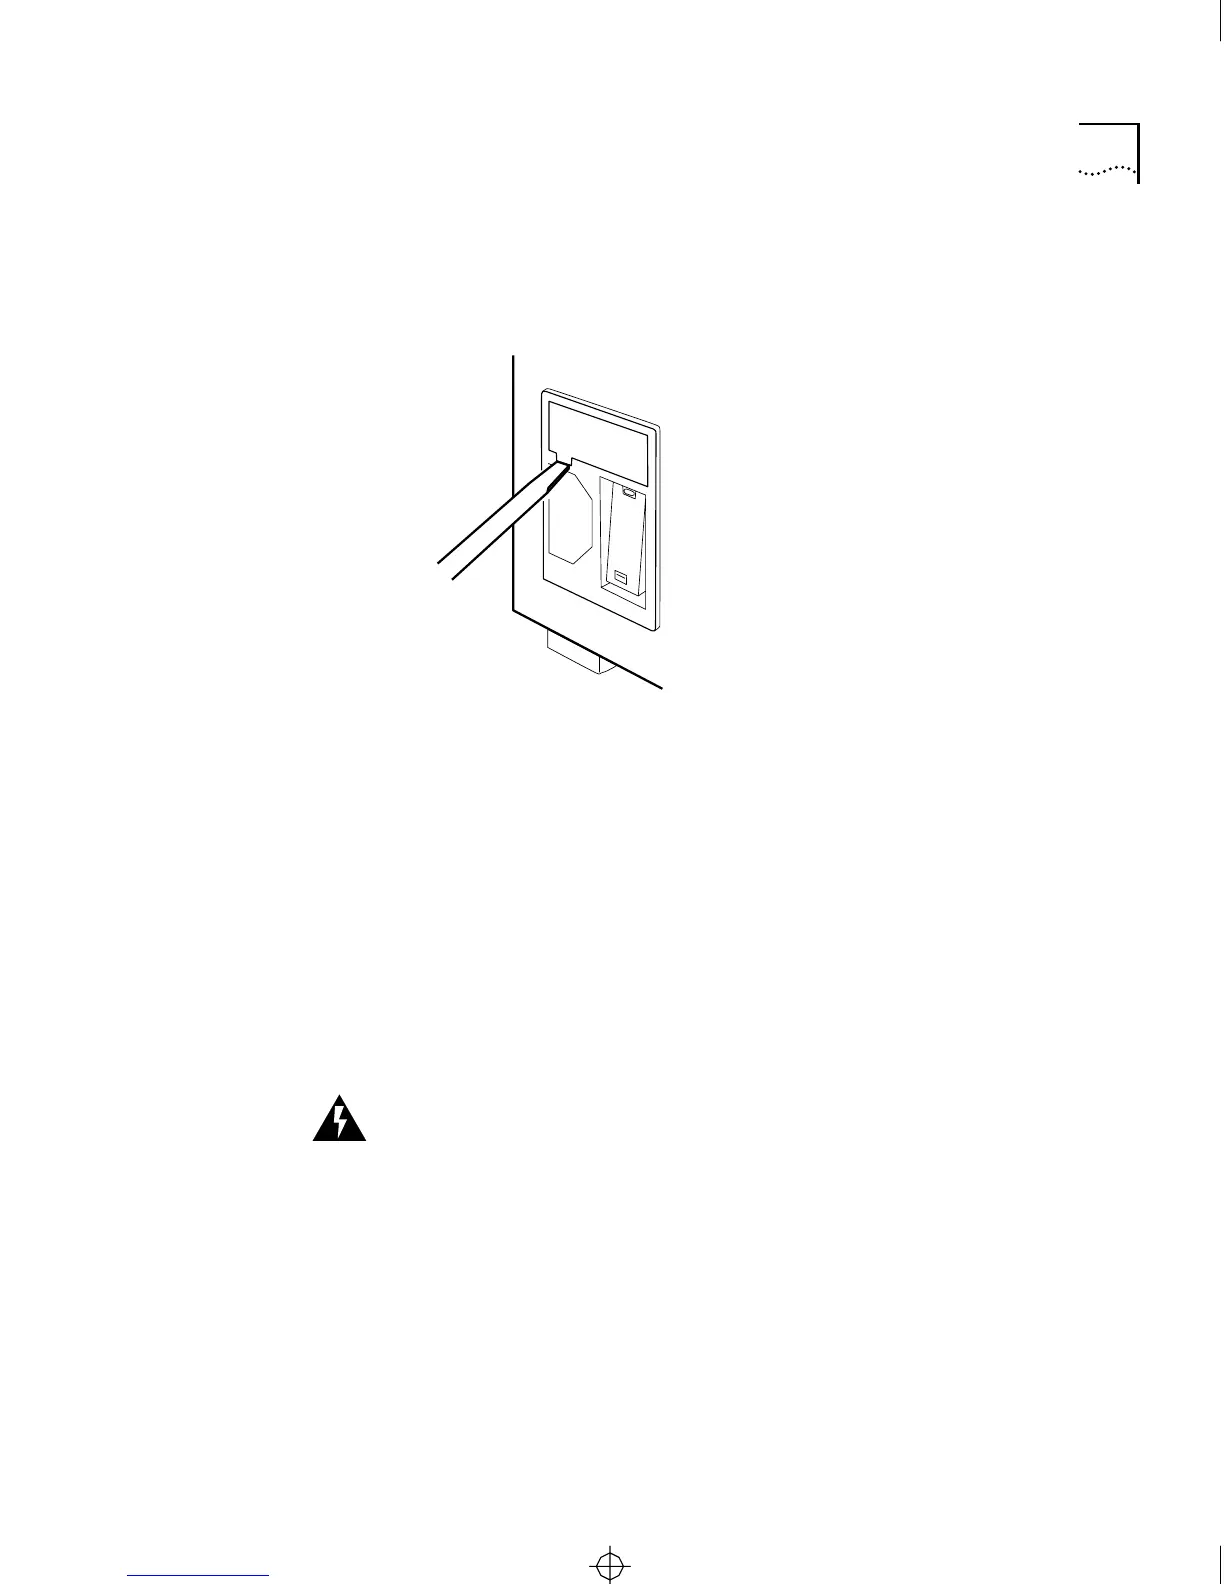
2 Pry the cartridge loose. It should pop out easily.
3 Slide the fuseholder cartridge completely out of the enclosure.
Figure 5-1 Removing the Fuseholder Cartridge
4 Remove the fuse clip insert from the fuseholder cartridge.
The fuse clips, conductors, and fuses are mounted on this cartridge. Pull
up the plastic retainer on the fuseholder cartridge and slide the insert
away from the cartridge, as shown in in Figure 5-2.
5 Once the fuse clip insert is clear of the fuseholder cartridge, pry the
spent fuse from the fuse clip with the screwdriver.
6 Replace the old fuse with a new fuse of the same type, size, and rating.
Use a 2-A, 250-V fast-blow fuse (5 mm by 20 mm).
WARNING:
For continued protection against fire hazard, replace the
fuse only with a fuse having the same type and rating.
ATTENTION
: Pour éviter le risque d’incendie, ne remplacer que par
des fusibles de même type et valeur de courant.
7 Reinstall the fuse clip insert in the cartridge so that the plastic retainer
locks it in place.
Prying cartridge)
CS2500BookFile : MaintenanceUpgrades Page 3 Thursday, December 11, 1997 10:44 AM