5-12 C
HAPTER
5: M
AINTENANCE
AND
U
PGRADES
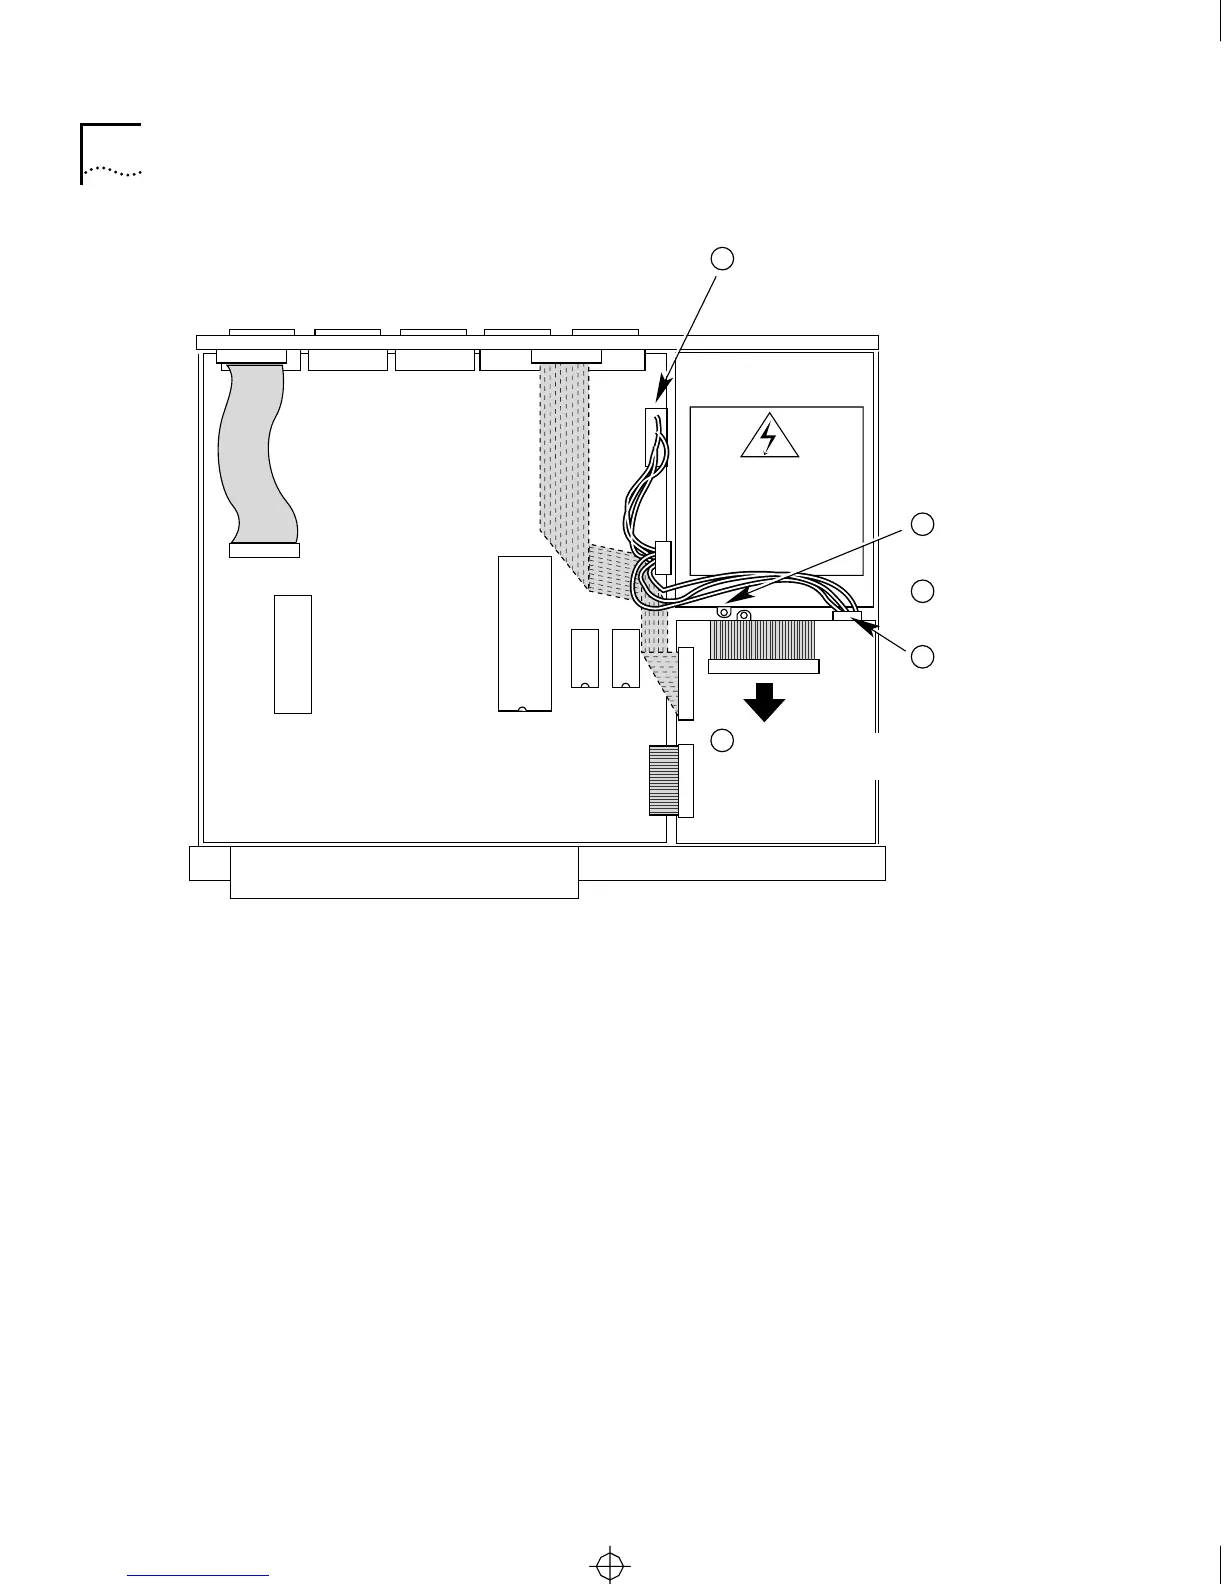
Figure 5-7 Removing the Power Supply
4 Install the new power supply module.
a For Model CS/2600 only, reconnect the power wiring harness to the
connector on the rear of the diskette drive.
b For both models, slip the keyhole slots on the bottom of the power
supply module over the standoffs on the bottom of the chassis. Slide
the power supply module toward the rear of the chassis.
c Fasten the module in place with the screw.
5 For Model CS/2600 only, reconnect the cable from the diskette drive to
the daughtercard.
6 Reconnect the power supply cable bundle to the connector on the
motherboard.
Make sure you keep the connector keys aligned.
7 Replace the cover, as described in “Replacing the Cover” on page 5-15.
Rear
Front
Power supply
WARNING:
Hazardous voltage.
Do not open.
No user-serviceable
parts inside.
Motherboard
Daughtercard
Remove
screw.
3
2
Remove
connector from
motherboard.
Remove
power wiring
harness connector.
4
Pull out power
supply.
5
Disconnect cable and
pull taut to expose screw.
1
CS2500BookFile : MaintenanceUpgrades Page 12 Thursday, December 11, 1997 10:44 AM