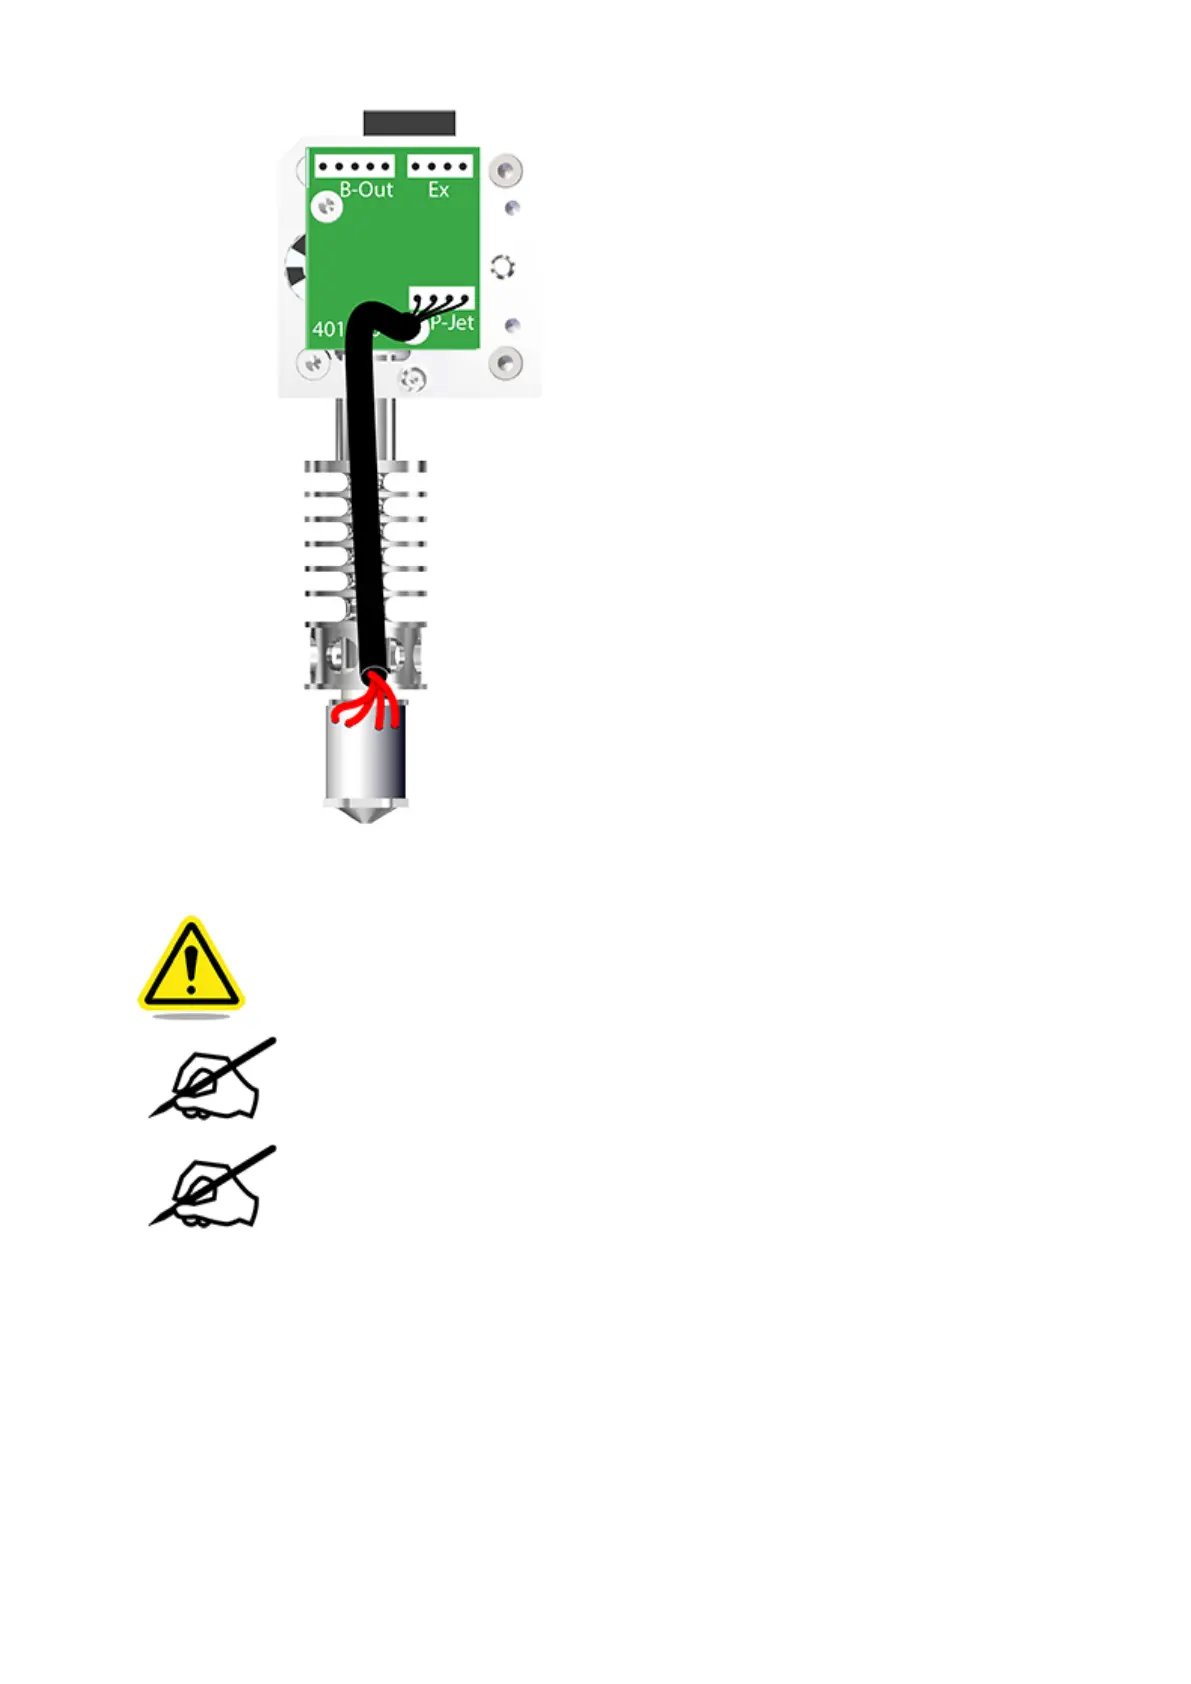
Carefully insert extruder assembly 2 into the carriage plate.30.
CAUTION: Be careful not to damage the print jet cable connected to junction
P-Jet of the extruder PCBs.
NOTE: If necessary, carefully adjust the cable alignment if the extruder
assembly is difficult to install.
NOTE: For clarity, the main extruder PCB was removed from the illustration.
It does not need to be removed for this procedure.






 To Next Page