Page 15 of 28
P/N 595369-01 Rev B 07/19
REGULAR OPERATIONAL INSPECTION
Inspect and test the PASS device, SEMS II Pro Wireless SCBA Telemetry System,
and the Locator System along with the inspection and test of the 3M Scott Air-
Pak X3 Pro SCBA respirator before each use. Refer to the PAK-TRACKER User
Instructions, 3M Scott P/N 595278-01, provided with the HHR for complete details.
Include the following inspection procedures with the REGULAR OPERATIONAL
INSPECTION procedures dened in your respirator instructions. If any malfunction
of the respirator, the PASS device, the Locator System, or the SEMS II Pro
Wireless SCBA Telemetry System is noted during the inspection, remove the
respirator from service and tag it for repair by authorized personnel.
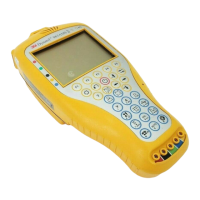
To test the PAK-TRACKER locator transmitter, you must have an operating HHR.
CAUTION
THE PERFORMANCE PROPERTIES OF THE
PASS DEVICE CANNOT BE PROPERLY TESTED
IN THE FIELD.
WARNING
THE PROPER OPERATION OF THE LOCATOR
SYSTEM CANNOT BE CHECKED WITHOUT
CHECKING ALL COMPONENTS OF THE SYSTEM
TOGETHER. THE REGULAR OPERATIONAL
INSPECTION MUST INCLUDE THE HHR AND THE
BASE STATION WORKING WITH EACH OTHER
TO CONFIRM PROPER OPERATION. FAILURE TO
PROPERLY INSPECT THE COMPLETE SYSTEM
MAY RESULT IN FAILURE OF ONE COMPONENT,
WHICH COULD LEAD TO SERIOUS INJURY OR
DEATH.
NOTE
IN SEVERAL OF THE INSPECTION PROCEDURES DESCRIBED, A FULL
ALARM WILL BE OBSERVED. THE FULL ALARM CONDITION INCLUDES
AN AUDIBLE TONE THAT CAN EXCEED 95 DBA AT 3 METERS (9.9 FT.). TO
PREVENT POSSIBLE HEARING DAMAGE DURING TEST, IMMEDIATELY
RESET THE ALARM ON VERIFICATION THAT IT IS FUNCTIONING PROPERLY.
WEAR HEARING PROTECTION IF PROLONGED OR REPEATED EXPOSURE
TO A FULL ALARM CONDITION IS ANTICIPATED.
NOTE
IF THIS INSPECTION IS DONE IN DIRECT SUNLIGHT, IT MAY BE HELPFUL TO
SHADE THE LENS ON THE CONTROL CONSOLE WITH YOUR HAND TO BE
SURE THE LIGHTS ARE FLASHING AS DESCRIBED.
1. While performing the visual inspection of the respirator, visually inspect all
PASS device enclosures, lenses, and wire conduits for cracks, wear or other
damage. If any damage is found, remove the respirator from service and tag
for repair by qualied personnel.
2. Inspect the HHR for any cracks or signs of damage. If any damage is found,
remove the unit from service and tag it for repair by qualied personnel.
3. Turn on the HHR according to the operating instructions provided with the unit.
Position the HHR near by.
4. Turn on the computer with Monitor with the USB Gateway installed. Position
the computer near by.
5. With the cylinder valve closed, press the manual alarm button, located on the
front of the Control Console.
a) The manual alarm sounds a loud, almost continuous, 3-tone chirp
accompanied by ashing of the red signal light on the Control Console.
b) The HHR sounds an alarm and displays the unique identication number
of the PASS device. Use the SCROLL button on the HHR to highlight the
active ID number and press the ENTER button on the HHR to select the
displayed ID number. Point the unit directly at and in close proximity to the
respirator. The signal strength displayed will be at its highest value.
c) Verify that the SEMS II Pro functions are all operating properly and that
PASS and EVAC alarms and acknowledgements operate according to
these instructions.
6. Reset the manual alarm by pressing twice on the reset button located on the
side of the Control Console (fully depress the reset button, release and
press again).
a) The unit will sound three chirps and the green light will ash.
b) The HHR will reset to its non-alarm state.
7. Turn the PASS device OFF by pressing the reset button twice again. The unit
will sound a two-tone chirp and the green light will go out.
8. Open the cylinder valve to pressurize the respirator system. The PASS deice
sounds 3 quick chirps and the light on the Control Console ashes green about
once per second. The 3 chirps will sound at approximately the same time the
VIBRALERT in the mask-mounted regulator actuates briey. Make sure the air
ow is stopped by pressing the air saver/donning switch.
9. To check the pre-alarm, leave the respirator motionless for twenty (20)
seconds. The green ashing light is replaced by a red ashing light. An
ascending/descending tone sounds, increasing in volume. Leave the respirator
motionless.
WARNING
IN SEVERAL OF THE INSPECTION
PROCEDURES DESCRIBED, A FULL ALARM
WILL BE OBSERVED. THE FULL ALARM
CONDITION INCLUDES AN AUDIBLE TONE
THAT CAN EXCEED 95 DBA AT 3 METERS
(9.9 FT.). TO PREVENT POSSIBLE HEARING
DAMAGE DURING TEST, IMMEDIATELY RESET
THE ALARM ON VERIFICATION THAT IT IS
FUNCTIONING PROPERLY. WEAR HEARING
PROTECTION IF PROLONGED OR REPEATED
EXPOSURE TO A FULL ALARM CONDITION IS
ANTICIPATED.
WARNING
FOLLOW THE REGULAR OPERATIONAL
INSPECTION PROCEDURE EXACTLY. IF THE
PASS DEVICE DOES NOT ACTUATE, OR IF ANY
OTHER FEATURE DOES NOT OPERATE AS
DESCRIBED OR IF ANY OTHER OPERATIONAL
MALFUNCTION IS NOTED, DO NOT USE THE
RESPIRATOR.
 Loading...