EasyManua.ls Logo

3M Clean-Trace LM1 - User Manual

3M Clean-Trace LM1
33 pages
Print Icon
To Next Page IconTo Next Page
Loading...
3M ™ Clean-Trace™ LM1
Luminometer
User Manual

Table of Contents

Other manuals for 3M Clean-Trace LM1

Questions and Answers

  • B
    Brian WongSep 10, 2025
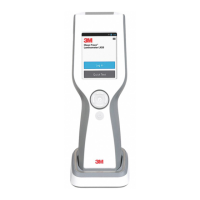
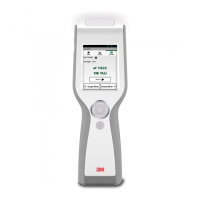
    What to do if the 3M Measuring Instruments was dropped?
    • P
      Paul CunninghamSep 12, 2025
      If you dropped your 3M Clean-Trace Measuring Instruments, turn the power off and wait for 5 minutes. Then, restart the Luminometer. If there is no error message after restarting, the Luminometer is okay to use.
  • L
    Louis BakerAug 23, 2025
    Why is there no display on my 3M Clean-Trace LM1?
    • T
      tannerdebraAug 23, 2025
      If your 3M Clean-Trace Measuring Instruments screen is blank, first press and hold the Up Navigation button for about 3 seconds to see if it's in Sleep mode. If that doesn't work, recharge the battery. The issue might be due to the instrument being in sleep mode, a fully discharged battery, or an instrument malfunction.
  • B
    brianasandersAug 25, 2025
    How to resolve a synchronization failure with 3M Clean-Trace LM1 Measuring Instruments?
    • J
      juan64Aug 25, 2025
      If you experience a synchronization failure with your 3M Clean-Trace Measuring Instruments, and you are using USB or Bluetooth, ensure you are signed in to the Sync Manager on your workstation before attempting synchronization again. If using Wi-Fi, verify that the Luminometer has been registered in the 3M Clean-Trace Desktop software. This issue occurs when the instrument is not registered.
  • A
    Amber LawrenceAug 27, 2025
    What to do if 3M Clean-Trace LM1 Measuring Instruments shows 'Error: 7'?
    • S
      stephen20Aug 27, 2025
      If your 3M Clean-Trace Measuring Instruments displays Error 7, first restart the instrument by pressing and holding the On/Off button for 3 to 5 seconds, then tap 'Restart'. Next, re-run the firmware upgrade. The error is caused by a firmware upgrade problem.
  • V
    vanessajohnsonAug 28, 2025
    What to do if 3M Clean-Trace LM1 becomes unresponsive?
    • B
      Brian PerezAug 28, 2025
      If your 3M Clean-Trace Measuring Instruments becomes unresponsive, restart the instrument by pressing and holding the On/Off button for 3 to 5 seconds, then tap 'Restart'. This issue is caused by a temporary software malfunction.
  • M
    michael98Aug 29, 2025
    What to do if 3M Clean-Trace LM1 says 'No Swab Detected'?
    • K
      Kara ReedAug 29, 2025
      If your 3M Clean-Trace Measuring Instruments indicates 'No Swab Detected', first insert a 3M Clean-Trace Test. The issue may be because no swab was inserted or due to an instrument or swab malfunction.
  • A
    andrew49Sep 18, 2025
    What to do if 3M Measuring Instruments shows 'Error: 12' or 'Error: 16'?
    • E
      Eric WebbSep 19, 2025
      If your 3M Clean-Trace Measuring Instruments displays Error 12 or Error 16, use the instrument at ambient temperatures greater than or equal to 5°C. This is because the instrument temperature is below 5°C.
  • N
    Natalie HamiltonSep 12, 2025
    What does 'Rocker Cap Open' mean on 3M Clean-Trace LM1?
    • A
      angelica31Sep 12, 2025
      If the 3M Clean-Trace Measuring Instruments displays a 'Rocker Cap Open' message, close the rocker cap after you insert a 3M Clean-Trace Test and before you start the reading process. This message appears when the rocker cap was open while attempting to start the reading process.
  • G
    Gregory MilesSep 8, 2025
    What should I do if my 3M Clean-Trace LM1 Measuring Instruments experienced a mechanical shock?
    • K
      Kyle MoranSep 8, 2025
      If you suspect your 3M Clean-Trace Measuring Instruments has experienced a mechanical shock, switch off the power by pressing and holding the On/Off button for about 3 to 5 seconds, then tap 'Power off'. Wait about 5 minutes, then switch the power back on. If there is no error message after restarting, the Luminometer is okay to use.
  • W
    whitestevenSep 5, 2025
    What to do if 3M Clean-Trace LM1 shows a range of errors (1, 2, 4, 6, 8, 10, 13, 14, 28, 17, 31, 18-30, 33-123)?
    • W
      wrightcharlesSep 5, 2025
      If your 3M Clean-Trace Measuring Instruments displays any of the following errors: 1, 2, 4, 6, 8, 10, 13, 14, 28, 17, 31, 18-30, or 33-123, restart the instrument by pressing and holding the On/Off button for about 3 to 5 seconds, then tap 'Restart'. Then, repeat the task.

Summary

I. Intended Use of the 3 M Clean-Trace Luminometer

II. User Responsibility for 3 M Clean-Trace Luminometer

III. Environmental Operating Conditions

IV. Instrument Specifications

V. Limited Warranty Information

VI. Limited Warranty and Disclaimer

VII. Limitation of Liability

VIII. Product Description

IX. How to Use This Manual

X. How to Operate the 3 M Clean-Trace Luminometer

a. Operating Controls of the 3 M Clean-Trace Luminometer

Identifies and explains the physical buttons, ports, and screen controls on the 3M Clean-Trace LM1 Luminometer.

b. Inserting and removing 3 M Clean-Trace test swab

Provides step-by-step instructions for correctly inserting and removing test swabs into the luminometer.

c. Using the Base

Explains how to use the accessory base for stability and optimal viewing angle of the luminometer.

d. Battery Usage and Maintenance

Details battery life, care, and replacement recommendations for optimal performance of the luminometer.

e. Charging the Battery

Guides users on the process of connecting and charging the luminometer's internal battery.

f. When the Battery is Charged

Describes the indicators and procedure when the luminometer's battery has finished charging.

g. The Battery Level Indicator

Explains how to interpret the on-screen battery level and charging status indicators.

h. Power Management

Details the device's power-saving features like sleep mode and automatic shutdown to conserve battery.

i. Waking the Luminometer from Sleep Mode

Instructs users on how to resume operation from the device's low-power sleep mode.

j. 3 M Clean-Trace Luminometer Calibration

Explains the importance and process of annual maintenance and calibration for ensuring accuracy.

k. How to Turn On the 3 M Clean-Trace LM1 Luminometer

Provides step-by-step instructions for powering on the luminometer and initial setup.

l. The Diagnostic Check

Describes the automatic self-check procedure performed when the luminometer is powered on.

m. Turning Off or Restarting the Luminometer

Details the procedures for safely powering off or restarting the 3M Clean-Trace LM1 Luminometer.

n. Controlling the Software

Explains how to navigate and interact with the luminometer's software interface using touch or buttons.

o. How to Sign In on the 3 M Clean-Trace LM1 Luminometer

Guides users through the sign-in process for accessing the luminometer's features and data.

p. Swab Sensor and Vertical Position Sensor

Describes sensors that detect swab presence and device orientation for accurate readings.

q. How to Look-up Calibration Date and Software Details

Instructs users on how to find calibration status and software version information on the device.

r. How to Sign Out of the 3 M Clean-Trace LM1 Luminometer

Provides instructions for properly logging out of the user session on the luminometer.

XI. How to Perform a Quick Test or Unplanned Test

a. Performing an Unplanned Test from an Un-registered Luminometer

Step-by-step guide for performing unplanned tests on a luminometer not yet assigned to a location.

b. Performing an Unplanned Test from a Registered Luminometer

Step-by-step guide for performing unplanned tests on a luminometer assigned to a location.

XII. How to Perform a Planned Test Run

a. Performing a Test Run on a Test Point within a Sample Plan

Instructions for conducting tests on specific points within a pre-defined sample plan.

b. Restarting an Incomplete Sample Plan

Guidance on resuming or restarting a previously interrupted sample plan test.

c. Performing an ATP Test Run

Details the procedure for conducting an ATP test using the luminometer and test swabs.

d. Performing a Retest on an ATP Test Point Before Moving

Instructions for retesting an ATP test point before proceeding to the next point.

e. Performing a Retest on an ATP Test Point After Moving

Guidance on retesting an ATP test point from a different sample plan.

f. Performing a Visual Inspection Test on a Test Point

Details how to perform and record results for visual inspection tests.

g. Adding a Comment to a Test Result

Explains how to add pre-defined comments to test results before synchronization.

h. Recording Temperature or pH for a Test Point

Guides on recording temperature or pH values for specific test points within a sample plan.

i. Moving to Another Test Point in the Same Sample Plan

Instructions for navigating between test points within the current sample plan.

j. Moving to Another Test Point in a Different Sample Plan

Instructions for navigating to test points in other sample plans.

k. Viewing Test Results

Details how to access and interpret previously recorded test results on the device.

XIII. How to Synchronize the 3 M Clean-Trace LM1 Luminometer

a. Definition of Synchronization

Defines synchronization and the types of information exchanged between the luminometer and desktop software.

b. Setting Up Synchronization with a USB Connection

Guides on configuring data synchronization using a USB cable connection to a computer.

c. Setting Up Synchronization with a Bluetooth Connection

Guides on configuring data synchronization using a Bluetooth wireless connection.

d. Setting Up Synchronization with a Wi-Fi Connection

Guides on configuring data synchronization using a Wi-Fi wireless connection.

e. Setting Wi-Fi Auto Synchronization Time

Details how to set an automatic schedule for Wi-Fi data synchronization.

XIV. Performing Administrative Tasks

a. Setting the Date, Time, and Time Zone

Instructions for setting the device's date, time, and time zone, including automatic updates.

b. How to Adjust the Date;Time

Step-by-step guide to manually adjust the luminometer's date and time settings.

c. Setting the Time Zone

Details how to manually set or automatically update the device's time zone based on location.

d. Changing Sleep Timeout

Explains how to adjust the inactivity period before the device enters sleep mode.

e. Changing the Screen Brightness

Guides on adjusting the display brightness for optimal visibility.

f. Resetting the 3 M Clean-Trace Luminometer

Provides instructions for resetting the device to factory defaults or clearing test results.

g. Looking Up Calibration Date and Device Software Details

Instructs users on how to find calibration status and software version information on the device.

XV. Appendix

Cleaning and Decontaminating the 3 M Clean-Trace Luminometer

Provides detailed instructions for safely cleaning and decontaminating the luminometer.

h. Troubleshooting

3M Clean-Trace LM1 Specifications

General IconGeneral
TypeATP Hygiene Monitoring System
Detection MethodBioluminescence
TechnologyATP (Adenosine Triphosphate) detection
Power SupplyRechargeable lithium-ion battery
Weight255 g (9 oz)
Resolution1 RLU
Relative Humidity10% to 90% non-condensing
DesignHandheld
Measurement Range0 to 9999 RLU
UnitsRLU (Relative Light Units)
DisplayLCD
ConnectivityUSB
Operating Temperature5°C to 40°C
Battery LifeApprox. 8 hours of continuous use
Storage Temperature-20°C to 55°C

Related product manuals