MAINTENANCE
P/N 595390-01 Rev D 202009 25
2 Select new nosecup inhalation valves and moisten the stem of the valve with a
drop of clean water.
3 From inside the nosecup, slip the stem of the valve into the center hole of the
valve seat. From outside the nosecup, gently pull the stem to seat the valve in
the valve seat. See Figure 4-5.
4 Repeat with the other valve and trim excess stem as required.
Figure 4-5 Replacing the valve
Removing and Installing the Head Harness & Straps
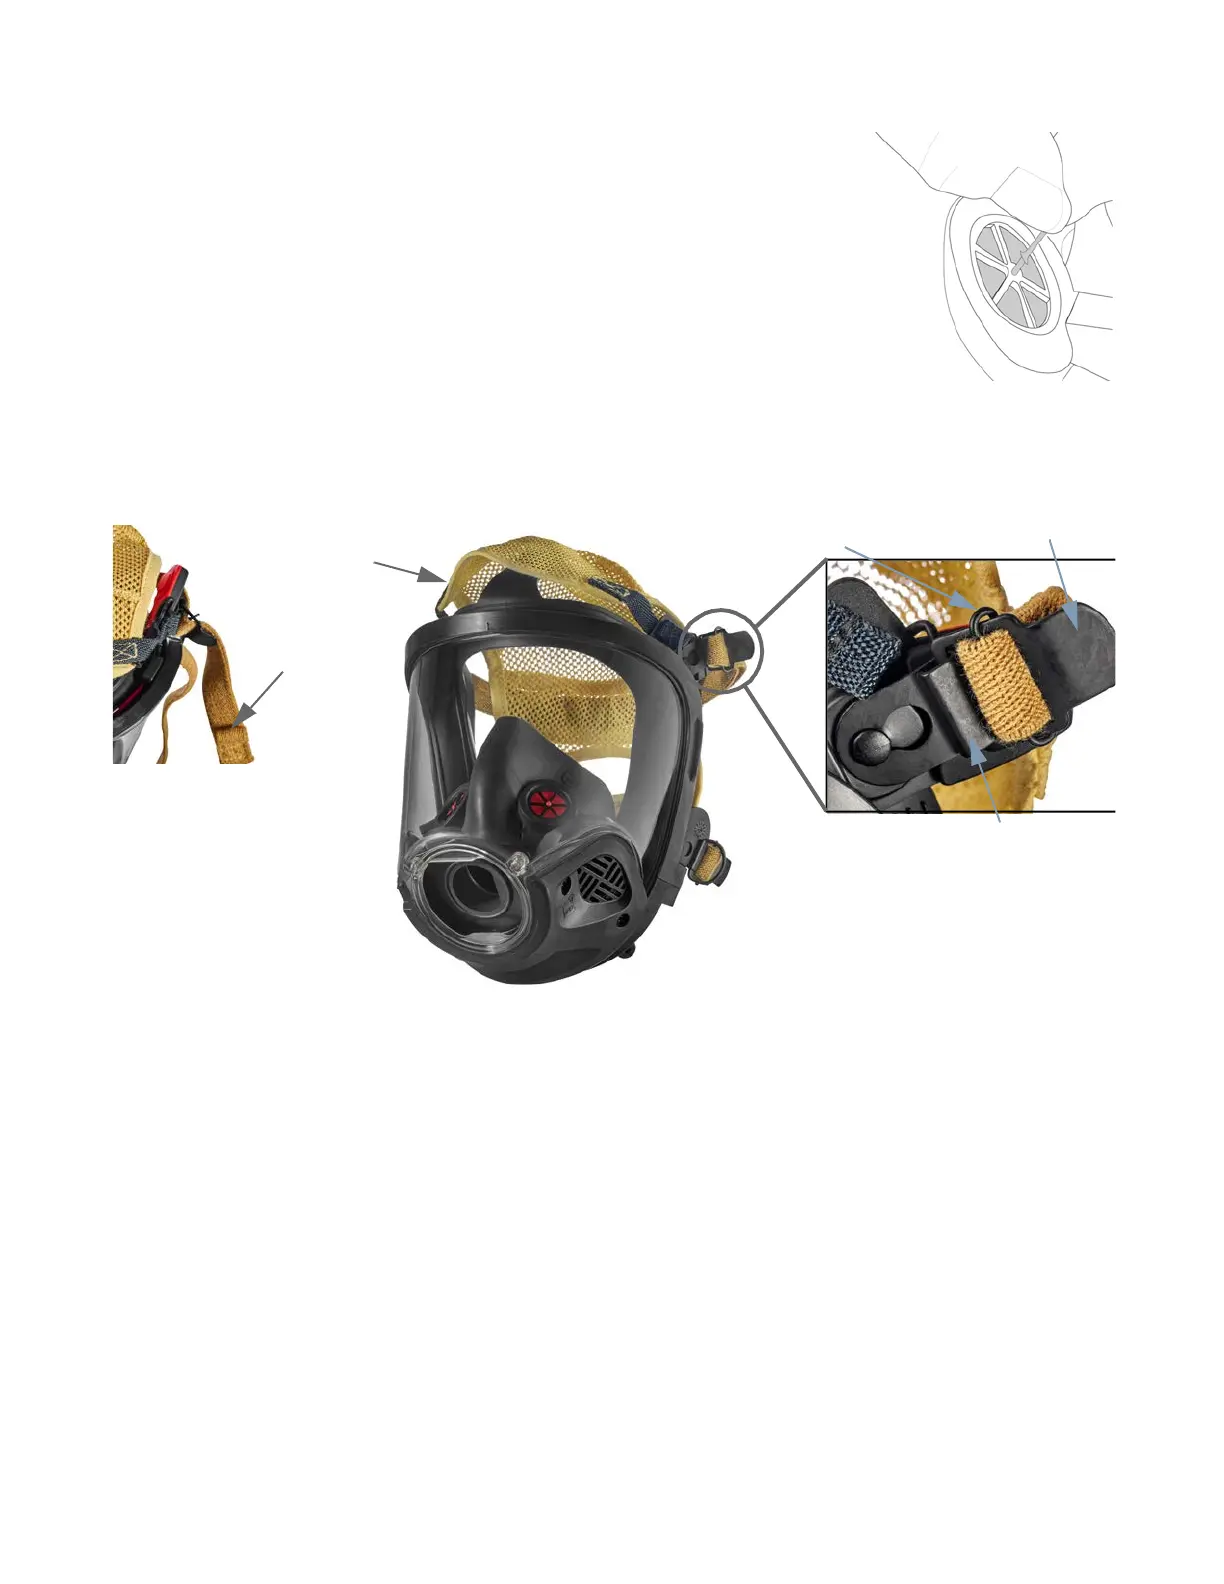
Figure 4-6 Head harness and straps
To remove and install the head harness
1 Locate one of the four buckles positioned around the facepiece holding the head harness straps. See picture A in
Figure 4-6.
2 Lift the buckle release lever and pull the adjusting head harness strap until the end of the strap is against the
buckle and the strap is fully extended. Repeat the process for the other buckles on the facepiece. See picture B
magnification in Figure 4-6.
3 Pass the ends of the adjusting straps through the buckles to release them from the facepiece.
4 The black temple straps and yellow forehead strap are held in place with sewn tabs. Push them away from their
retainer, then while lightly squeezing the sewn tab, push it back through its individual retainer slot until the head
harness is free. See pictures A, B and C in Figure 4-7.
Head harness
Head harness buckle
Buckle release lever
Buckle roller
Pull loop
A
B