Reset to Default
Typically, administrators can reset the system to factory default from the Web Management Interface as
below description. Additionally, there is another way to from the Console Interface and just refer to
“session 8.2 Remote Connection by SSH Interface”
- Keep Network Interface Settings: in some cases, it is helpful to check this option to ensure the
original Network Interface settings remain even after a system reset-to-default.
- Keep VLAN for Management: in some cases, it is helpful to check this option to ensure the original
VLAN for Management settings remain even after a system reset-to-default.
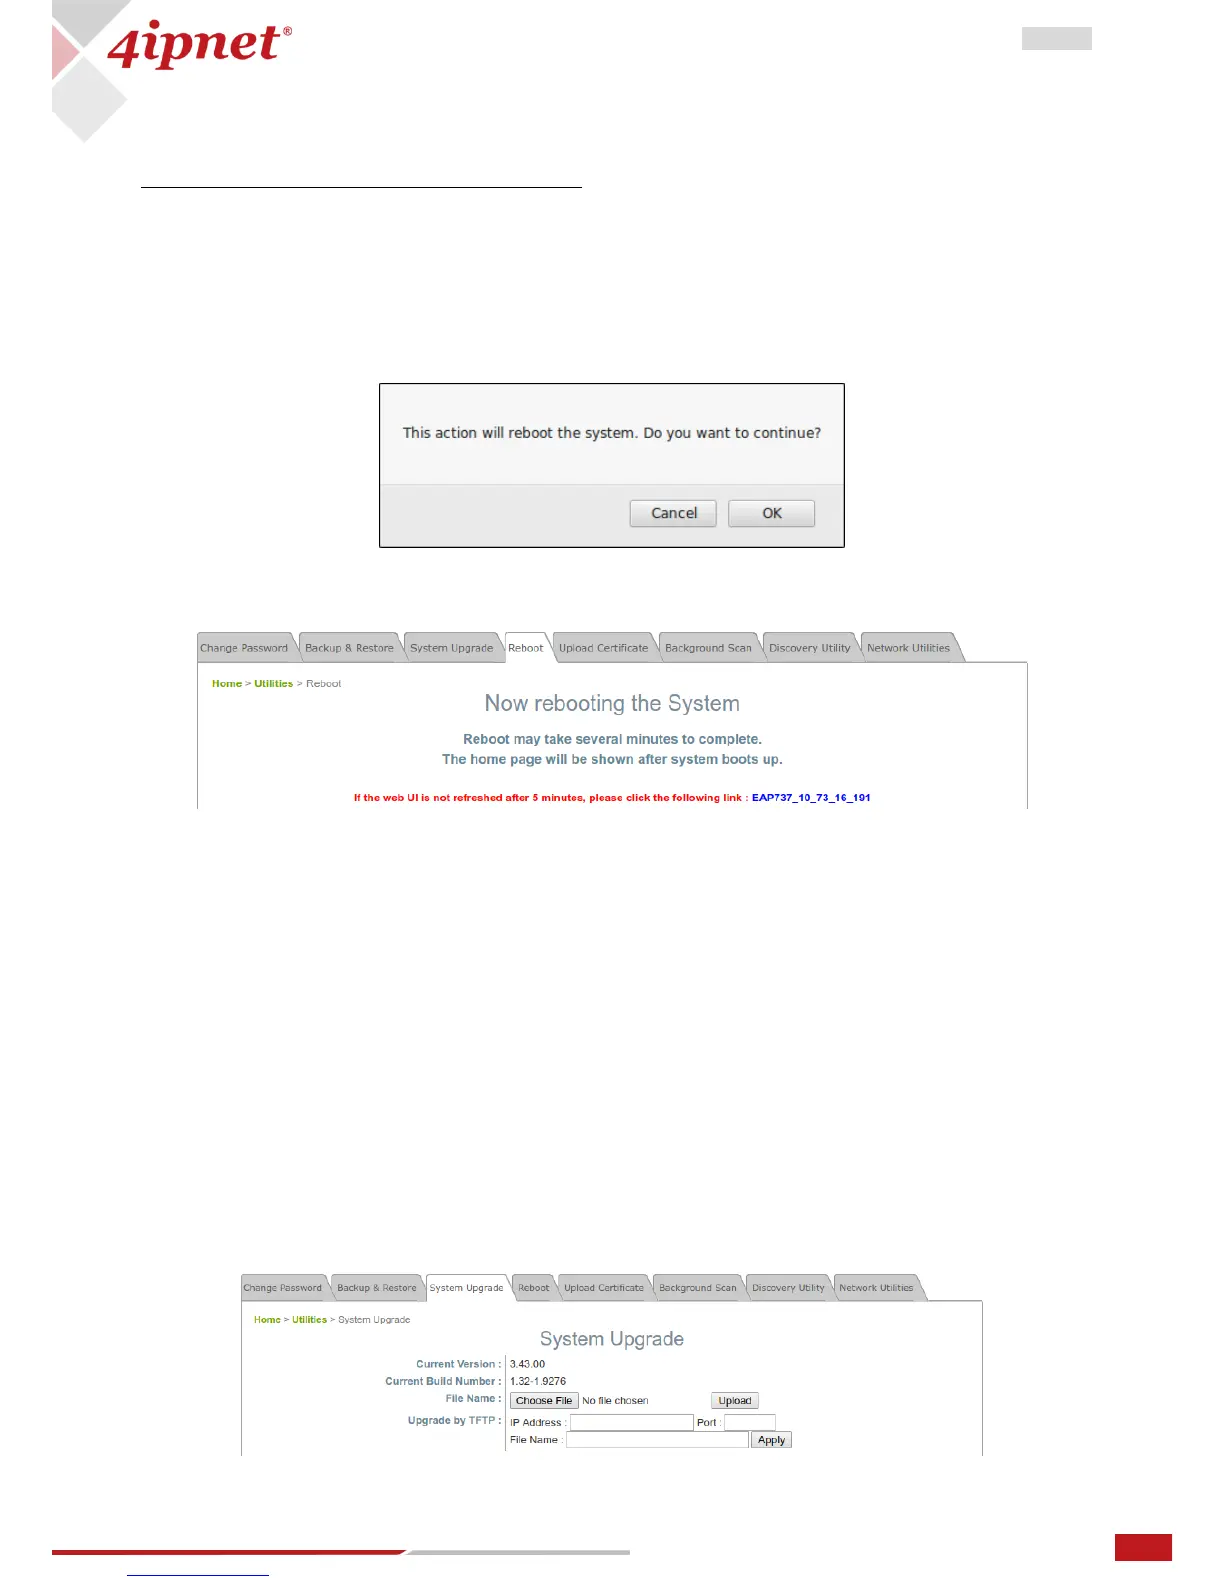
- Click Reset to load the factory default settings. A pop-up message will appear to re-confirm the
request to reboot the system. Click OK to proceed, or click Cancel to cancel the action.
- A message as displayed below will appear during the reboot period. The system power must be
kept on before the completion of the reboot process. The System Overview page will appear upon
reboot completion.
Backup System Settings: to save the current system configurations to a backup file on a local disk of the
management console. A backup file can be restored to the system by clicking Choose File button to select
the backup file and then clicking Restore button to execute the process.
Restore System Settings: to click Choose File to search for a .db database backup file created by the
controller and click Restore to restore to the same settings at the time when the backup file was saved.
6.3 System Upgrade
There are two methods of firmware upgrade: via the WMI or via a TFTP server. The administrator can
obtain the latest firmware from the 4ipnet Support Team. To upgrade the firmware, click “Choose File” to
select the new firmware file you downloaded onto your PC and then click “Upload” to execute the
process. To upgrade by TFTP, enter the designated IP address, Port, and File Name, then click “Apply”.
Please restart the system after upgrading the firmware.