2-4 Installing the VetScan HM5
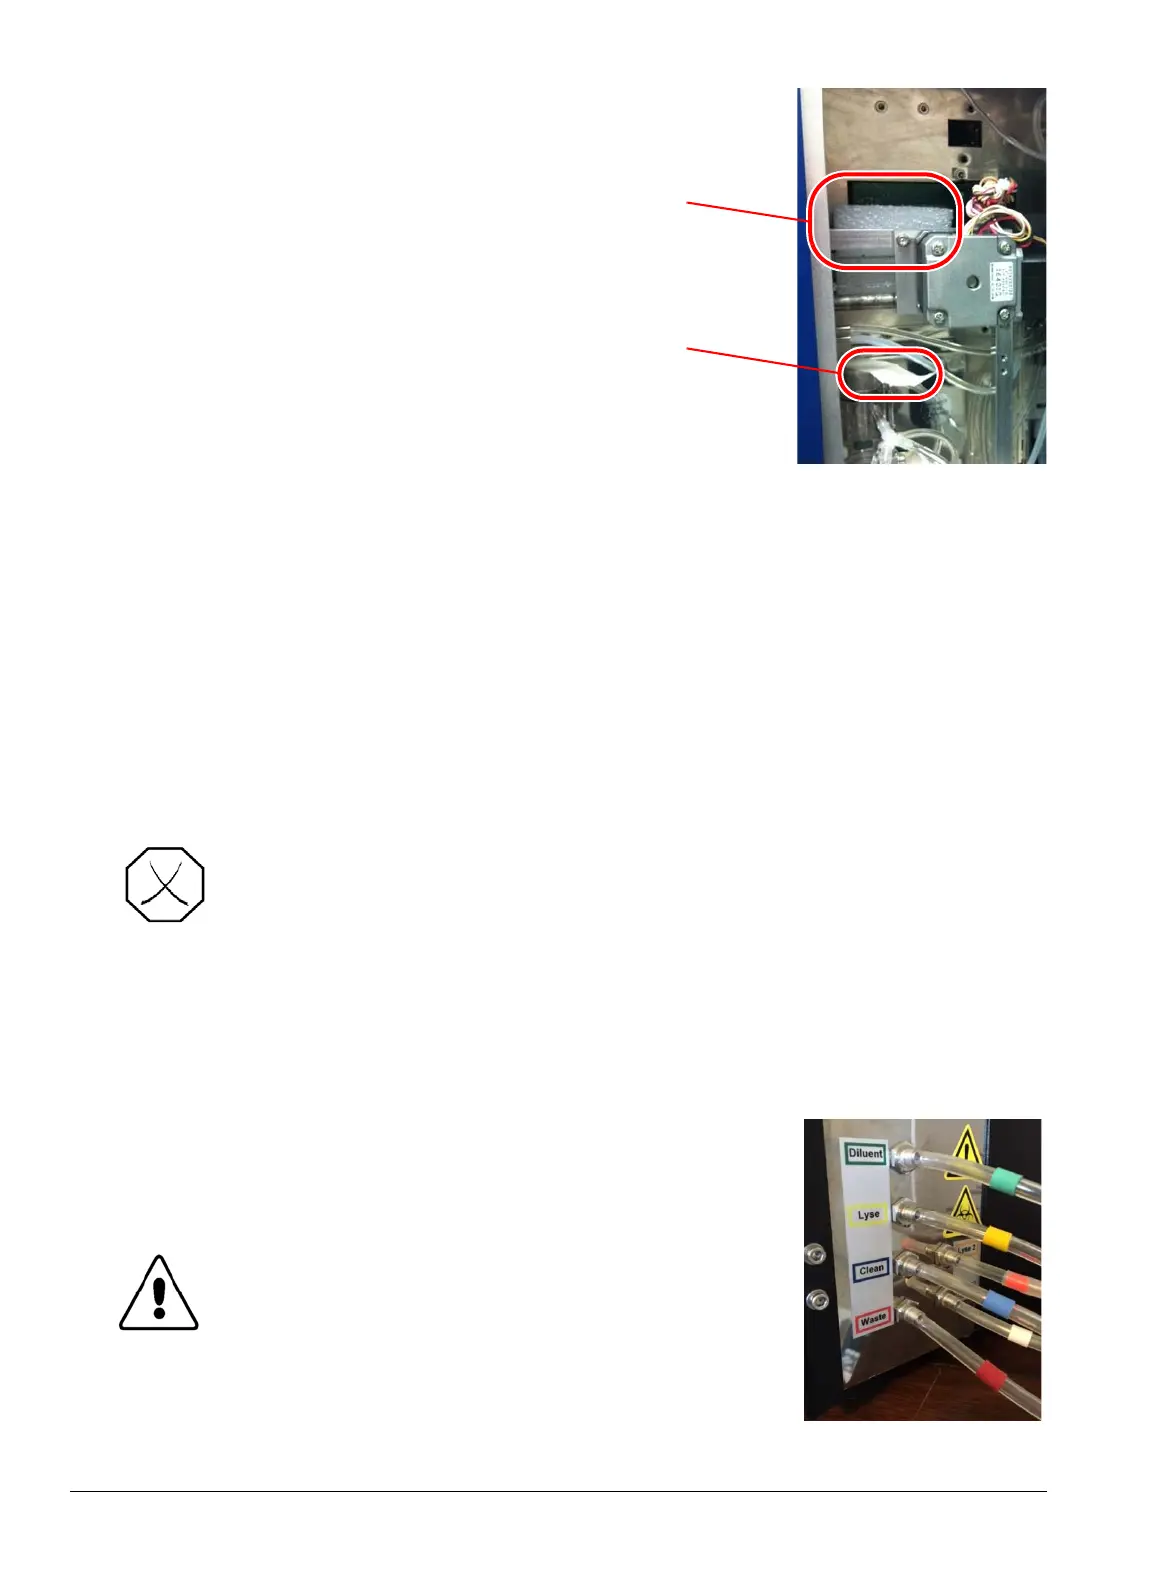
7. Remove the foam and tape from inside the
unit, as shown.
8. Open the Accessory and Initial Goods boxes, and make sure all the following are included:
9. Plug the battery backup or surge protector into a standard outlet. Hold the power button down
until it beeps.
10. Screw the power supply onto the back of the HM5.
11. Plug the power cable into the power supply and the battery side of the battery backup or surge
protection device once it has been turned on.
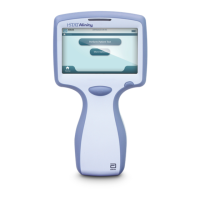
12. Attach the long reagent tubes to the back of the HM5. Match the
colors of the reagent tubing with the colors on the rear of the
analyzer.
HM5 Operator's Manual CD Quick Reference Guide Power supply and cord
Mini-keyboard Four sample tube adapters Thermal paper rolls (2)
Tubing kit (reagent tubing,
bottle caps with drop down
tubing)
VetScan HemaClean Kit
1 liter polypropylene flask
Peristaltic pump tube
Waste bottle and lid with
nozzle
WARNING: USE ONLY THE POWER SUPPLY PROVIDED WITH THE VETSCAN
HM5. USING ANY OTHER POWER SUPPLY CAN DAMAGE THE
INSTRUMENT AND WILL VOID THE WARRANTY.
CAUTION: When working with the reagent tubing,
make sure the tubing does not become
pinched or kinked and is not trapped
between or beneath objects.