FEP630, FEH630 ELECTROMAGNETIC FLOWMETER | OI/FEP630/FEH630-EN REV. D 21
Installing the sensor
NOTICE
Damage to the device
Damage to the device due to improper assembly.
• The use of graphite with the flange or process connection
gaskets is prohibited. This is because, in some instances,
an electrically conductive coating may form on the inside
of the meter tube.
• Vacuum shocks in the piping should be avoided to prevent
damage to the liners (PTFE liner). Vacuum shocks can
destroy the device.
The flowmeter sensor can be installed at any location in the
piping while taking the installation conditions into account.
1. Remove protective plates, if present, to the right and left of
the meter tube. To prevent possible leakage, make sure that
the liner on the flange is not cut or damaged.
2. Position the flowmeter sensor plane parallel and centered
between the piping.
3. Install gaskets between the surfaces, see Gaskets on
page 16.
Note
For achieve the best results, ensure the gaskets fit concentrically
with the meter tube
To ensure that the flow profile is not distorted, the gaskets must
not protrude into the piping.
4. Use the appropriate screws for the holes in accordance with
Torque information on page 144.
5. Slightly grease the threaded nuts.
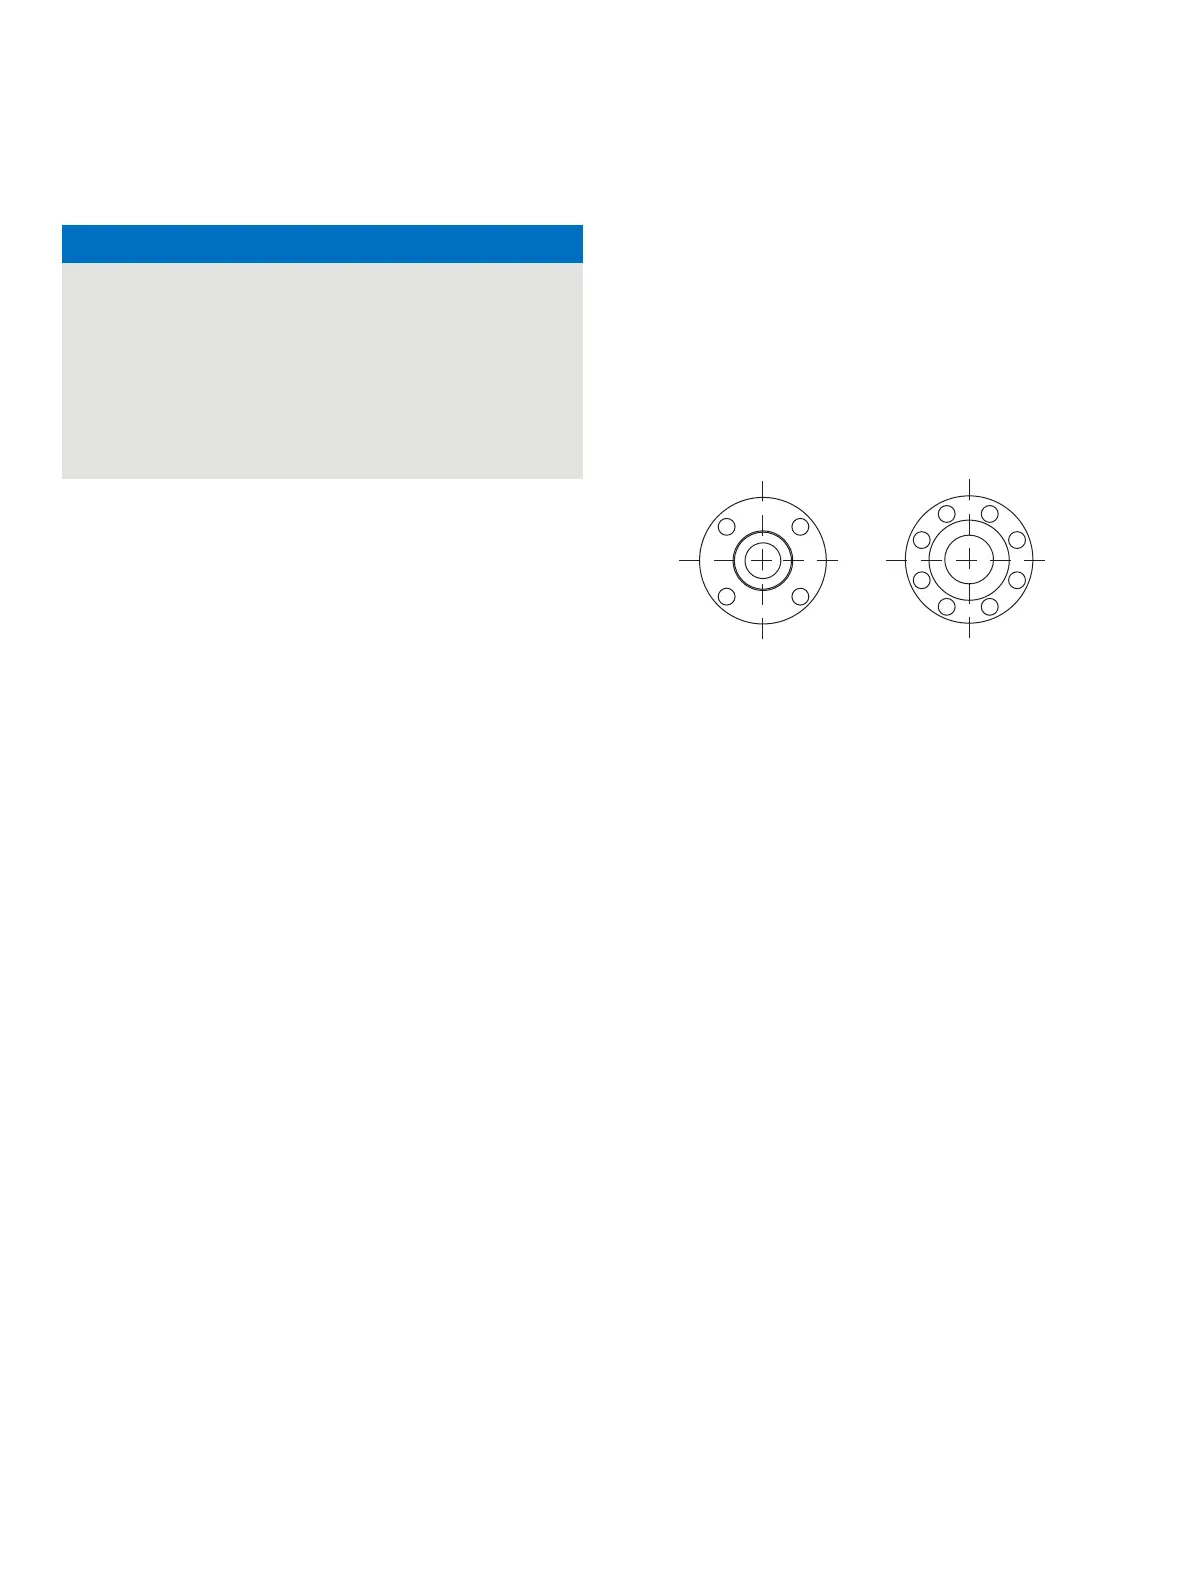
6. Tighten the nuts in a crosswise manner as shown in the
figure. Observe the tightening torques in accordance with
Torque information on page 144!
First tighten the nuts to approx. 50 % of the maximum
torque, then to 80 %, and finally a third time to the maximum
torque. Do not exceed the max. torque.
G11726
1
2
7
8
5
3
4
6
1
2
3
4
Figure 23: Tightening sequence for the flange screws