46 Service PSTX720...840 | Service Manual | 1SFC13105M0201
3.7.2 Assemble the Softstarter
Please don’t forget to vacuum clean the
Softstarter from dirt and dust when reassembling.
CAUTION
Use protective gloves when working with cover
plates to prevent cutting injuries.
INFORMATION
It is important that the cooling tower is mounted
to the unit through the internal phase bar before
tightening the hexagon screw-nuts. This prevent
the cooling tower from being bent due to torque
forces.
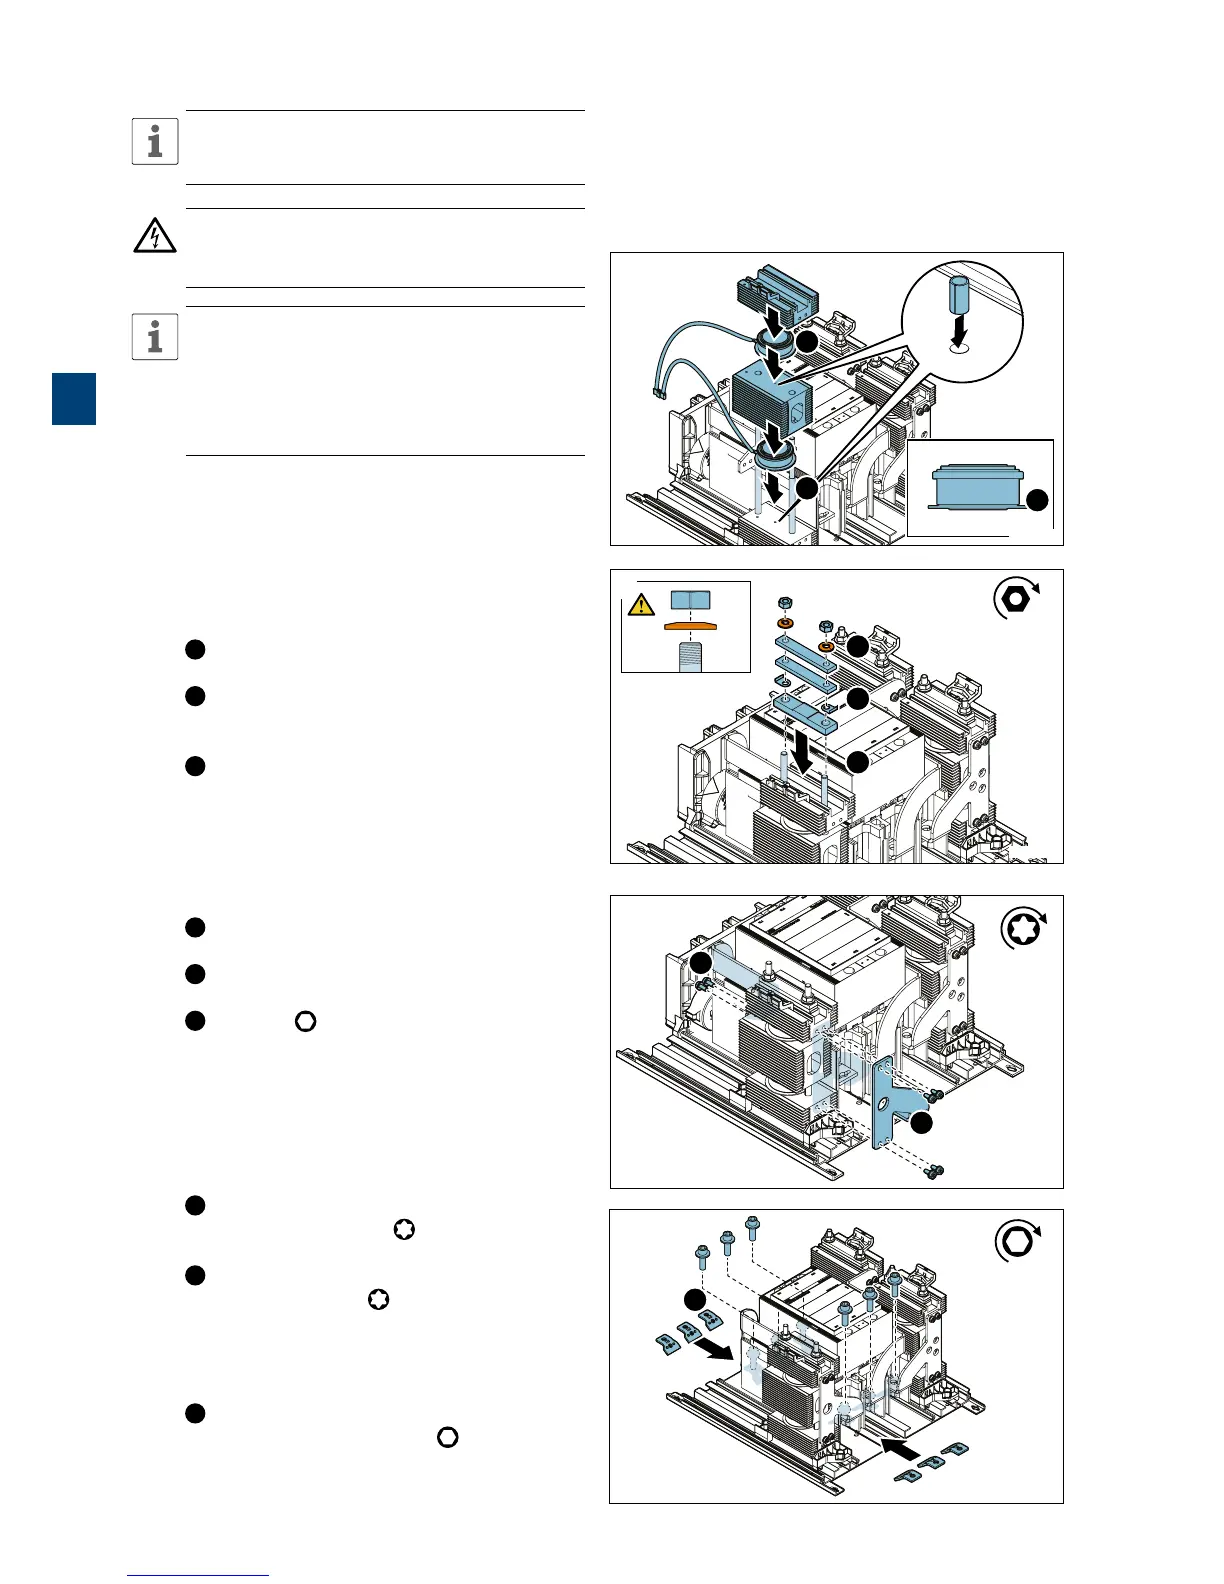
1. Place new SCR
Make sure that the symbol and type specification
of the new SCR corresponds to previously installed
SCR prior to assembly. Do not scratch the contact
surfaces with the guide pins. Turn the component
so that the SCR wires point towards the bypass
contactor.
1
Make sure to place the SCR units with the
correct sides facing upwards; see illustration.
2
Place the lower SCR unit and middle heat sink
onto stud bolts on cooling tower. Align to guide
pins.
3
Place the upper SCR unit and upper heat sink
onto stud bolts on cooling tower. Align to guide
pins.
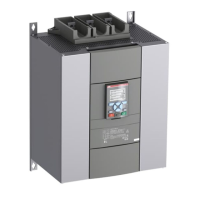
2. Place tension bars and screw-nuts to cooling
tower
1
Place the spacing bar onto stud bolts on
cooling tower.
2
Place the two torque washers and tension bars
onto stud bolts on cooling tower.
3
Place (2x) Hexagon no. 16 M10 Screw-
nut and the two spring washers onto stud bolts on
cooling tower (do not yet fasten). Spring washers
are to be placed with the concave side facing
downwards.
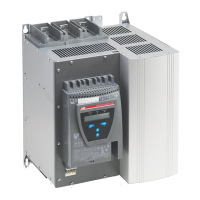
3. Place phase bars to cooling tower
1
Place the internal phase bar on the cooling
tower and fasten with (4x)
Torx 30 M6x16
(8Nm). Washers to be used.
2
Fasten the second internal phase bar to the
cooling tower with (2x)
Torx 30 M6x16 (8Nm).
Washers to be used.
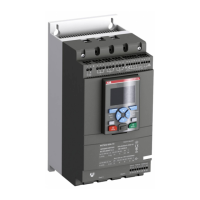
4. Fasten phase screws
1
Place the square nuts with the angled sides
inwards and slightly tighten (6x)
Hexagon no.
10 M12x40.
UP
DOWN
1
3.7.2_1
3
2
1
Hexagon no. 16
M10
1
2
3
3.7.2_2
2
Tx 30
M6 x 16
(8Nm)
1
2
3.7.2_3
3