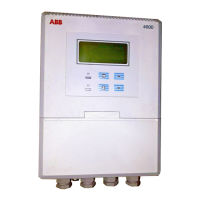
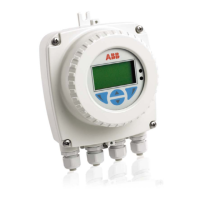
TB82PH ATEX Product Instruction Manual ABB
18 TB82PH-ATEX-EN-A
DISMANTLING AND RE-ASSEMBLY
Dismantling
1. Use the bladed screwdriver to loosen the four captive
screws that secure the Front Bezel and/or Rear Cover
Assemblies (depending on which component is being
replaced) and remove the cover(s).
2. Remove Power Supply and/or Input PCB Assemblies
by unscrewing the two Phillips screws and unplug the
assemblies from their connectors.
3. Remove Microprocessor/Display PCB Assembly by
unscrewing the four Phillips screws and unplug the
keypad cable by lifting the locking arms on the side of
the connector and remove the cable from the
connector.
4. Remove the cable hubs by screwing the retaining nut
and removing the hub from the Shell Assembly.
Reassembly
Check that the gaskets are not damaged and have a thin
layer of silicone grease. If the gaskets are damaged,
replace gaskets.
1. Install the Microprocessor/Display by securing the
assembly with the four Phillips screws and installing
the keypad cable into the connector and locking it into
place by pushing down the two locking arms on the
side of the connector.
2. Install the Power Supply and/or Input PCB
Assemblies into their respective connector and secure
the assemblies with the two Phillips screws per
assembly.
3. Attach cable hubs by installing the gaskets onto the
hubs and insert the hubs into the ports in the Shell
assembly. Secure the hubs by tightening the nut onto
the hub threads.
4. Install the Front Bezel and/or Rear Cover Assemblies
and secure by tightening the four captive screws per
assembly using a bladed screwdriver.
Caution.
Dismantling and reassembly should not be
carried out on site because of the risk of
damage to components and printed
circuits. The dismantling and reassembly
procedures should be carried out in the
listed order to avoid instrument damage.
Warning.
Substitution of any components other than
those assemblies listed in this section will
compromise the certification listed on the
transmitter nameplate. Invalidating the
certifications can lead to unsafe conditions
that can injure personnel and damage
e
ui
ment.
MICROPROCESSOR/DISPLAY PCB ASSY KITS:
HART/NON-HART VERSIONS -
TB82PH 4TB9515-0154
TB82EC/TC/TE 4TB9515-0178
FF VERSIONS -
TB82PH 4TB9515-0255
TB82EC 4TB9515-0256
TB82TE 4TB9515-0257
TB82TC 4TB9515-0258
POWER SUPPLY PCB ASSY KITS:
HART/NON-HART VERSIONS -
TB82 NON-HART 4TB9515-0158
TB82 HART 4TB9515-0159
FF VERSIONS -
TB82 4TB9515-0253
PA VERSIONS-
TB82 4TB9515-0254
PG9 LIQUID TITE FITTING KIT (TB84)
4TB9515-0191
4TB9515-0198
1/2” LIQUID TITE FITTING KIT
4TB9515-0165 (FOR TB5 SENSORS)
4TB9515-0163 (FOR TBX5/TB4 SENSORS)
PROFIBUS PA VERSIONS -
TB82PH 4TB9515-0260
TB82EC 4TB9515-0261
TB82TE 4TB9515-0262
TB82TC 4TB9515-0263
LINE POWER ANALYZER VERSIONS -
TB84PH 4TB9515-0199
TB84EC 4TB9515-0201
TB84TE 4TB9515-0205
TB82TC 4TB9515-0203
FRONT BEZEL KIT
TB82 VERSIONS:
4TB9515-0160 (TB82 non-FM)
4TB9515-0181 (TB82 FM)
4TB9515-0208 (TB84 non-FM)
4TB9515-0210 (TB84 FM)
POWER SUPPLY PCB ASSY KIT
4TB9515-0207 (TB84)
INPUT PCB ASSY KITS:
4TB9515-0153 (PH)
4TB9515-0176 (EC)
4TB9515-0226 (TC)
4TB9515-0187 (TE)
REAR COVER KITS:
4TB9515-0162 (82)
4TB9515-0214 (84)
SHELL KITS:
4TB9515-0161 (82PH)
4TB9515-0175 (82EC/TE)
4TB9515-0224 (82TC)
4TB9515-0212 (84PH)
4TB9515-0213 (84EC/TE)
4TB9515-0225 (84TC)
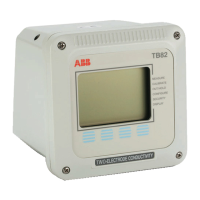
Figure 26 - TB82PH Transmitter Exploded View