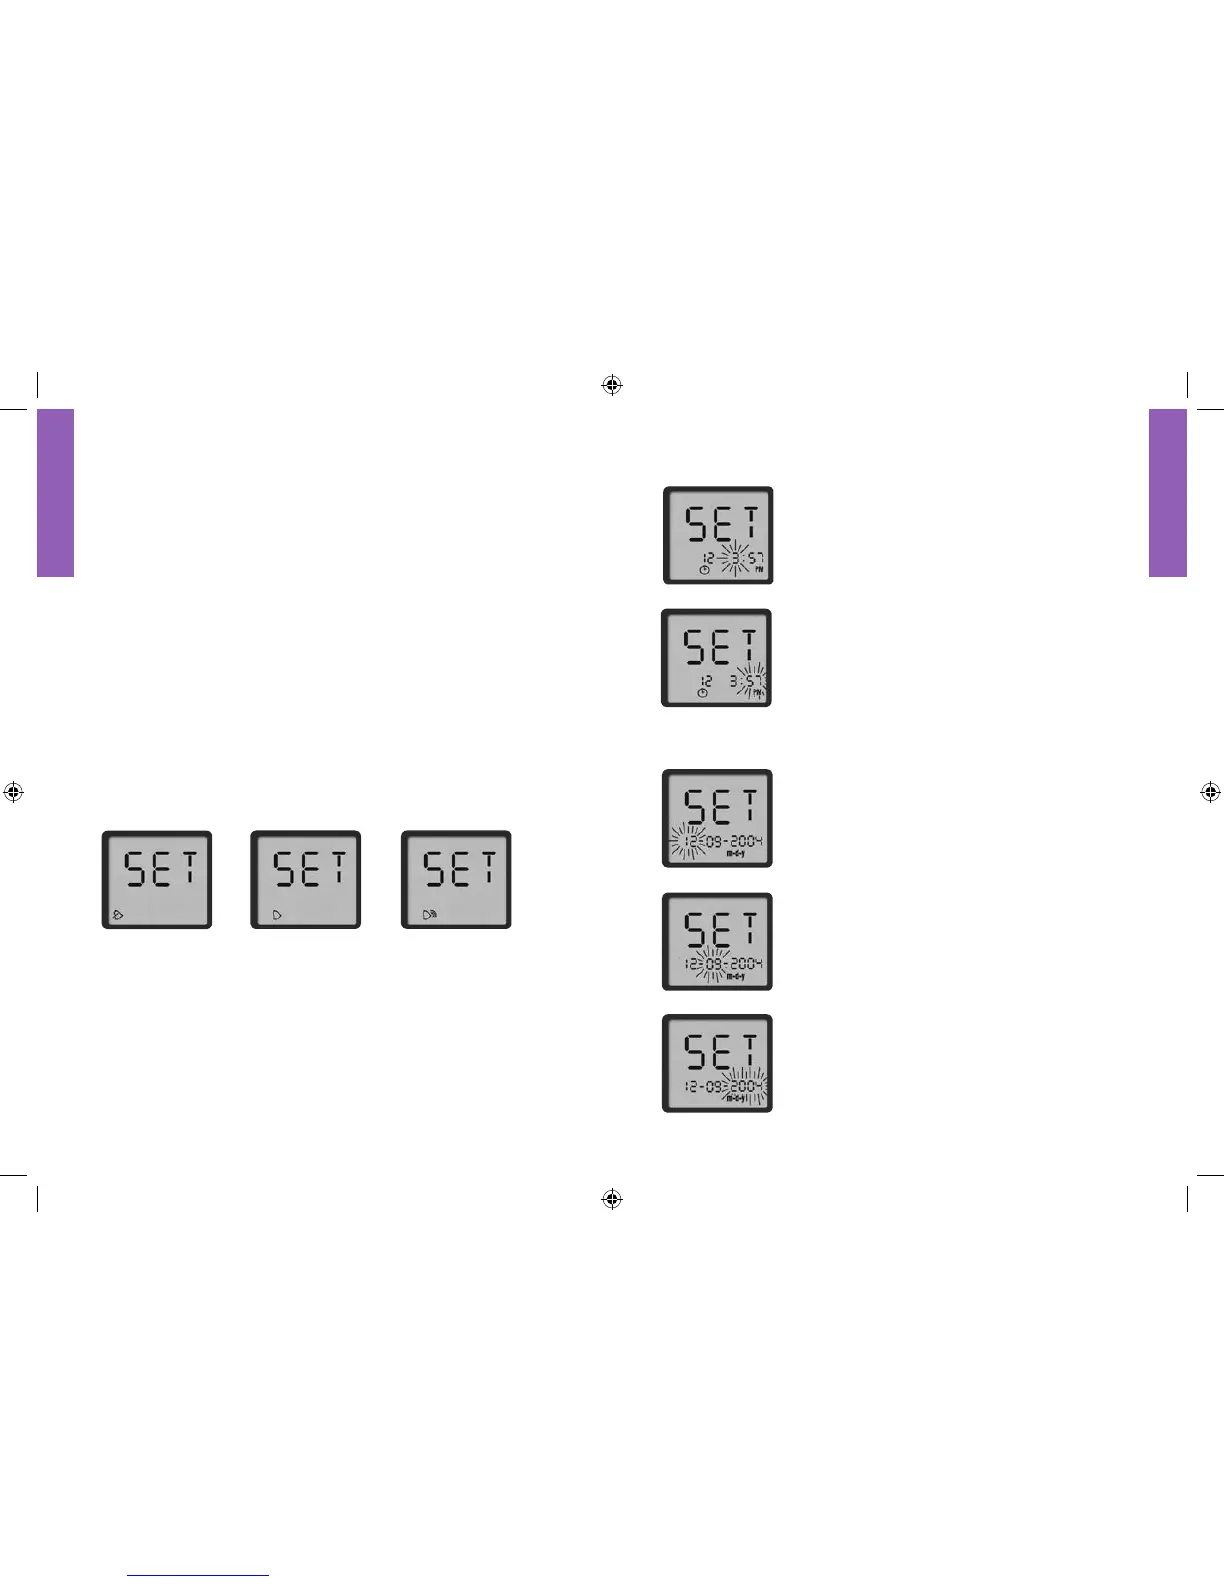
Setting the Time
1. With the hour blinking, press the “c” button
until the correct hour appears. If using the
12-hour time format, be sure to press the “c”
button until the correct choice between “AM”
and “PM” appears.
2. Press the “m” button to move to minute
setting.
3. With the minute blinking, press the “c” button
until the correct minute appears.
4. Press the “m” button to move to “Setting the
Date.”
Setting the Date
1. With the day blinking, press the “c” button
until the correct day appears.
2. Press the “m” button to move to the month
setting.
3. With the month blinking, press the “c” button
until the correct month appears.
4. Press the “m” button to move to the year
setting.
5. With the year blinking, press the “c” button
until the correct year appears.
6. Press the “m” button to move to “Setting the
Unit of Measurement.”
HOUR
MINUTE
DAY
MONTH
YEAR
Setting Up The Meter
To Enter Setup Mode•
Start with the meter off. Press and firmly hold the “m” button
until the set display screen appears.
To Exit at Any Time•
Press and hold the “m” button until the meter powers off.
How to Move Through the Screens•
Press the “m” button to move through all the setup screens such
as sound level, time, date, and so on.
Press the “c” button to change settings within a setup screen.
Setting the Sound
There are three sound volume options: Off, Low, and High
(default setting). Press the “c” button until the desired sound level
appears. Press the “m” button to move to “Setting the Time.”
LOW
OFF
HIGH