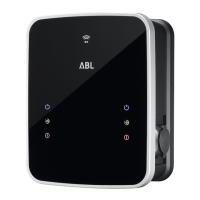
PREPARATIONS, INSTALLATION AND TAKING INTO OPERATION
10
ed RFID module: The necessary procedure is described in section “Deactivating and
reactivating of the charging function via RFID” on page 12 of the user manual.
• Please always ensure that the installation requirements listed in this manual are
complied with. Disregard or actions to the contrary may lead to severe injury by
electric shock or even death. In addition, in case of contravention of the notices
given, the proper operation of the wallbox cannot be guaranteed.
Mechanical and electrical installation of the wallbox
After determining the mounting site for the wallbox, you can begin with mechanical
installation. For installation you will need the following components:
• Power drill or cordless drill (not included)
• Drill bit Ø 10mm, appropriate for the wall substrate (not included)
• Screwdriver with flat head (2.5 mm blade width), Phillips head (PH1) and torx head
(TX40, TX25, TX20, TX10) bits
• Mounting plate (included)
• Pliers or cutter for breaking or cutting out the cable inlet in the mounting plate (not
included)
• Four 8 x 60 wafer head (TX40 bit) screws for fixing the mounting plate (included)
• Four 6 x 25 (TX25 bit) screws for fixing the wallbox housing to the mounting plate
(included)
• If required: Wall plugs suitable for the mounting substrate (included: 10 x 50 nylon
wall plugs)
• Spirit level if required (not included)
DANGER!
Always observe the 5 golden rules of electrical installation:
1. Cut off all voltage sources
2. Secure all cut-off devices
3. Verify absence of voltage
4. Ground and short-circuit
5. Cover or bar access to adjacent components under voltage
Always deactivate the MCB (and RCCB if present) allocated to the wallbox
in the domestic power supply before you begin installation. Also ensure
that the MCBs (and RCCBs) cannot be reactivated during installation. Oth-
erwise, there is a risk of severe injury through electric shock or even death!
Proceed as follows to drill the holes using the mounting plate:
1. Ensure that a sufficiently dimensioned power supply is available at the desired
installation site. Otherwise, a power supply must be installed especially.
 Loading...