Alarm
52
Alarm Output
1. Click on “Alarm Output” in the “Alarm Settings”
menu.
Select the alarm output to make
the settings
Enter a clear description here (e.g.
siren in warehouse)
Length of the activated alarm
Time-dependent control of the
alarm output
2. Assign the alarm output in the drop-down menu.
3. Enter the alarm name.
4. In the drop-down menu, enter the interval between
the alarm input message and the signal output on
the relay.
5. Select the day and enter the schedule (see page 38).
6. Copy the settings to other alarm inputs if the pa-
rameters match or if so required.
Note
If a network camera is used, then this must be set
up correctly and network access must be possible.
Pay attention to the information under Manual
Alarm on page 33.
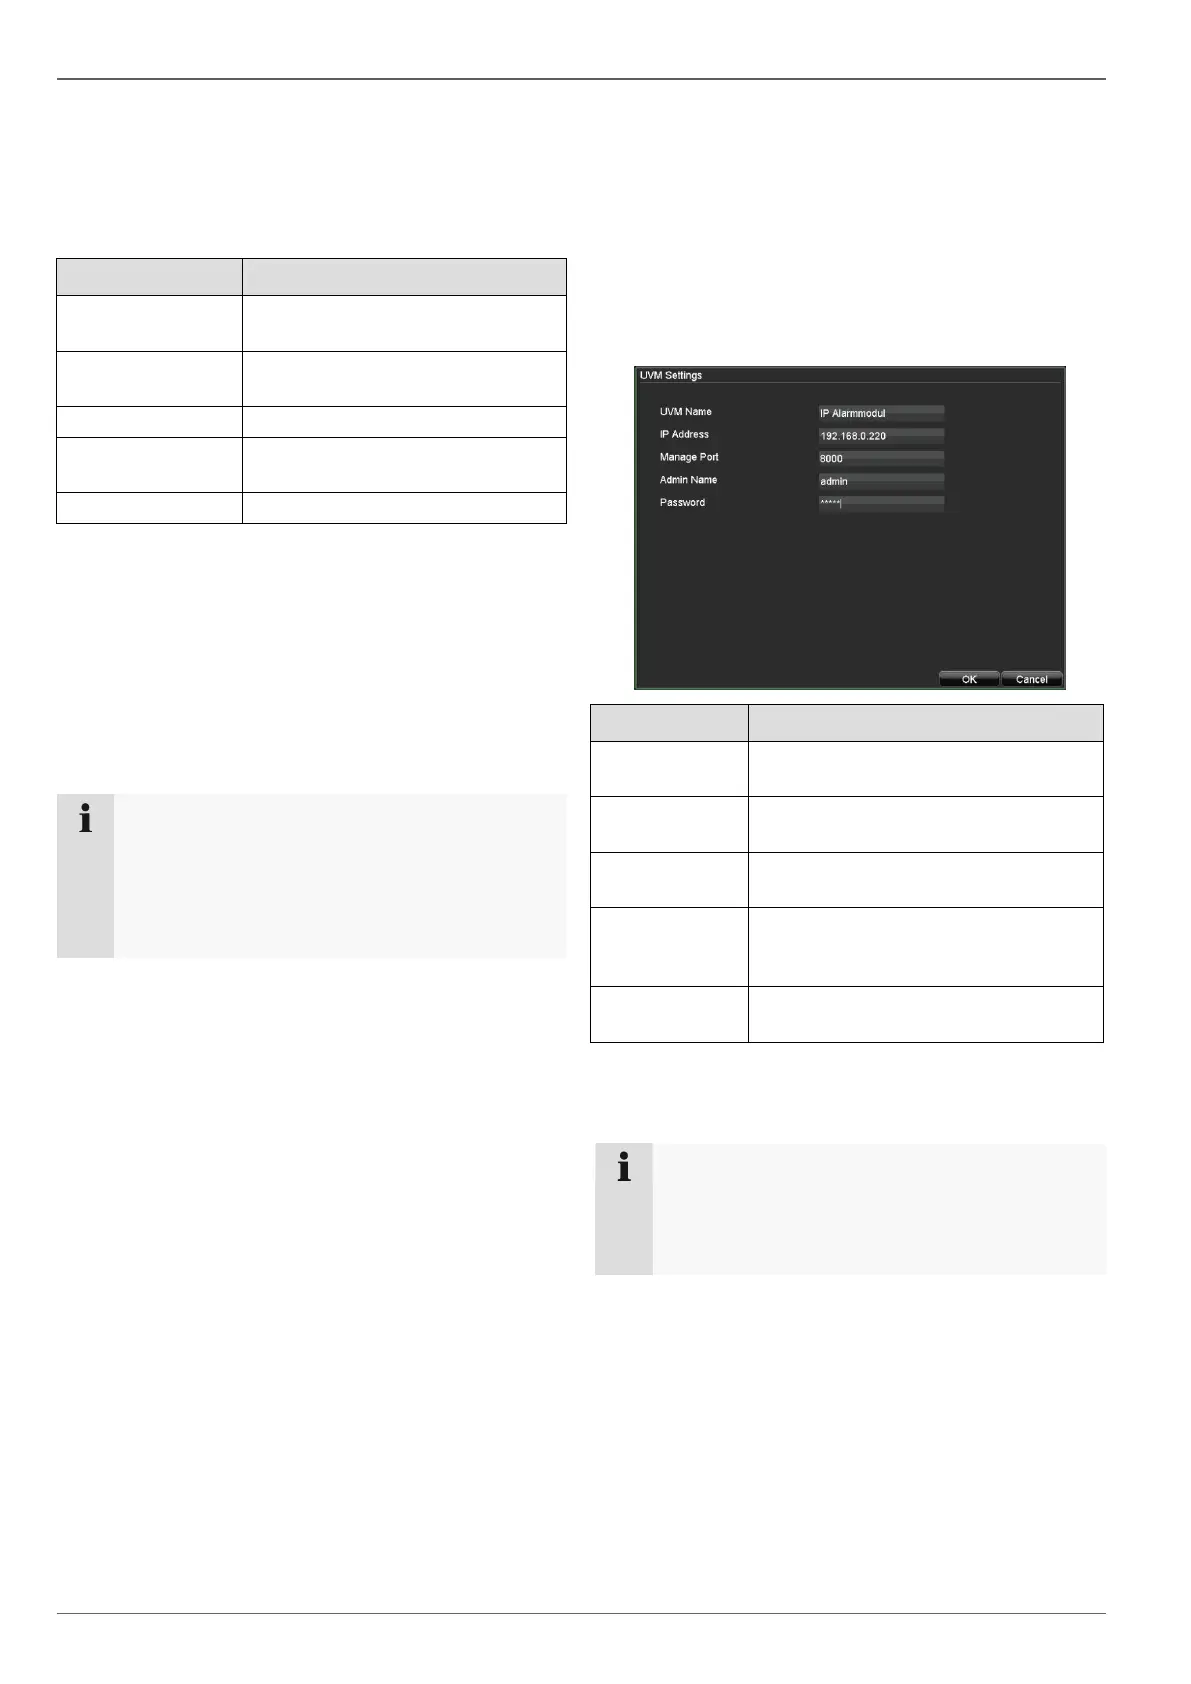
IP alarm module
You can add up to three ABUS IP alarm modules
(CASA10010) here. After successfully connecting via the
network, two alarm inputs and two alarm outputs are
added to each of the “Alarm Input” and “Alarm Output”
tabs. The short name of the inputs is
U1<-1 / U1<-2, whilst the short name of the outputs is
U1->1 / U1->2.
Click on “Add” to configure an ABUS IP alarm module.
A unique name for the IP alarm mod-
ule can be entered here.
Enter the IP address of the IP alarm
module here.
Enter the port (default: 8000) of the IP
alarm module here.
Enter the user name of the IP alarm
module here (user must have admin-
istrator rights).
Enter the password of the user speci-
fied above here.
After a successful connection two virtual alarm in- and
outputs are added. These can only be switch by network.
Note
Please refer to the homepage (www.abus-sc.com)
to find further installation instructions in the down-
load section of the ABUS IP Alarm Module
(CASA10000).