Chapter 3: Tags, IDTAD, & TTS3-12
Testing Tags
Testing a Tag for ID, Battery Level,
& Warranty Date
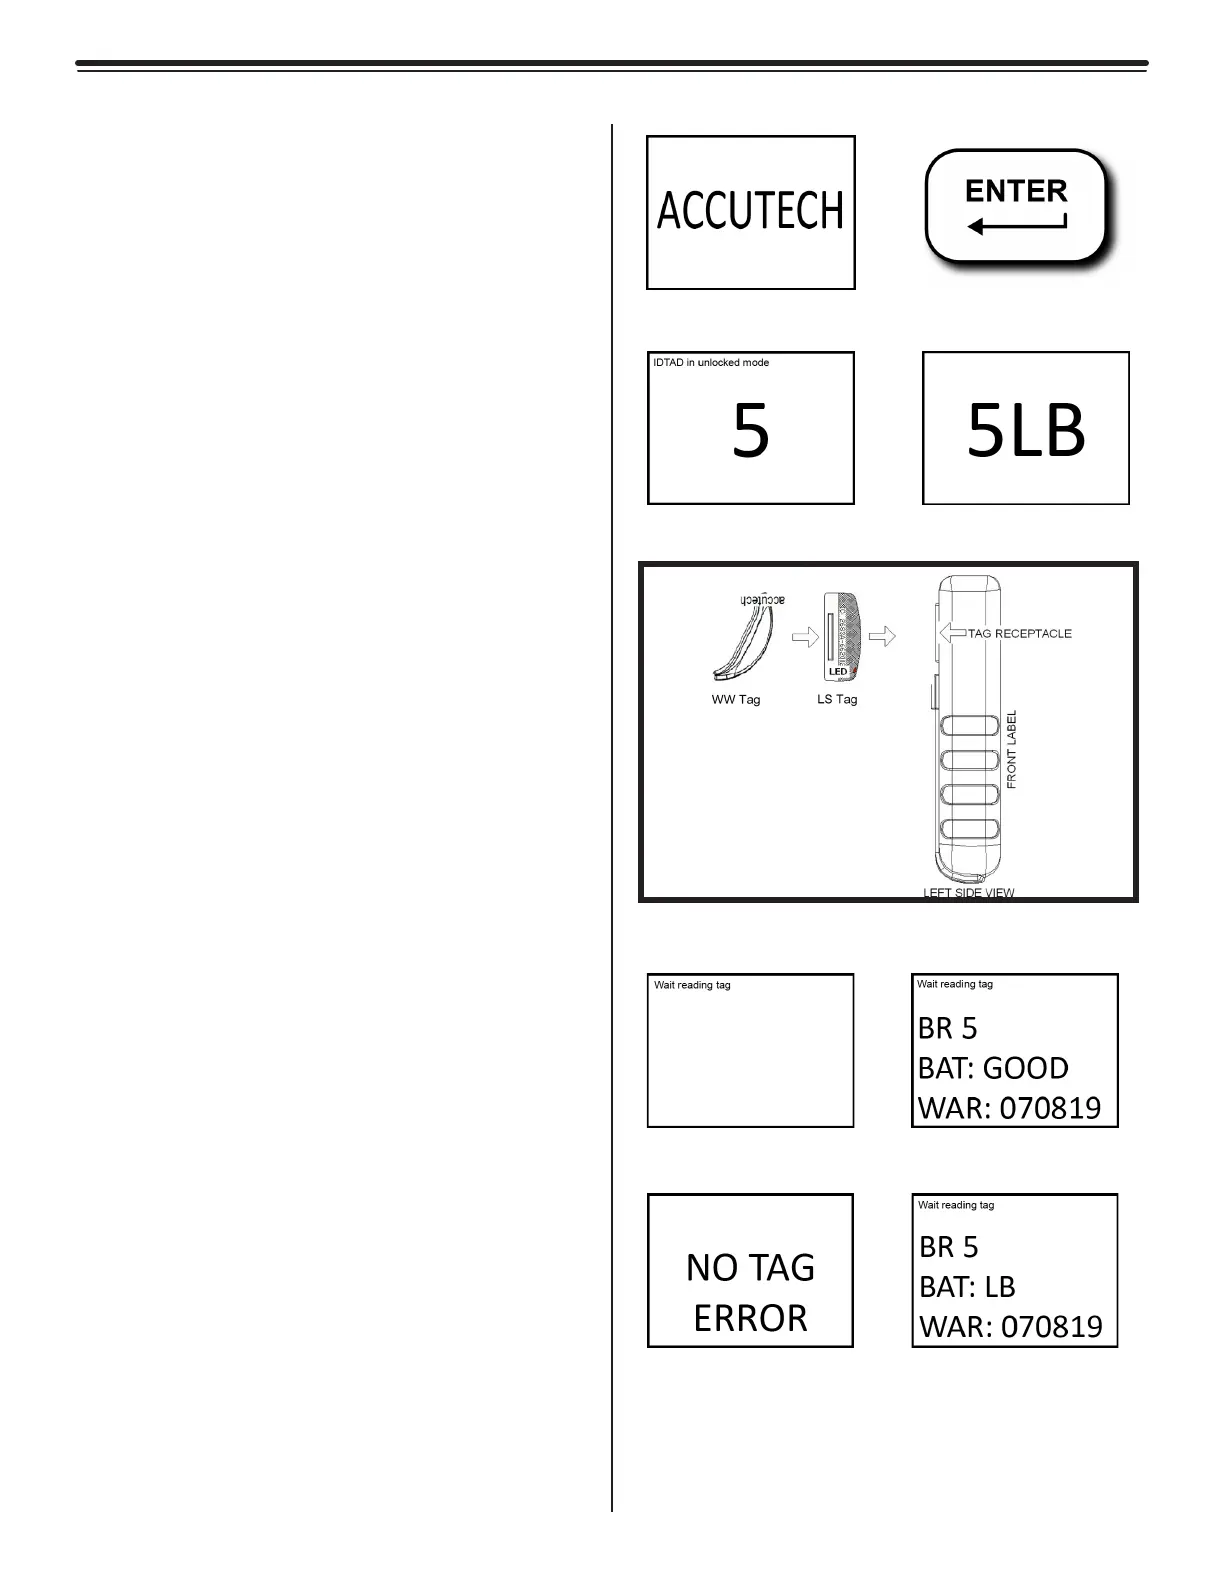
The IDTAD can be utilized to test tags.
1) Press the Power/Clear button to turn the
IDTAD on. Do not unlock the device. The
screen will display "ACCUTECH" (a).
2) Touch the top side of the tag (the side
with the Accutech logo) up against the
IDTAD and within the tag receptacle
(e). Position the tag in the orientation
displayed within the receptacle.
3) Press the Enter button (b). The screen
will display “Wait reading tag” (f). Do not
remove the tag during this process.
4) Once the tag data is received, the screen
will display the tag type and number, the
battery level (only if tag is active), and the
warranty date (g).
5) If “NO TAG ERROR” is displayed
(h), reorient or re-seat the tag in the
receptacle of the IDTAD and press the
Enter button.
6) If the tag is active and has low battery,
the screen will display the letters "LB"
next to the tag number (d). In this case,
you must replace the tag immediately.
Never use a tag with a low battery.
To test a tag while it is being worn:
1) Power the IDTAD up. The screen will
display "ACCUTECH" (a).
2) Hold the IDTAD up to and within 3 inches
of the tag. The tag number will display on
the screen (b).
3) If the tag has a low battery, the screen
will display the letters "LB" next to the tag
number (d). In this case, you must replace
the tag immediately. Never use a tag with
a low battery.
(a)
(c) (d)
(e)
(f) (g)
(h) (i)
Figures 3.15a-3.15i
References for IDTAD Tag Testing
(b)