SP8026-1909
EVOLUTION ELECTRIC STEAMER
45
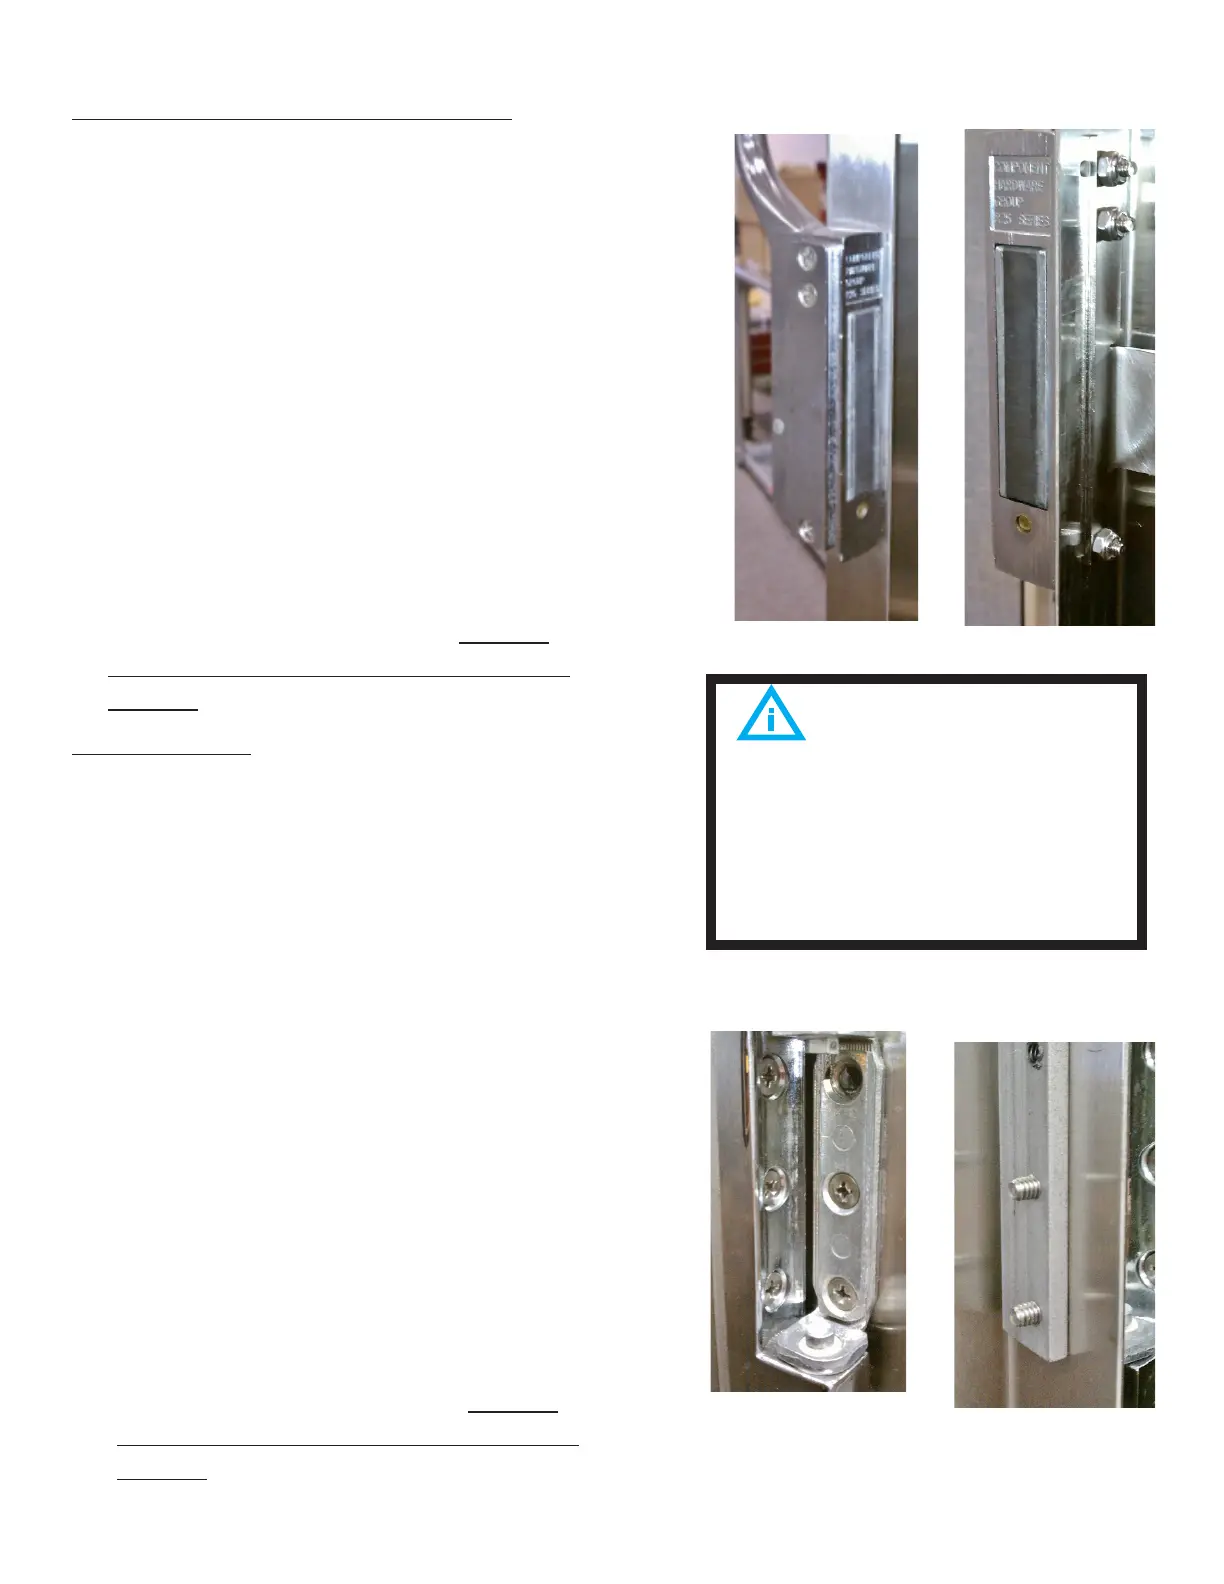
Ensure That the Inner Door
is Reinstalled with its Middle Brace
Bar Behind the Door Latch Tab (FIG
4.5H).
Also, Ensure That the Screw Retainer
Openings are Lined-Up with the
Door’s Hinge Side (FIG 4.5I).
DOOR HANDLE LATCH ASSEMBLY
1. Unplug the unit & shut the Door.
2. Remove the Hinge Covers (FIG 4.5G).
3. Remove the very bottom screw on the
door hinge-side of the Bottom Hinge &
remove the very top screw on the door-
side hinge of the Top Hinge.
4. Pull the door handle and open the door
5. Lift and pull out the Inner Door Panel.
6. Remove the 3 mounting nuts and
screws, holding the Door Handle Latch
to the side of the door, and the Inner
Door Holding Tab.
7. Remove the Door Handle Latch Assem-
bly.
8. Re-install in reverse order. Ensure
Anti-seize is re-applied to all hinge
screws.
DOOR HINGE
1. Unplug the unit & shut the Door.
2. Remove the Hinge Covers (FIG 4.5A).
3. Remove the 3 hinge screws going into the
face of the steamer of the Bottom Hinge.
4. While supporting the Door on the hinge-
side, remove the 3 hinge screws into the
face of the steamer of the Top Hinge.
5. Pull the door handle and remove the Door.
6. Remove the very bottom screw on the door
hinge-side of the Bottom Hinge & remove
the very top screw on the door-side hinge
of the Top Hinge.
7. Lift and pull out the Inner Door Panel.
8. Remove the remaining door-side screws
for the hinge or hinges to be replaced.
(Note the orientation of the Hinge Spacer
Bars as they relate to the Hinge orientation.)
9. Remove the Door Hinge or Hinges.
10. Re-install in reverse order. Ensure
Anti-seize is re-applied to all hinge
screws.
FIG 4.5G
FIG 4.5H
FIG 4.5I