©2018 ACP, Inc.
Cedar Rapids, IA 52404 Page 32 of 80
Part No. 16400033
Original Instructions
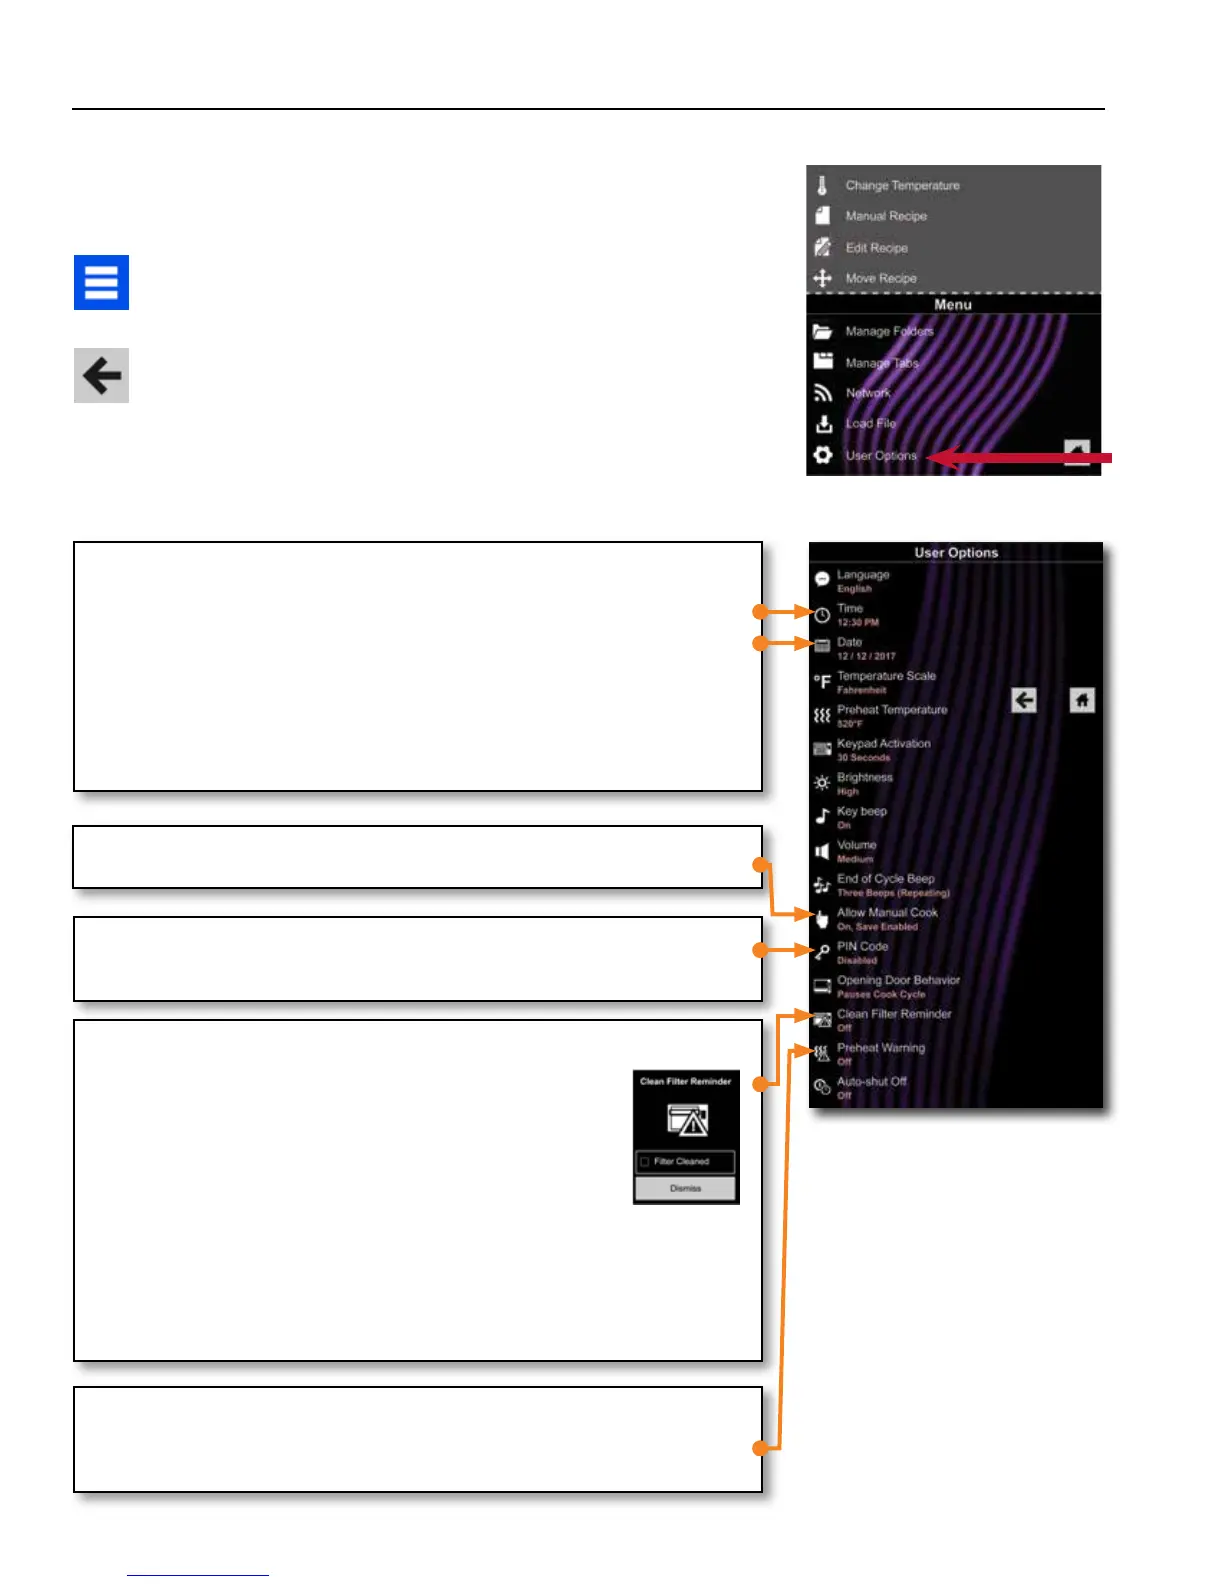
User Options
There are several options you can change to customize the operation of the
oven for your business. The table on the following page shows these options.
The factory setting is shown in bold type.
Access and Modify User Options:
1. Press the Blue Menu Icon at the bottom of the screen.
2. Scroll down and press to select User Options.
3. Use this Menu to modify Oven Settings.
4. Press the Left Arrow Icon to return to the Menu after making each change.
Note: You may also make User Options changes using the ACP
Programming Application.
Note: Programming the Preheat Temperature in the User Options
Menu will set the oven to heat to a certain temperature each time it is
powered on.
ALLOW MANUAL COOK
Allow Manual Cook option must be enabled to view Allow Manual Save options.
CLEAN FILTER REMINDER
When “Clean Filter” message displays, clean air lters thoroughly.
Cleaning the air lters will not shut o message.
Message will automatically stop displaying after 24 hours.
a. Check “Filter Cleaned” box to conrm clean.
b. Select “Dismiss” to close popup.
Note: If “Filter Cleaned” box is checked, reminder time resets.
Necessary cleaning frequency of air lters dependant on microwave use and
environmental conditions. Once frequency is determined, set the user option for
appropriate time frame.
Air lters and vents must be cleaned regularly to prevent overheating of oven.
Refer to “1. Clean Air Filters” on page 30 for cleaning instructions.
PIN CODE
If enabling PIN Code, select a 4-digit numeric PIN. PIN Code must be enabled
before trained technician may enter Service Mode.
PREHEAT WARNING
To guarantee that oven reaches the desired temperature before the start of cook
cycle, enable Preheat Warning in user options. Enable setting when using recipe
with dierent starting temperature than default Preheat Temperature.
TIME AND DATE
This oven maintains a data log of information, including date and time of operation.
This information is used to diagnose and troubleshoot errors. An accurate date and
time are important for the data log.
1. Select Time. Choose format (12 HR or 24 HR). Enter local time.
2. Press the Left Arrow Icon to return.
3. Select Date. Choose format (MM/DD/YYYY or DD/MM/YYYY).
Enter today’s date.
4. Press the Left Arrow Icon to return.
2