Unit Installation NetVanta 4660/5660 Series
34 Copyright © 2014 ADTRAN, Inc. 617004660F1-34A
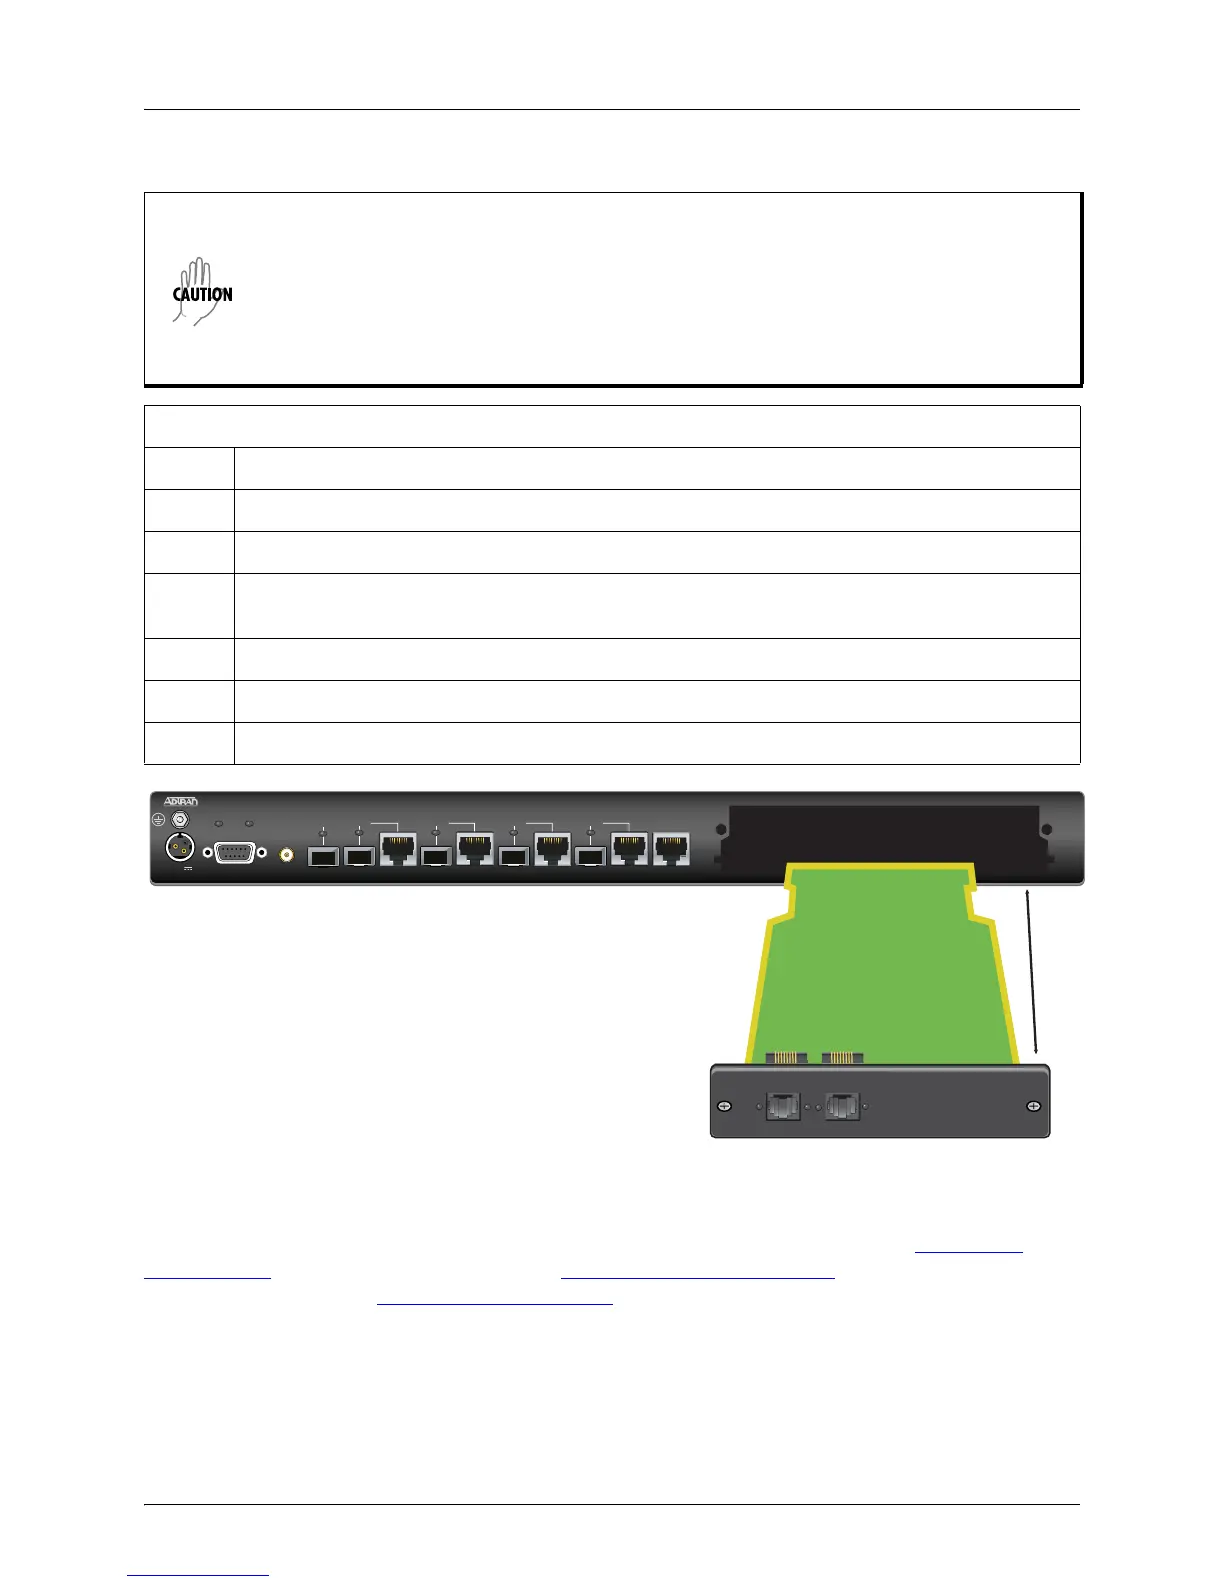
Figure 9. Network Module Installation
Your NetVanta unit is now ready to be configured and connected to the network. For information on
configuration for a specific application, refer to the configuration guides provided online on ADTRAN’s
Support Forum For details on the CLI, refer to the AOS Command Reference Guide. All other related documents
are also available online on ADTRAN’s Support Forum
.
• Electronic modules can be damaged by static electrical discharge. Before handling
modules, put on an antistatic discharge wrist strap to prevent damage to electrical
components. Place modules in antistatic packing material when transporting or
storing. When working on modules, always place them on an approved antistatic mat
that is electrically grounded.
• Always remove power from the unit prior to removing or installing a module.
• Improper installation could result in damage to the modules.
Instructions for Installing the Network Modules
Step Action
1 Remove power from the unit.
2 Use a screwdriver to remove the cover plate from the option slot in the NetVanta base unit.
3 Slide the option module into the option slot until the module is firmly seated against the chassis
(see Figure 9).
4 Secure the screws at both edges of the module using a screwdriver.
5 Connect the cables to the associated device(s).
6 Restore power to the unit.
T4
48VDC
GIG 0/1
STAT FAN
GIG 0/2 GIG 0/3 GIG 0/4 GIG 0/5
CONSOLE
NetVanta 4660
1 PPS
OUT
1
2
3
4
 Loading...