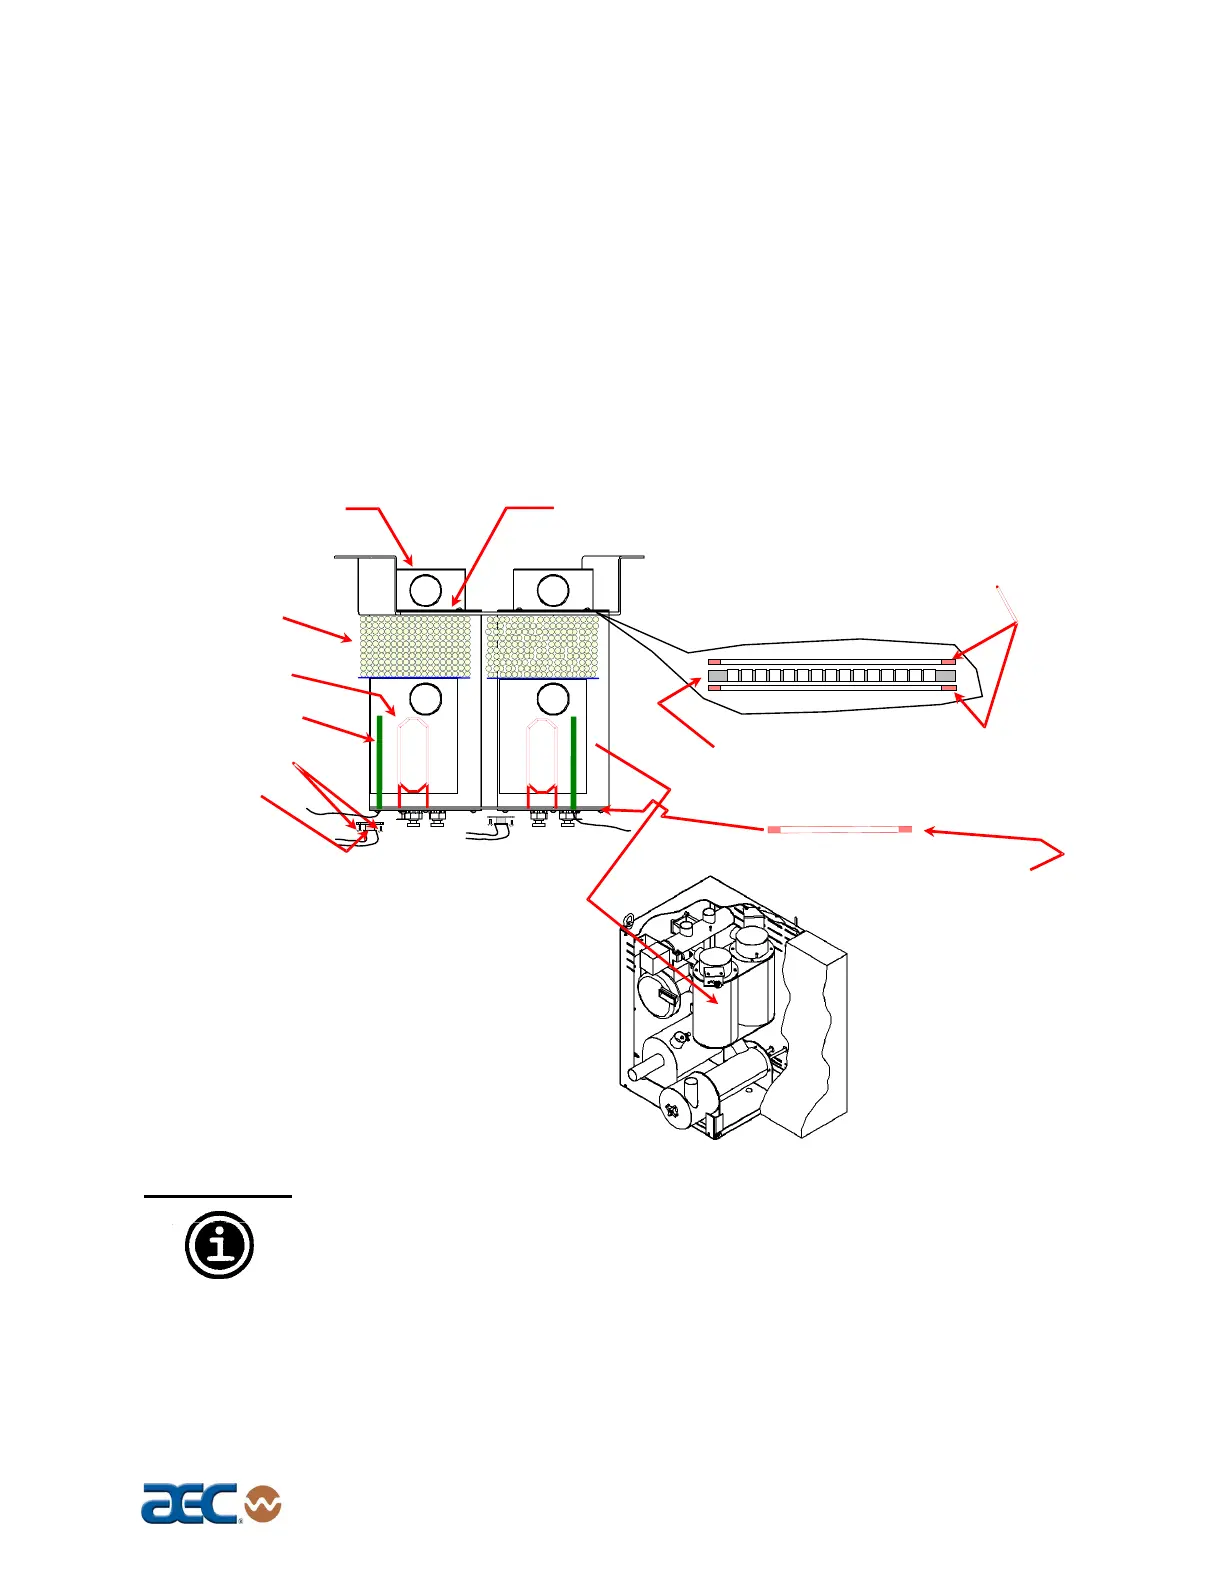
AD Series Dehumidifying Dryers Page 57
To access the Desiccant Bed:
Disconnect electrical power to the dryer.
Using a 1/8” Allen wrench, remove the four (4) 10-32
button head screws holding the Dessicant Cap to the
Regeneration Heater.
Remove the Desiccant Cap.
With a shop vacuum, carefully remove all desiccant from
each tower.
Figure 13
Desiccant Bed Location and Disassembly
Important!
You should properly dispose of any discarded desiccant.
Consult local disposal regulations for more information.
Inspect each lower desiccant screen for tears or holes where
desiccant burned-through. Replace as needed.
Undo (4) 10-32 Button
Head Screws using 1/8
Allen Wrench
Desiccant Cap
1" Wide x 1/8" Thick Silicon
Strip and Stick Gasket
16 Mesh 0.028 Diameter Wire
Stainless Steel Screen
(2) 4-40 screws
Hi Temperature
Snap Switch
Regeneration Heater
1" Wide x 1/8" Thick High
Temperature Gasket
Regeneration
Thermocouple
13X Molecular Sieve
8x12 Beads