:ANAPURNA L/XL OPERATOR MANUAL
AB]]]]]]]]]]]]]]]]]]]]]]]]]]]]]]]]]]]]]]]]]]]]]]]]]]]]]]]]]]]]]]]]]]]]]]]]]]]]]]]]]]]]]]]]]]]]]]]]]]]]]]]]]]]]]]]]]]]]]]]]]]]]]]]]]]]]]]]]]]]]]]]]]]]]]]]]]]]]]]]]]]]]]]]]]]]]]]]]]]]]]]]]]]]]]]]]]]]]]]]]]]]]]]]]]]]]]]]]]]]]]]]]]]]]28] 8/09/2006]
9.2. Rigid Media
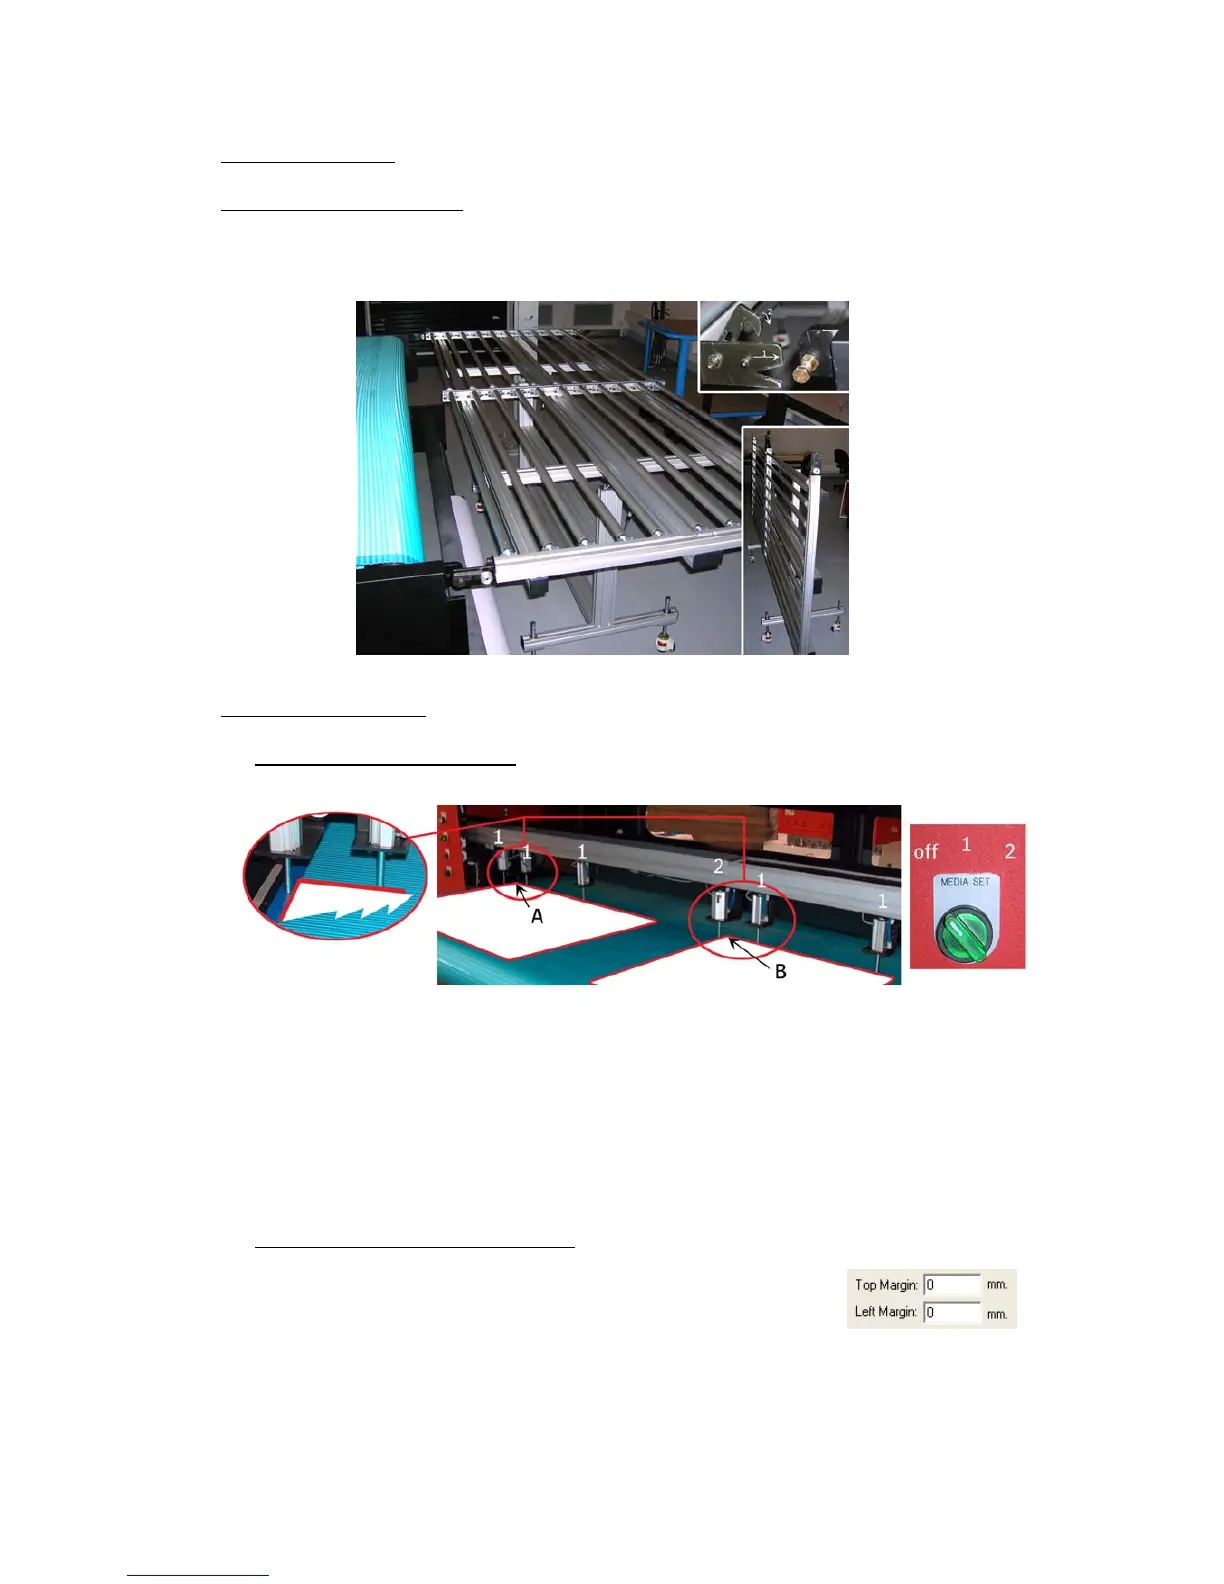
9.2.1. Rigid Support tables
- One table for use on the front, and one table for use on the back are delivered
with the machine. (Standard table; full engine width, and 1m long)
9.2.2. Rigid Alignment
9.2.2.1. Media Register Pins:
When turning the “Media Set” button once, all nr.1 pins will come down, allowing
you to load one rigid. This rigid can be small or at full engine width.
When you turn the button once more, the nr.2 pin will also come down, allowing
you to load two rigid media.
While performing those actions, the blue light will lighten up on the tower.
9.2.2.2. Top and Left Margin Setup:
The “A” and “B” positions, the “o-point”
at the corner of your media, are known distances.
The “A” point has a Top margin of 300 mm and 50 mm
as a Left Margin. These can be entered in the Control program.
Image placement for printing on two rigid media, must be done on Rip level.