Chapter 2 — Installing the scanner 16
Installation for the Apple Macintosh
This section shows you how to set up your StudioStar with your Macintosh computer. You must first
choose and set a SCSI ID number, then connect the scanner to your Macintosh, and finally test the
connection.
Choosing a SCSI ID number
Connecting the scanner
Testing the connection
Choosing a SCSI ID number
Before you connect your StudioStar to your Macintosh, you have to find out which SCSI ID numbers
are already assigned and which numbers are free. To do this, you can use the Macintosh utility
‘SCSI ID Checker’. You will find this utility in the FotoLook folder after you installed the software.
1. Copy the SCSI ID Checker to your Macintosh computer if not already done.
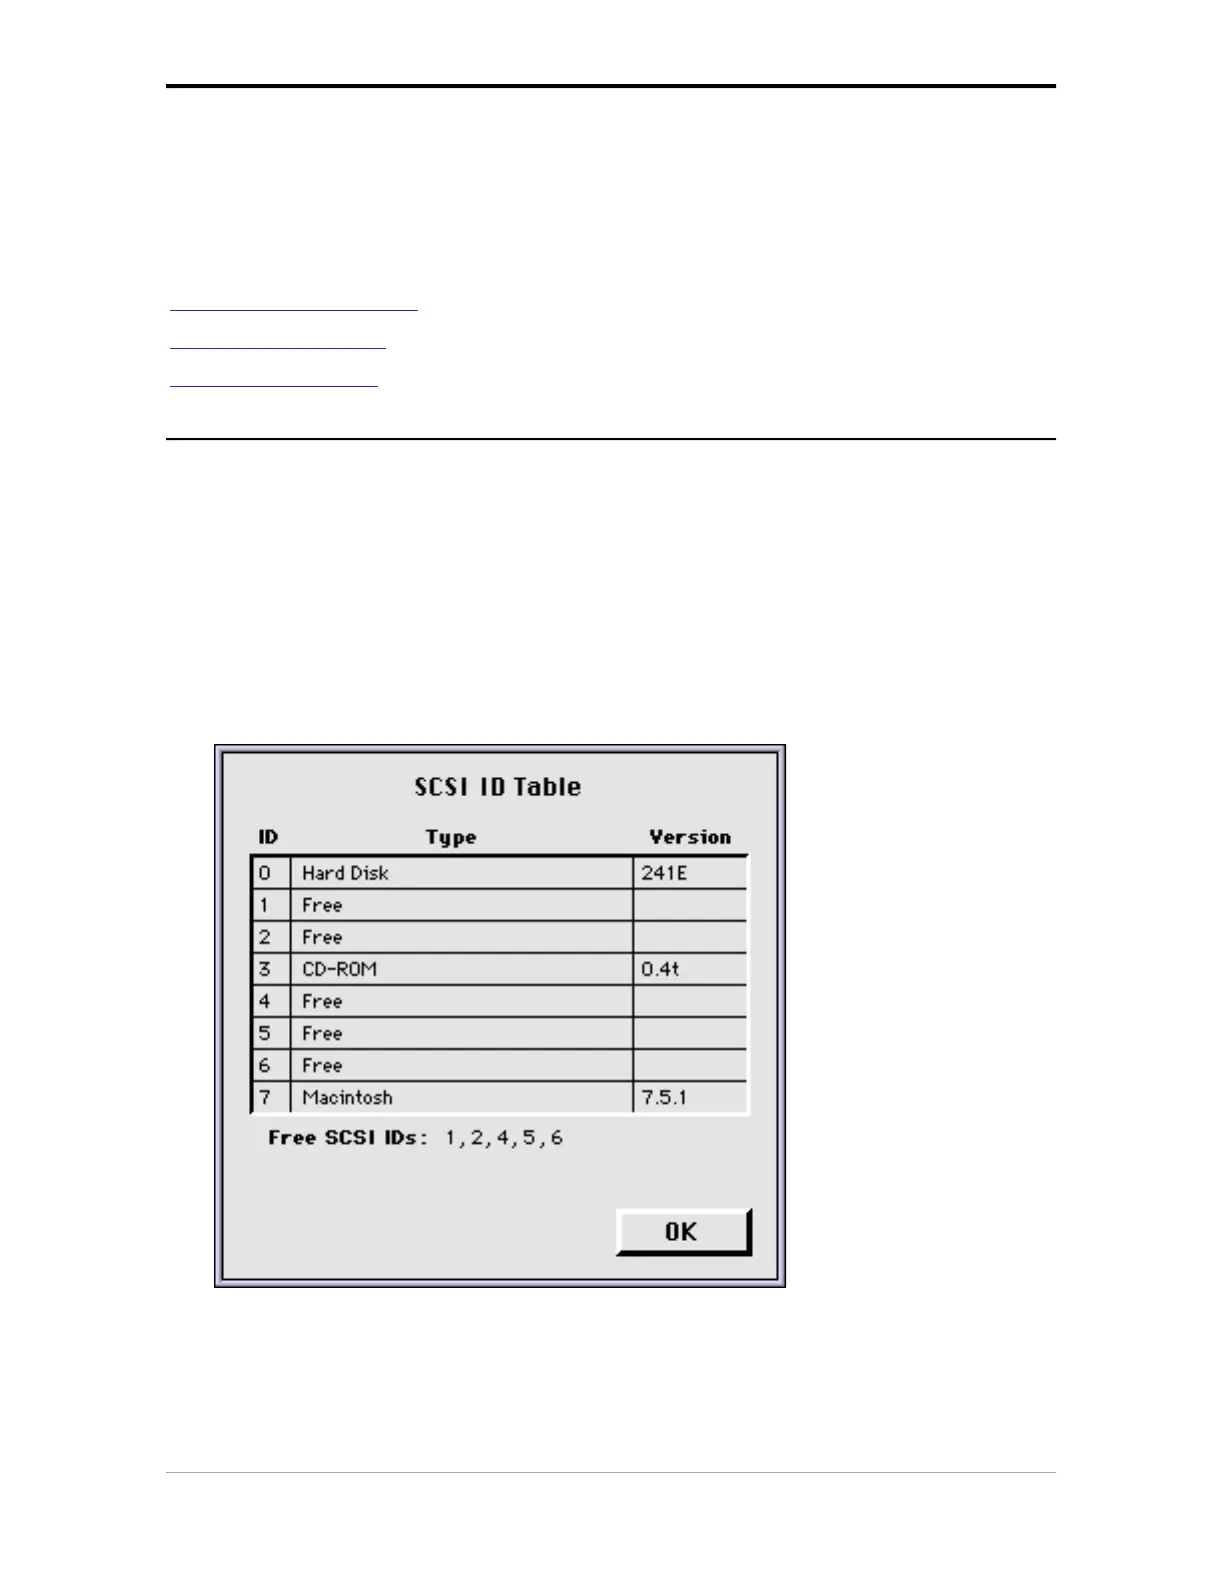
2. Open the SCSI ID Checker.
A dialog box appears with a list of the SCSI ID numbers that are free in your Macintosh
computer.
Your Macintosh always occupies ID 7, its internal hard disk usually occupies ID 0 or ID 1 and CD
ROM usually occupies ID 3. If your Macintosh is equipped with 2 SCSI-busses, the button Next
Bus allows you to switch busses.