Making Your First Measurements
Running a WLAN Confidence Check
Chapter 2 31
Step 3. Rename the Test Set in Connection Wizard.
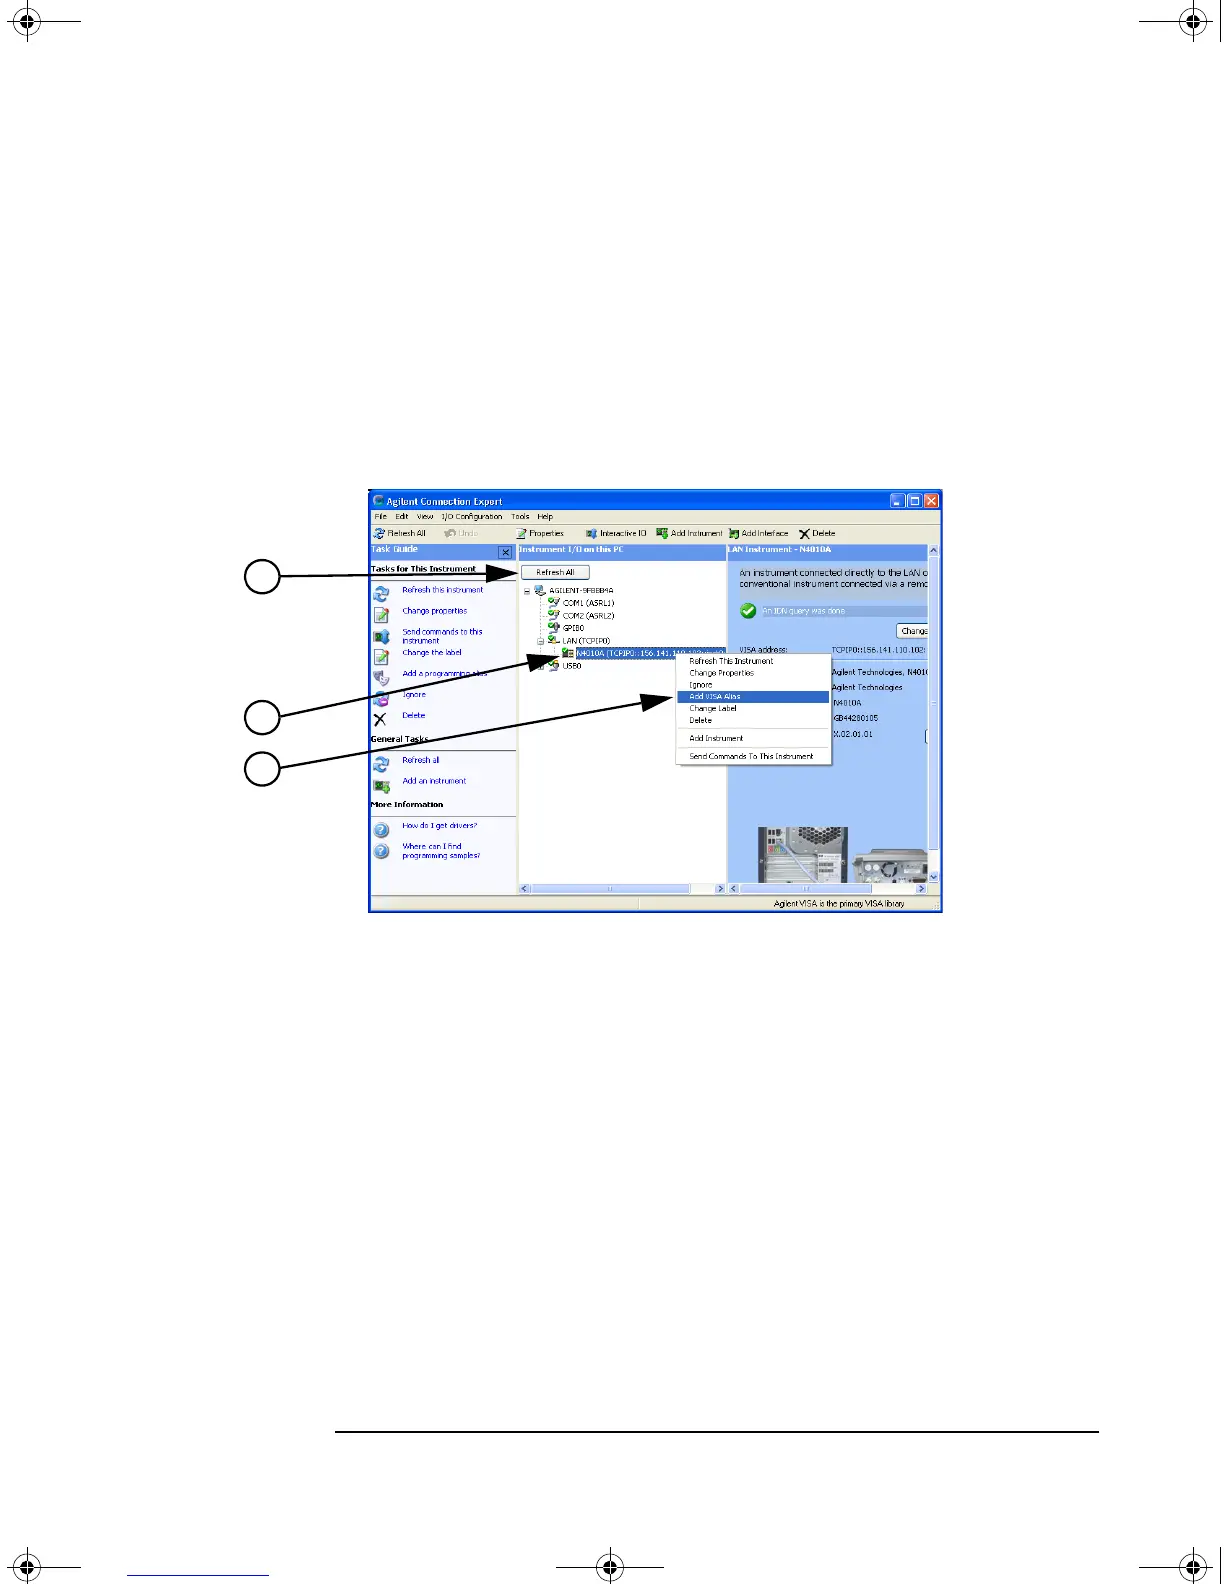
1. In the Agilent Connection Expert, Click on Refresh All as shown in Figure 2-13.
2. From the Instrument I/O on this PC panel, select your Test Set listing with a
right click. If you do not see your Test Set expand the appropriate connection
type by clicking on the + symbol.
Figure 2-13 Typical Connection Expert Screen
3. Click on Add Visa Alias.
4. Enter your new Visa Alias Name, remember this as it is used in step 4. For
example “MyNewInstrument”, do not use spaces.
5. Click on OK.
Step 4. Running the Test Harness Program.
1. Run the Test Harness program, from the windows task bar, Start>All
Programs>Agilent N4010 WLAN Test suite>Sample Program - Test
Harness.
2. In the field marked Instrument, enter the Visa Alias Name of the Test Set
(created in Step 3.4).
3. Click on Create.
In a few seconds the Test Set’s display changes to yellow.
N4010-90086.book Page 31 Monday, November 18, 2013 9:20 AM