8A-16A-32A INSTALLATION Page 9 of 28
8A-16A-32A Rev.00-EN (+34) 944 71 16 00 (+34) 944 53 17 54 export@alba.es www.alba.es
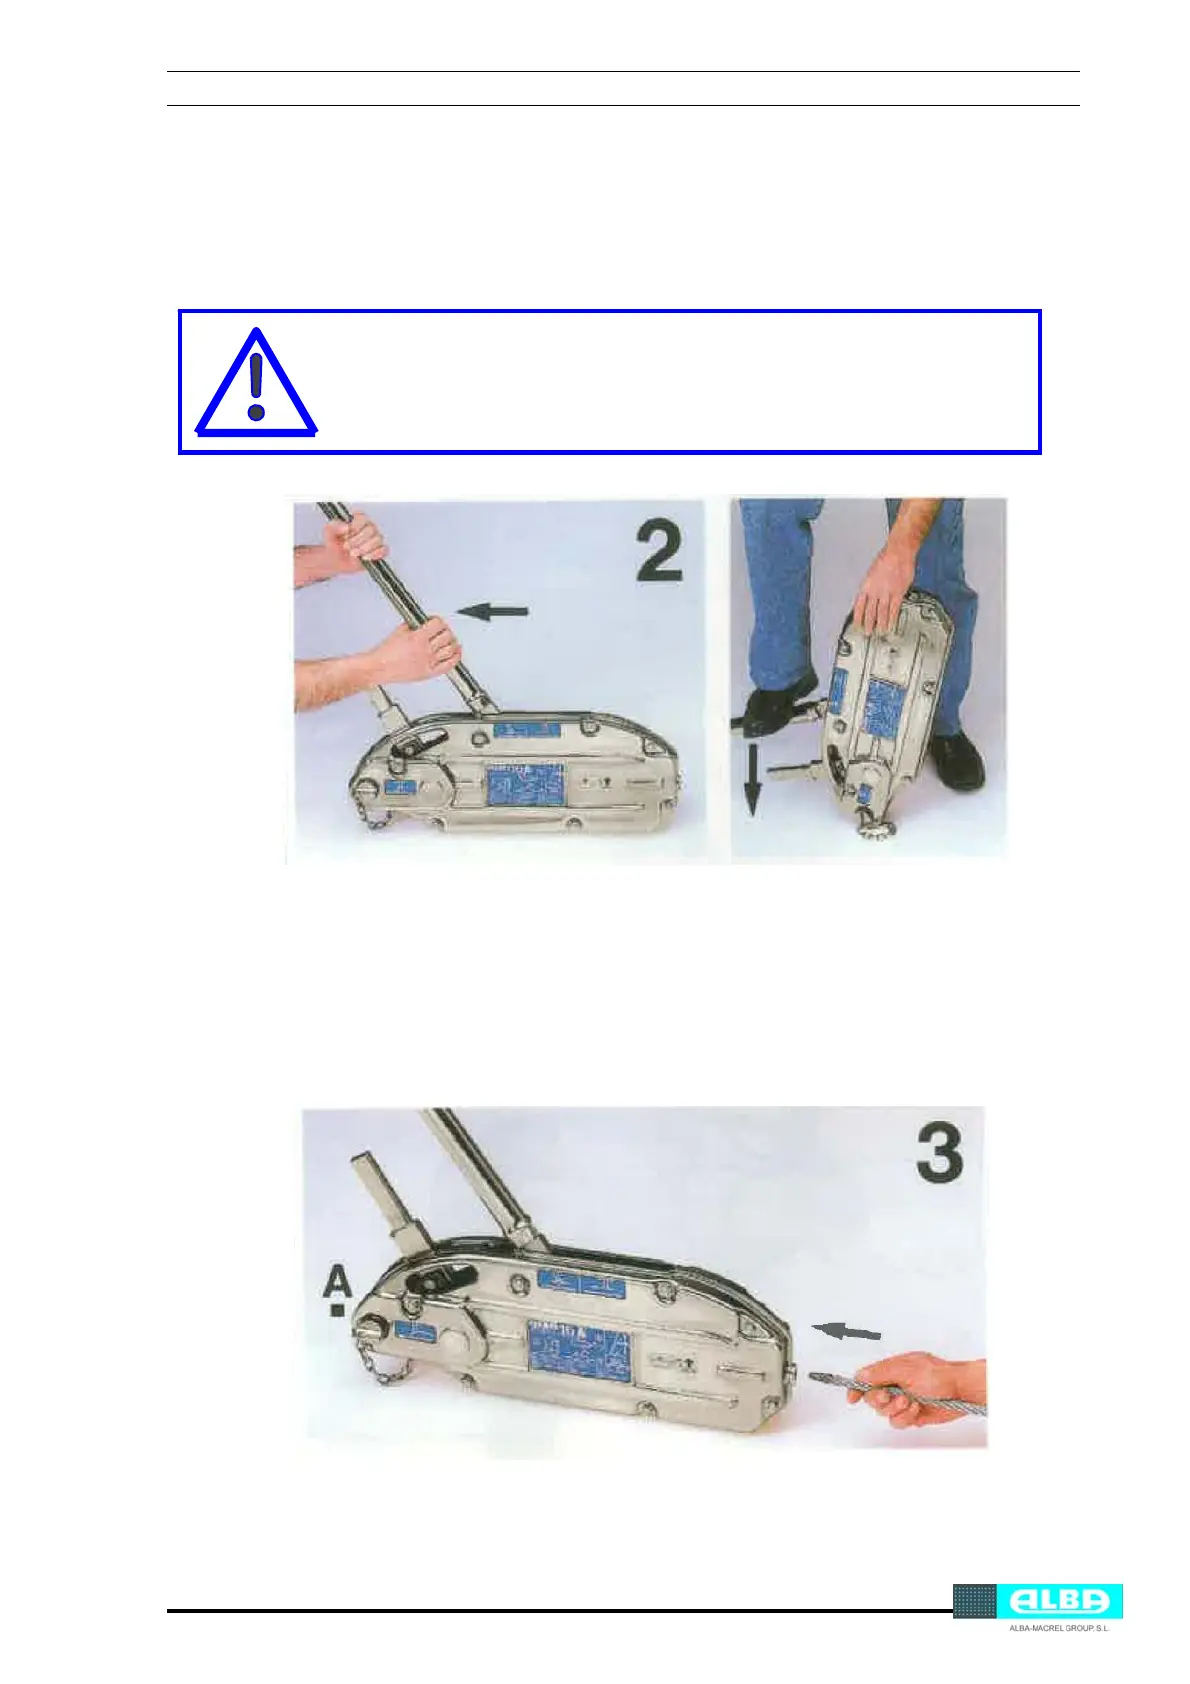
Step Nº 2
When the apparatus has been fastened and the lever is in the reverse position, make a
parallel movement and hook the alignment pin into the unlocking claw. You can use your foot
to help you do this.
Fig. 2-2 - Hooking the alignment pin into the unlocking claw.
Step Nº 3
Place the cable into the opening indicated by the arrow without forcing it until it comes out
through A. In the event of difficulty, pull the cable out around 3 cm and push it through again
while turning it at the same time.
Fig. 2-3 - Introducing the cable
WARNING:
Do not leave the apparatus unlocked for any length of time.