25
» Edit an Existing Monitor
• Click the name of the monitor you wish to modify.
• Modify the monitor nam or MAC Address. All other settings are specied on the monitor itself.
• Once you are nished, click Save Monitor.
» Deleting a Monitor
• Click the button next to the monitor you wish to delete.
• You will be presented with a conrmation dialog to ensure that you truly wish to delete that resident.
• Once you have veried that you wish to delete the monitor, conrm that by clicking Delete Monitor.
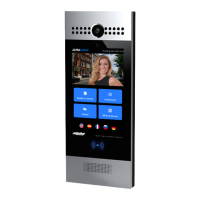
» Door / Entry Panels
Door / Entry Panels are entities that belong to an intallation. They are physically placed at a point of
entry (like a door or a gate), and provide a way for visitors to call residents or building sta.
NOTE: You must have appropriate “Hardware” permissions to view, add, edit or delete Door/Entry Panels.
» Viewing an Installation’s Door/Entry Panel(s)
• To view the door/entry panels for an installation, click Door Panels in the left-side menu.
» Adding a New Door/Entry Panel
• Click Add a New Door/Entry Panel.
• Specify a Panel Name.
oThis is just a general name for the location where the device is located, such as Front Door, Service
Entrance or South Entrance. It will be used on notications for events that take place there.
• Specify a Panel MAC Address.
oThis is Vital. The MAC address is how the cloud knows which device is which, and how to
program it.
• For Push-Button Panels, you should also, at minimum, set the apartments to call for each “Custom Call
Button” on your panel. Failure to do so will cause the unset buttons to be non-funcational.
• For Touchscreen Directory Panels, you should also, at minimum, select one or more “Buildings To
Display”. Failure to do this will result in a blank directory. The use of custom call buttons is optional.
• Once you’re done, click Add Panel.
NOTE: You must connect the panel to the cloud within one hour of creating it. This is the only way the panel can download its required
credentials.
For detailed help with the specic settings for your door panel device(s), please see device-specic help
secons: AT700AS Door Panel