Installation
Erectio n gen eral p rocedu res
T31--003EN/01
5/6
09--1998
E ALSTOM
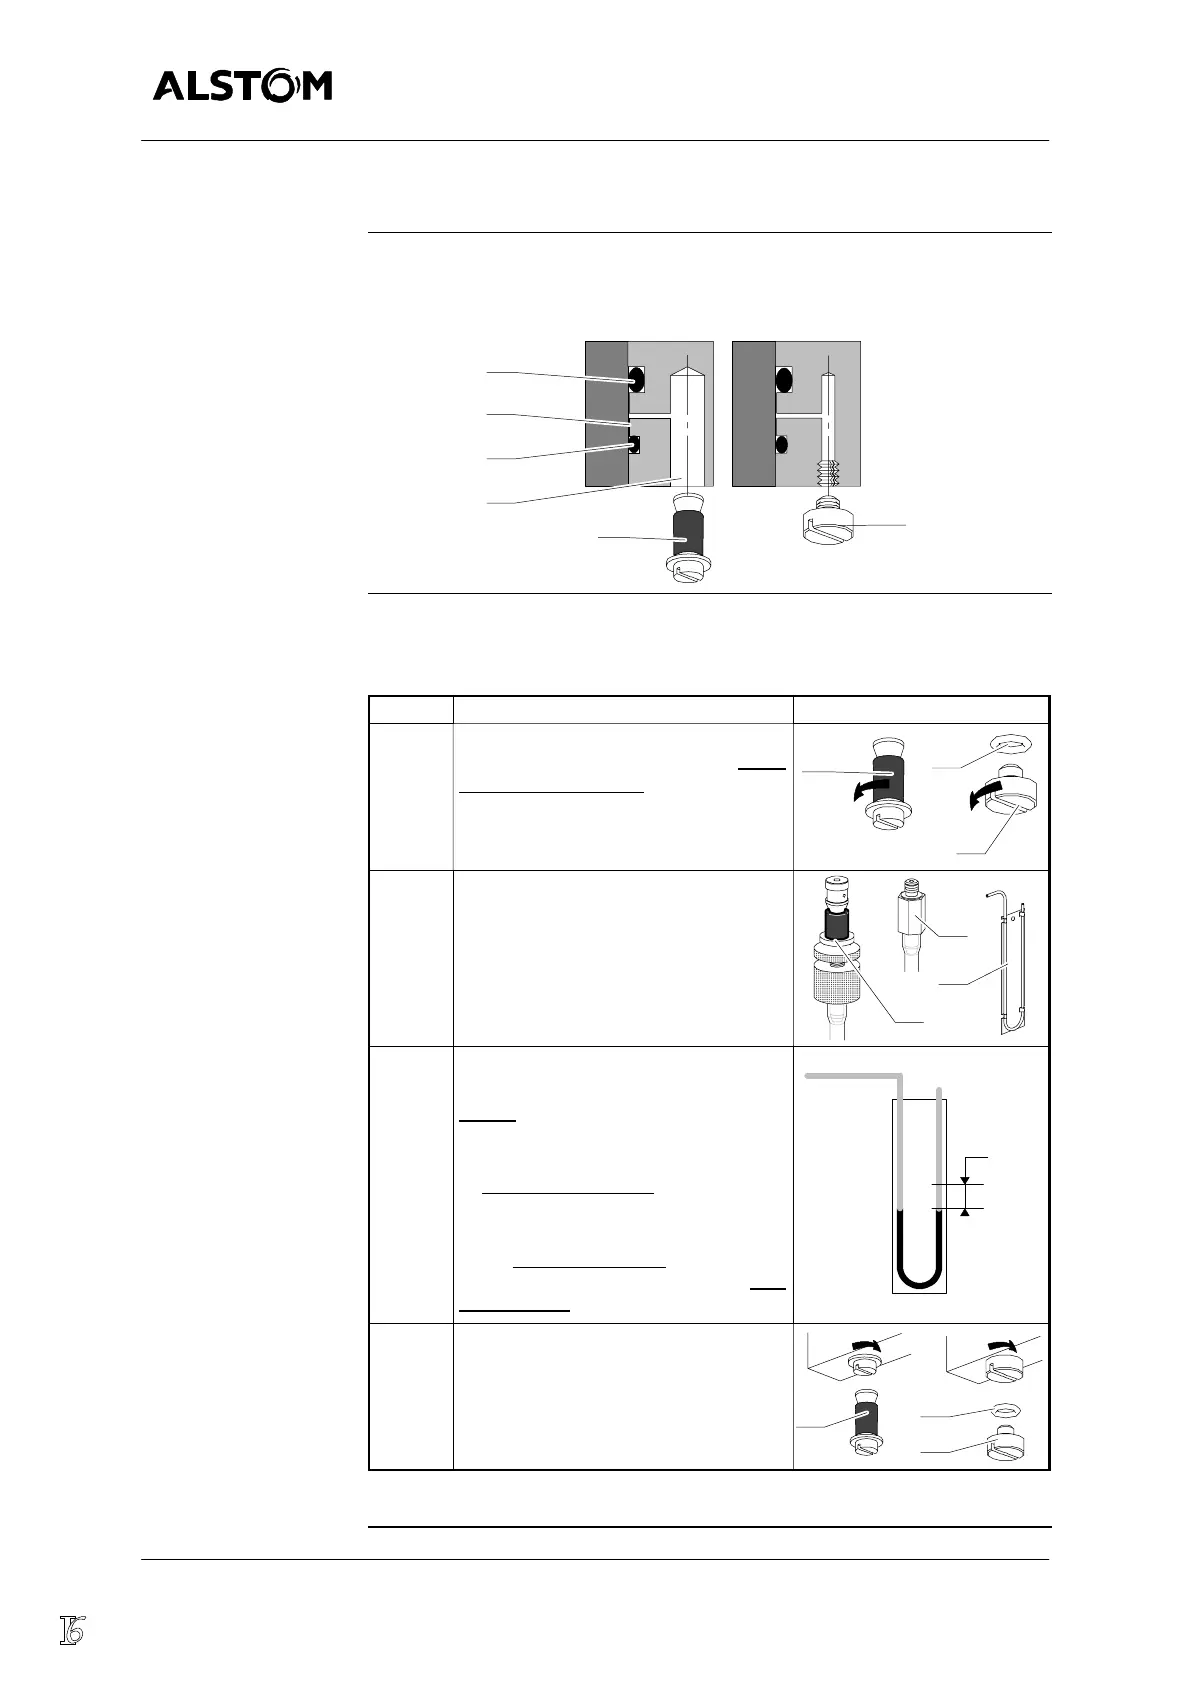
Using a water pressure gaug e
Introduction
In each assemblage performed using a double seal (1) and (2), the volume
(3) communicates with the outside by a channel (4), blocked--off by a plug (5)
or (6), so that leak--tightness can be checked.
6
5
1
3
2
4
Process
The table below gives the steps of the leak--tightness checking using a
water pressure gauge :
Step Action Diagram
1 Remove the leak test plug (5) or (6)
and its seal (7) if necessary,
leave
open for half an hour
.
2...3 turns
5
7
6
2 Connect up the water pressure gauge
(8), using the adapter (9) or (10).
9
10
8
3 Fill the water pressure gauge’s U tube
to half way up.
NOTE
: If temperature is less
than 0C, use an anti--freeze mix-
ture instead of water .
D After a few minutes
note the water
column level R1.
D Note the water column level R2
again after half an hour
.
The displacement H should be
less
than 10 mm
.
H
R1
R2
4 At the end of the inspection, pull the
adapter of the water pressure gauge
and replace the leak test plug (5) or (6)
and its seal (7), where required.
5
7
6