1
2
3
4
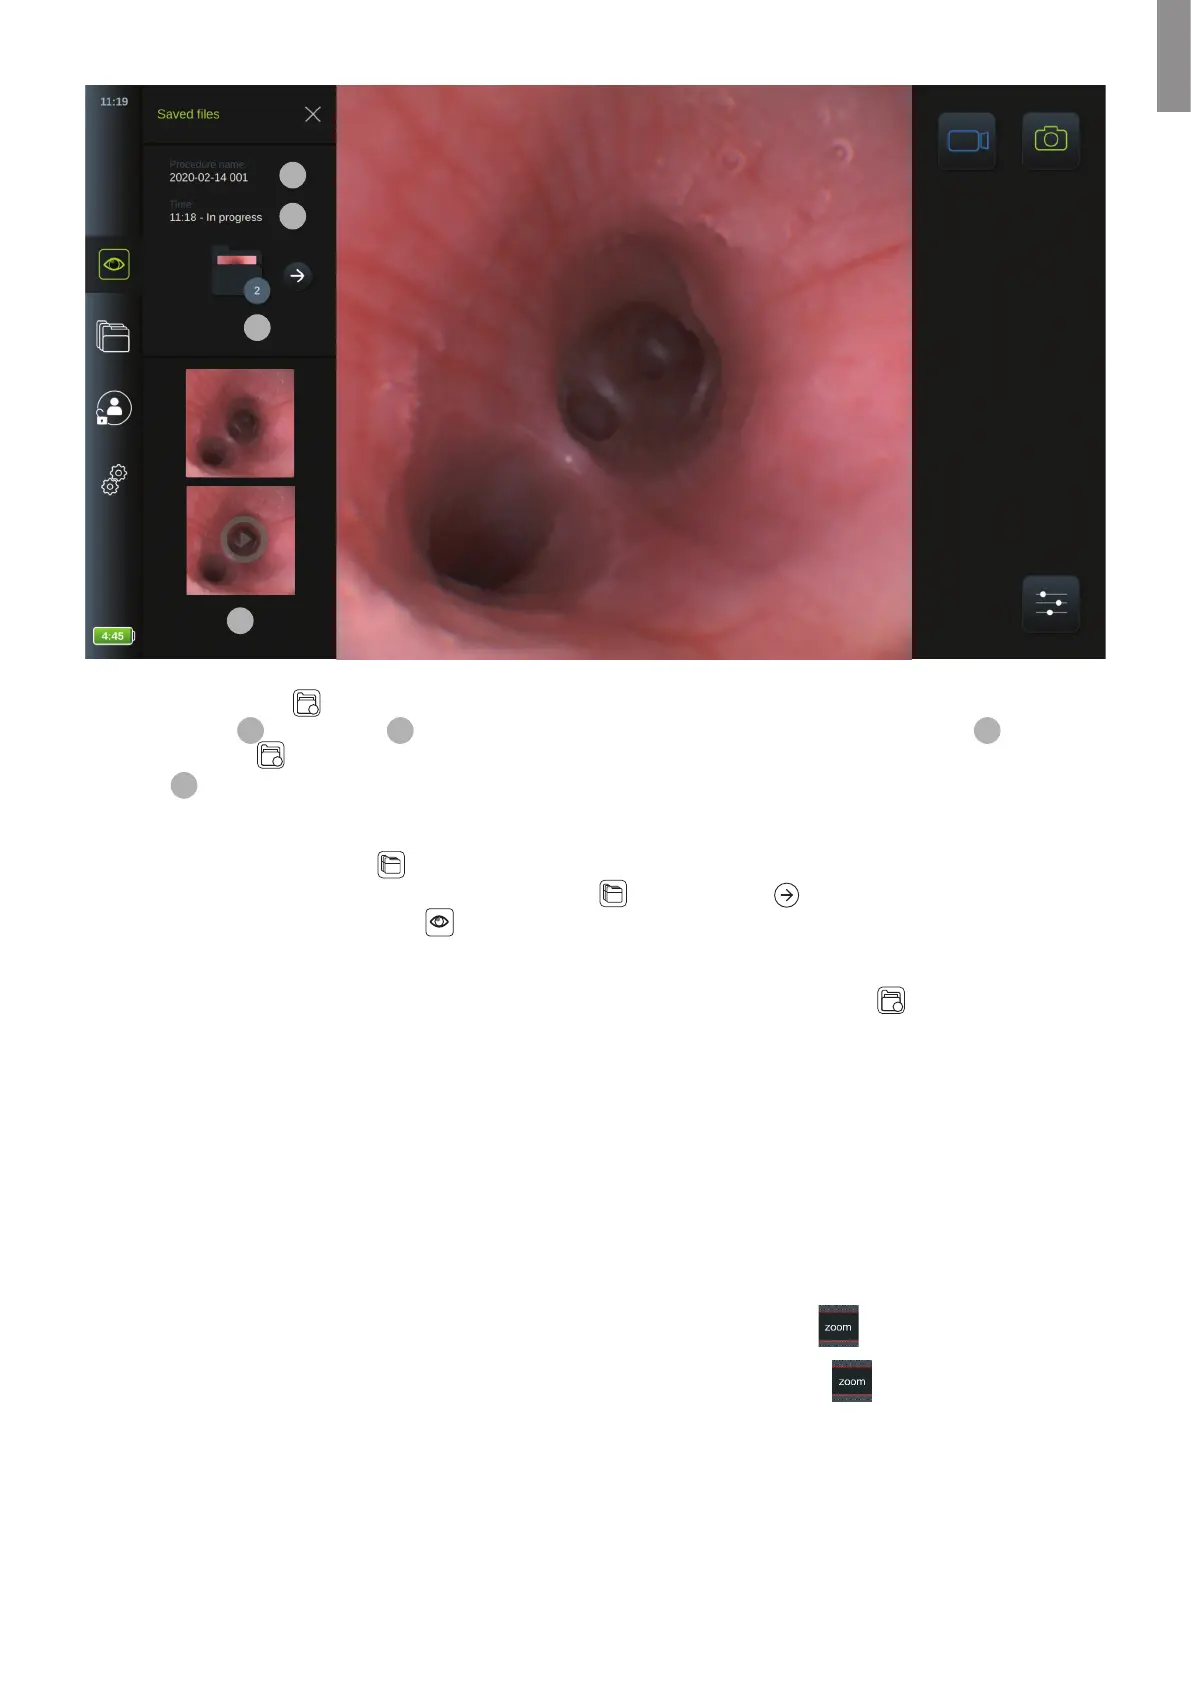
The Current Procedure
folder is now shown in the left side to the screen. The list of saved items shows the
Procedure name
1
and the Time
2
at which the visualization device was first connected. The number
3
on the
Current Procedure
folder icon show how many recordings have be made in the procedure.
• Scroll
4
to see all available recordings from the procedure. All recordings from the procedure are shown in
descending order with the newest at the top.
• You can choose to view a specific recorded file by pressing it directly in the Current Procedure folder. This will open
the file directly in the Archive
recordings view (see section 5.2.3).
• To access the current procedure overview in the Archive
, press the arrow (see section 5.2.1).
• Press < Back or press the Live View
tab to go back to the live image when the procedure overview or a recording
is opened through the Current Procedure Folder.
When a procedure is ended by disconnecting the visualization device, the Current Procedure
folder will open
automatically to show the recorded files. If no files are recorded, the procedure folder is created internally in the
displaying unit to recognize the visualization device if connected again. Administrators have privileges to see these empty
procedure folders in the Archive but these are not visible to Advanced Users.
For information on file export options see section 5.2.5.
5.1.5. Zoom
When a visualization device is connected to the displaying unit, it is possible to expand the size of the image by zooming
in slightly on the live image. The shown zoom image is obtained by expanding the image horizontally and cropping the
top and bottom. It is not possible to move the zoom area.
• To activate zoom double tap on the image. The live image will expand and a Zoom
icon will appear next to the
image.
• Exit the zoom view either by double tapping the live image or by pressing the Zoom
icon once.
27
EN
 Loading...