Installation Manual - Rev D California Instruments
MX Series 20
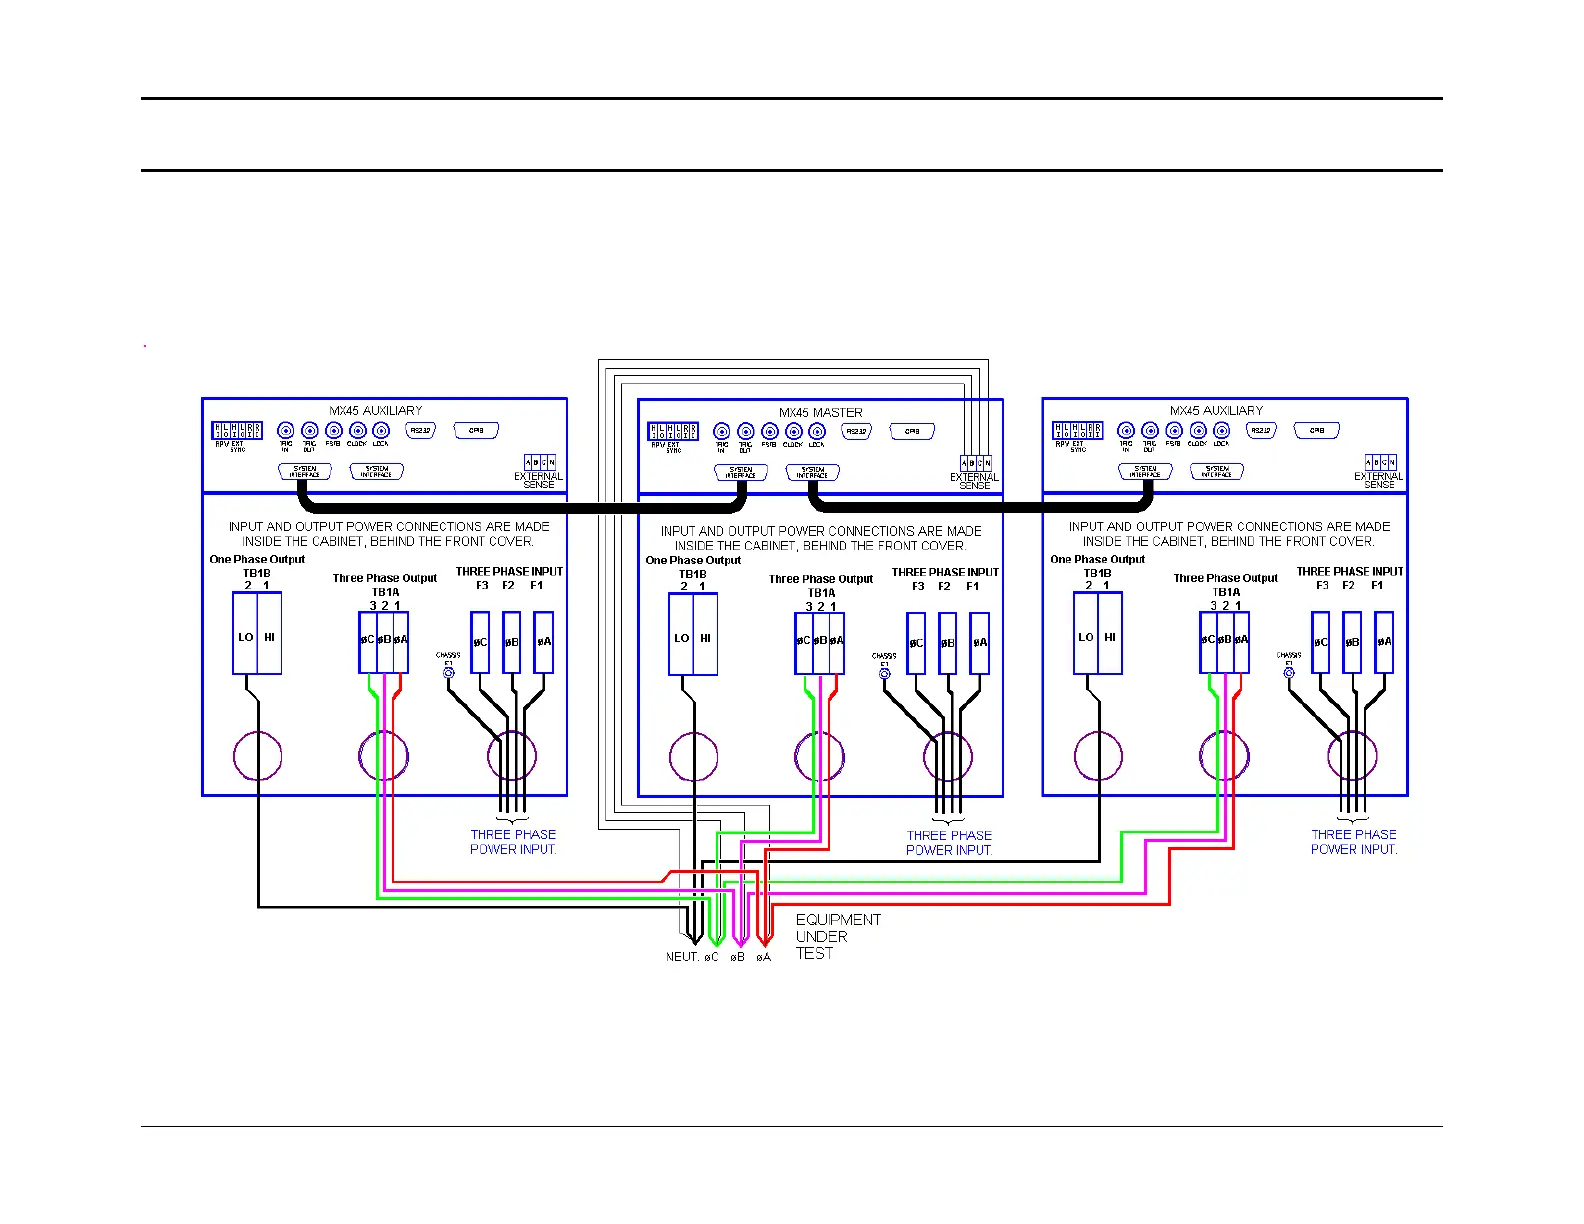
2.6.6 MX135 Output Wiring Diagram
Figure 2-11 shows the required output connections for a MX135-3Pi or MX135-3Pi-MB three phase output configuration (rear-view
perspective). Always disconnect all input power from the MX135 before removing the front panel cover that provides access to the input
and output terminal connections. Route the wires from the back of the MX45 chassis to the front in the provided cable guides. Note that
the master is shown in the center in this drawing. MX90 and MX135 systems are shipped with external output terminal blocks that enable
the output wiring from two or three chassis to be combined, providing a single point of connection to the EUT. These blocks are not
enclosed however.
Figure 2-11: MX135 or MX135-MB Output Wiring
 Loading...