5. Front panel
Remote Sensor: Detects infrared signal from remote control unit.
POWER Indicator: Lit whilst the receiver is powered on and at standby mode.
Signal Indicator: When received signal is strong, the signal indicator is lit.
USB: USB 2.0 Host, connect to USB hard disk, or flash disk (on the right side of the receiver).
Display: (LED type) Indicates operating status of receiver
Buttons: (Standby, CH-, CH+) to operator the receiver.
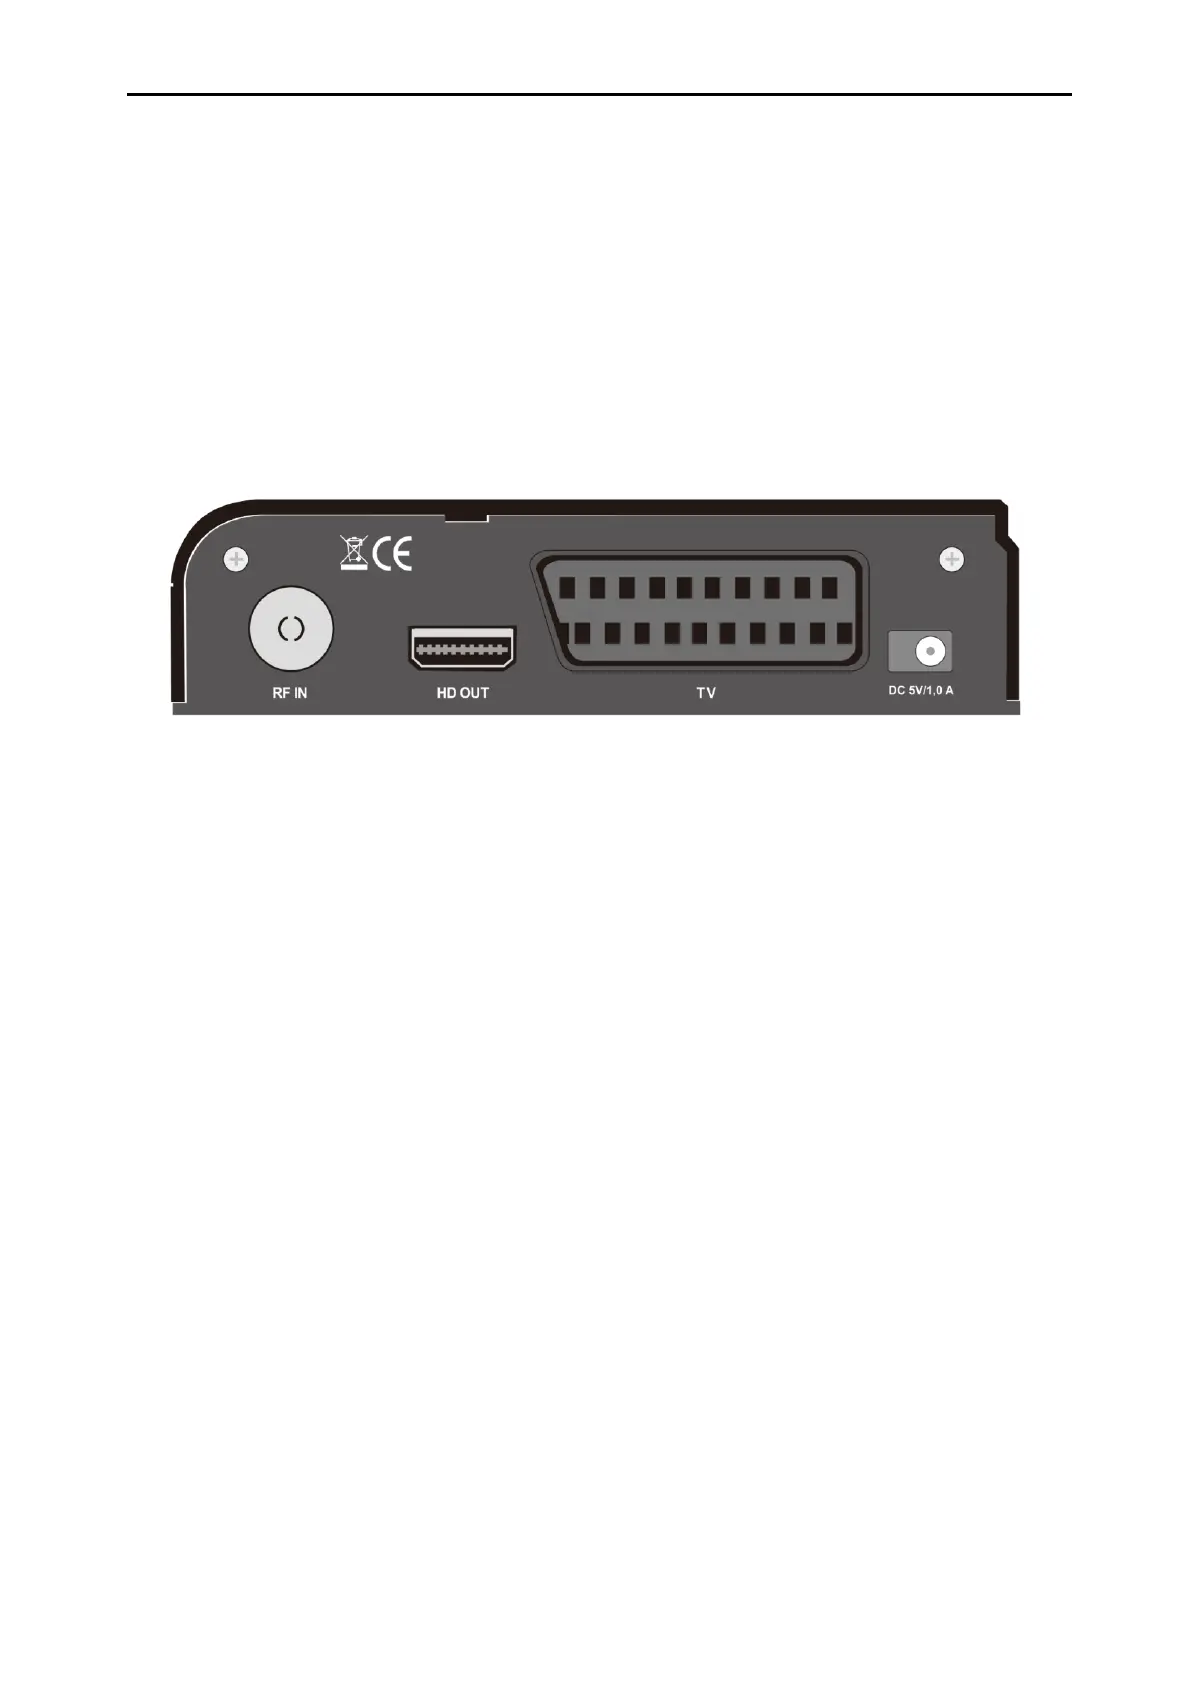
6. Rear Panel
DC 5V:This is used to connect an external 5V adapter.
TV: This is used to connect your TV through SCART cable.
HD OUT: Audio and Video output socket for TV set with HDMI Input Jack only.
RF IN: This port is to connect the coaxial cable from Terrestrial/CableAntenna.
7. Connecting Your System
There are two ways to connect the receiver to your existing TV system. We recommend using one of
the following cases for the best result:
1. If you have a high definition television set, you should use a HDMI cable for best result, Plug one
end of the cable into the HD OUT socket on the receiver, and the other end into the matching socket
on your television. In this case, you do not have to make audio connections because the HD OUT
connector can output stereo audio or Dolby Digital audio.
2. Connect one end of SCART cable to the SCART jack on the back of the receiver and the other end
to a SCART jack on your TV.