Appendix A – Adding or Replacing Boards
236
Hardware Reference Manual – Enova DGX 100 Series Digital Media Switchers
Adding or Replacing a Board
IMPORTANT: When replacing a board, be sure to install the new board in the same slot that held the original board to make sure the
switching commands are correct.
Enova DGX 100 Series Switchers are configured to accommodate a full enclosure’s worth of boards and do not require modification
to the configuration file when a board is added.
CAUTION: Cable management bars are not to be used as handles to remove or install boards.
In the following procedure, read each step entirely. The steps include helpful tips to avoid damage to the enclosure’s internal
cables and connectors.
IMPORTANT: The Audio Insert/Extract board is not hot-swappable; when installing an AIE Board, be sure to power down the system.
To remove and replace an Enova DGX board:
1. Optional – If the board being replaced has custom settings that have not been saved, use the System Configuration interface
to save the settings now (see page 169).
2. Enova DGX 3200 only – Loosen the captive screw on each end of the connector numbering plate above the boards, and set
the plate aside.
3. If applicable – Label and disconnect all cables on the board being replaced. If cables from adjoining boards obstruct access,
label and disconnect them as necessary.
4. Remove blank board plate – Remove the screw that holds the board plate in place (for Enova DGX 3200, see FIG. 118; for
Enova DGX 800/1600/6400, see FIG. 119). Pull the plate out of the board slot opening (the tab on the end of the board plate
fits in a slot near where the ejector handle would otherwise go). The plate consists of an aluminum sleeve with a black metal
piece, which slides in and out of the sleeve, and an EMI (Electromagnetic Interference) gasket.
Or
Remove current board – Remove the pan head screw that holds the board in place (for the Enova DGX 3200, see FIG. 118; for
the Enova DGX 800/1600/6400, see FIG. 119). Push on the board’s extractor handle as far as it will go (about a 45° angle).
With the handle extended, carefully pull the board straight out of the board slot. Place the board in an ESD approved static
shield bag and set aside.
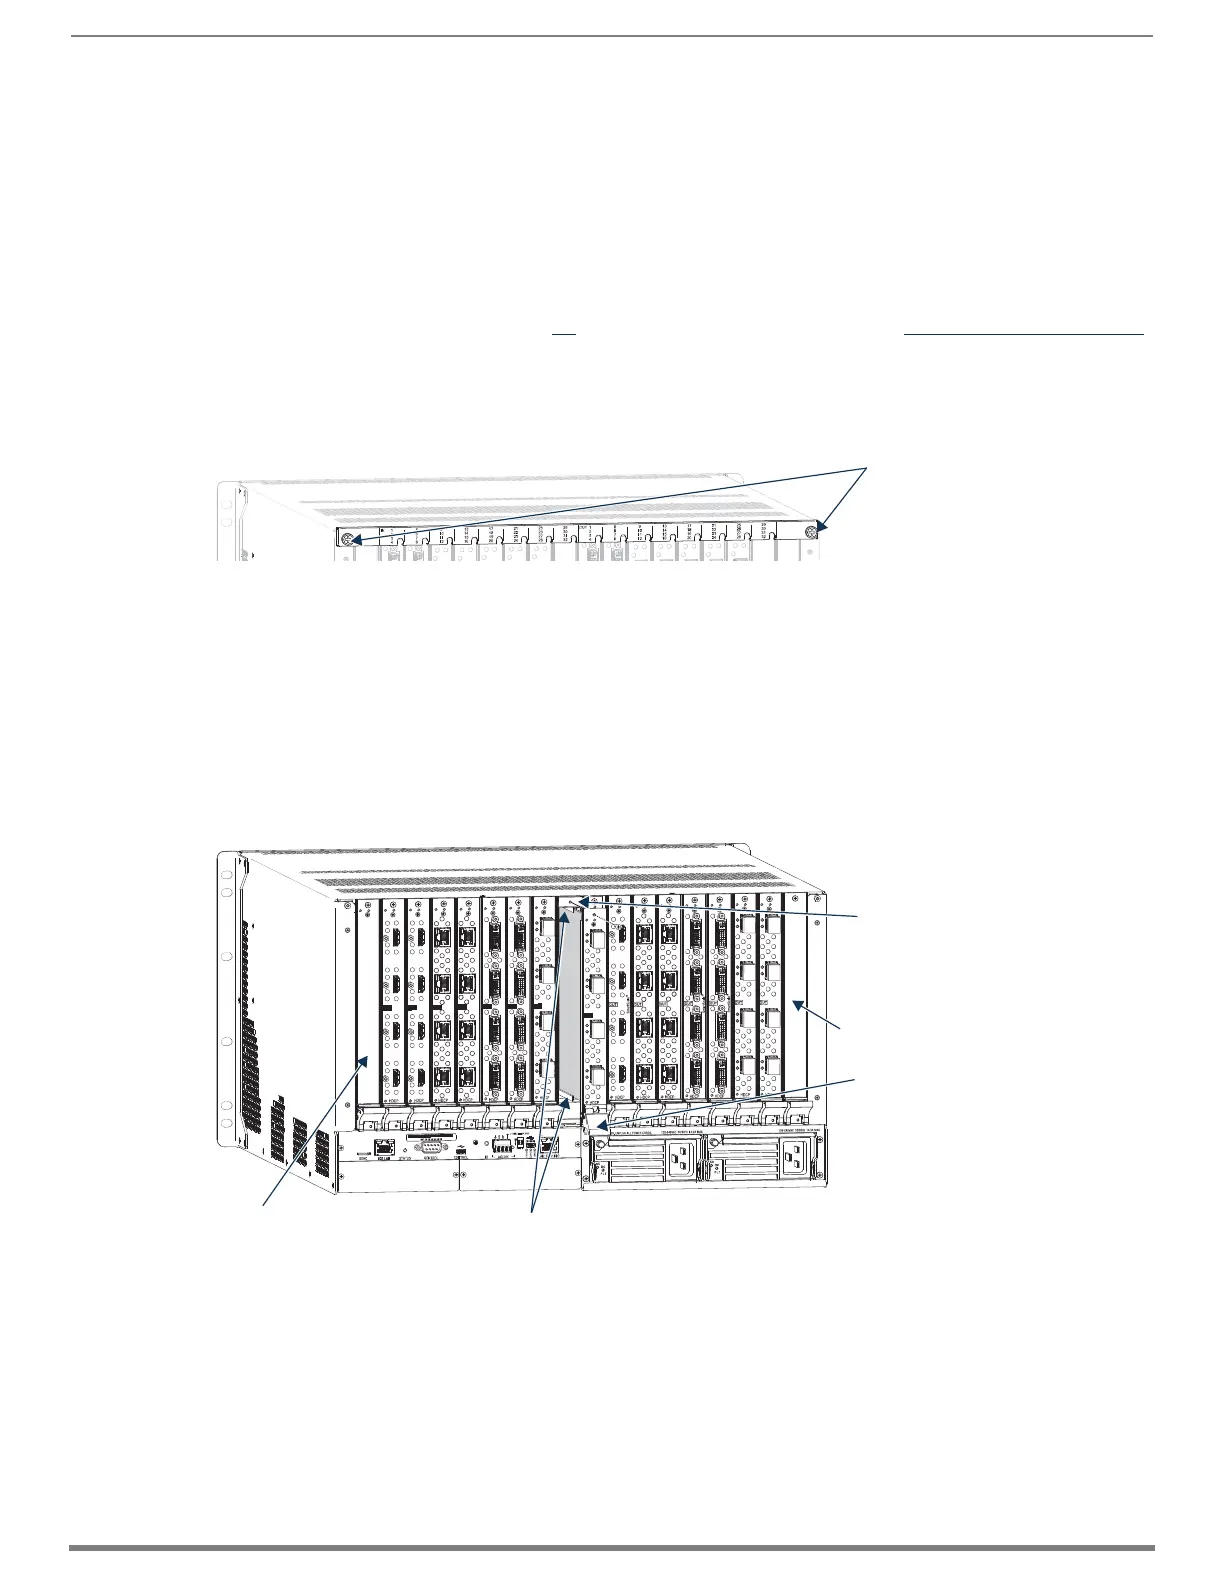
FIG. 117
Enova DGX 3200 only - Two captive screws hold numbering plate above boards
FIG. 118 Vertical boards - Remove screw, push board extractor handle down, and then pull board straight out
Captive screws
or
numbering plate
Expansion slot
Push board extractor
handle down into
extended position
Expansion slot
One screw holds each
board or board plate in
place
Board guides
 Loading...


