Appendix E – Upgrading/Downgrading the System
268
Hardware Reference Manual – Enova DGX 100 Series Digital Media Switchers
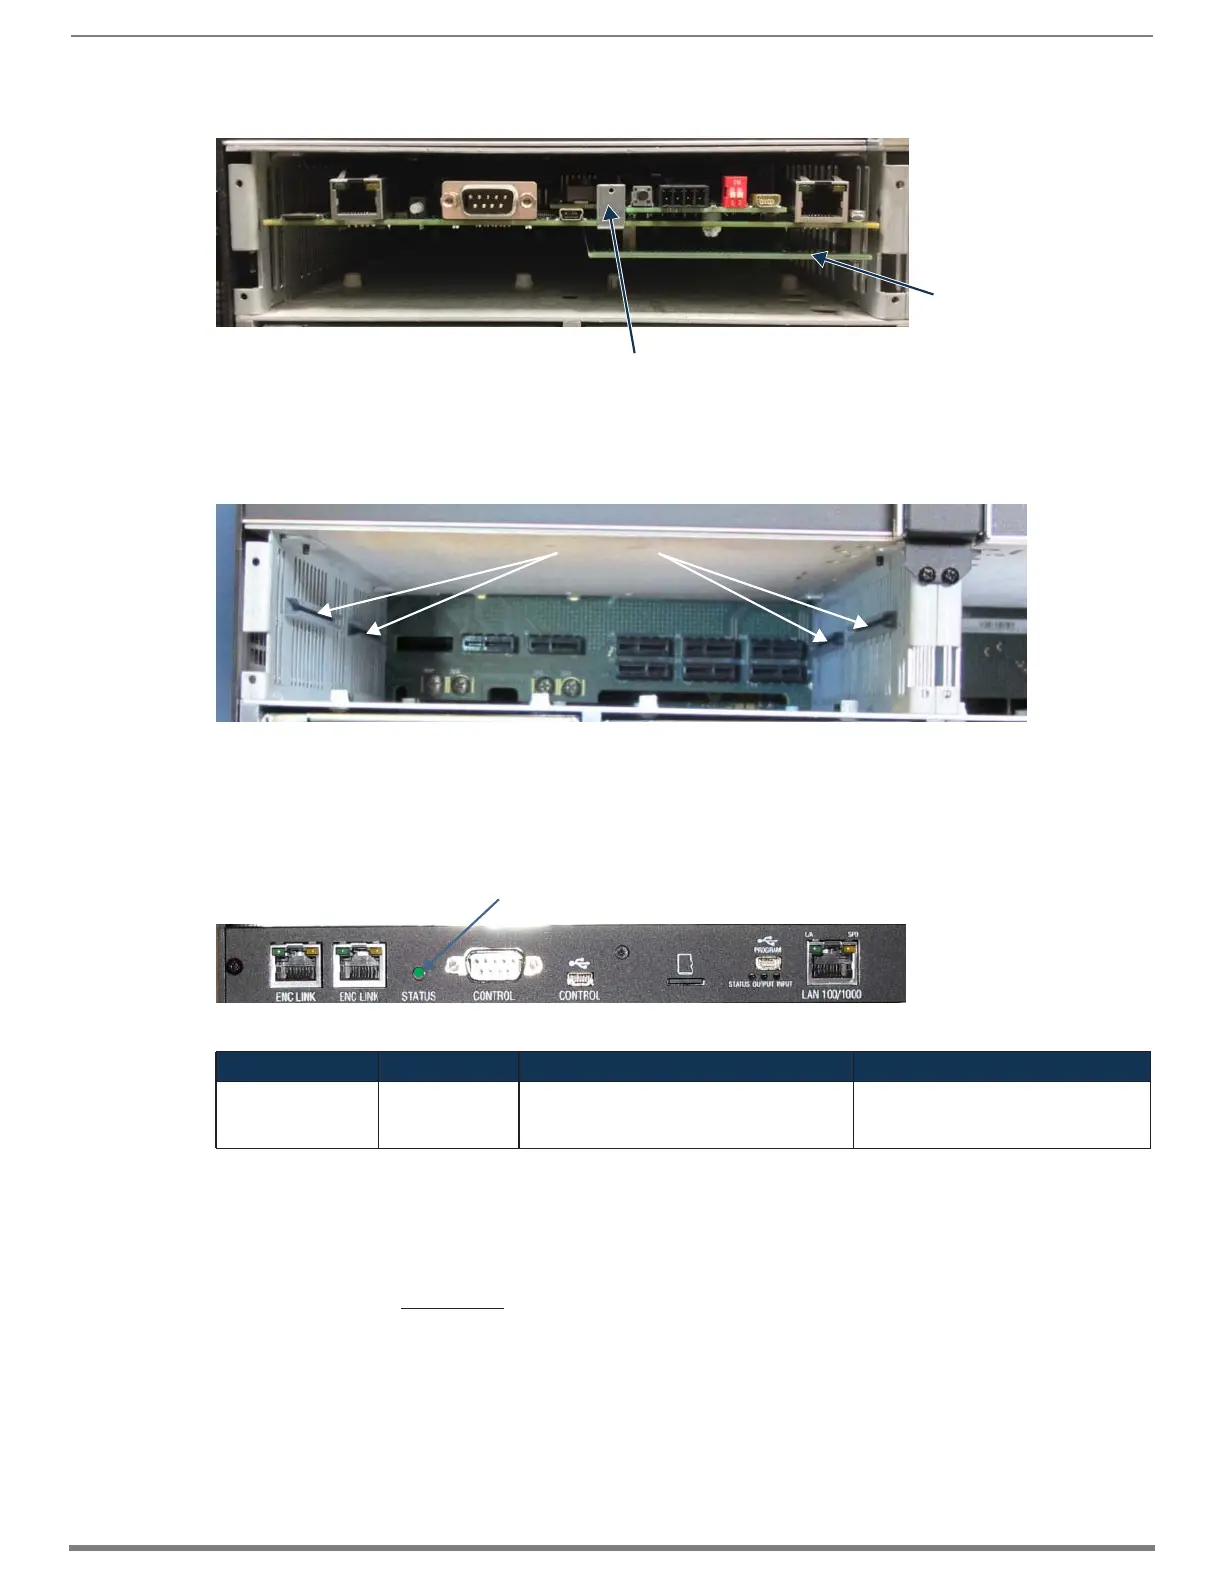
5. Use the removal tab indicated in FIG. 139 to pull the CPU board assembly straight out of the enclosure.
6. Place the old (100 Series) CPU board in an ESD approved static shield bag and set aside.
7. Slowly slide the replacement CPU board into the empty slot, being careful to align the edges in the board guides along the
insides of the slot.
8. Push on the CPU removal tab (FIG. 139) firmly enough for the board to make a good electrical connection (avoid pushing on
the connectors). When the CPU board is fully inserted, its faceplate should sit flush with the back metal.
9. Set 100 Series CPU faceplate aside and reattach the Enova DGX 8/16/32/64 faceplate provided with the CPU.
10. Apply power to the enclosure.
11. Check the CPU’s System Status LED for indications of normal display (see table below).
* A system is in IOS mode when an unexpected, temporary, critical error is trapped and logged and control is passed to the host
software (IOS) which prevents the normal appcode from running until the error is manually cleared. Please report all such errors to
technical support (see page 61).
12. Re-attach any cables that were removed in Step 2.
13. Execute a test switch to make sure the system is working correctly.
If you are not familiar with operating this type of system, see the Enova DGX 8/16/32/64 Digital Media Switchers Hardware
Reference Manual at
www.amx.com for control information.
FIG. 139 Use removal tab to pull CPU straight out
FIG. 140 Align CPU with board guides
FIG. 141 System Status LED indicator (Enova DGX 64 shown)
LED Indicator Indicates Normal Display Cautionary Display
System Status LED System status Constant green during power up, then blinking
green at 1/2 second on/off intervals
• Blinking red/green: an exception has
been logged in IOS (validation failure)
• Blinking red: dropped into IOS mode*
NOTE: The only CPU with a
bottom daughter board is the
Enova DGX 6400.
Removal tab
Board guides
System Status LED
 Loading...


