Appendix F – DGX Configuration Software
280
Hardware Reference Manual – Enova DGX 100 Series Digital Media Switchers
To read and save EDID data:
1. On the PC, open the DGX Configuration Software and select the EDID Programmer tab.
2. From the Inputs/Outputs device tree on the left, select an output from which to read the EDID information that it receives from
the destination device.
3. Click Read to read the EDID information. The results display in the large read-only area.
4. From the File menu, select Save to File (select location, enter file name, and click Save).
Leave the EDID Programmer view open for using the instructions on writing the EDID to a DGX Digital Media Switcher input
connector below.
TIP: If the program cannot read and write the EDID information, the system may not support all of the DGX Configuration Software
functionality.
Writing EDID Data to DGX DXLink, DVI, or HDMI Input Connector
The instructions that follow tell how to use the EDID Programmer view to write the EDID information from an output or from a saved
file to the EDID chip for an input connector on a DGX DXLink, DVI, HDMI, or 4K HDMI Input Board.
NOTE: DXLink Fiber hardware in Unidirectional or Data Link-lost Mode – EDID timings are not accessible as there is no return path
available to receive the information.
To write EDID data to the EDID chip for an input connector:
1. In the DGX Configuration Software interface, select the EDID Programmer tab.
2. Save the board’s EDID default as a backup (assumes the board has factory default EDID programming).
a. Select the input connector.
b. Click Read.
c. From the File menu, select Save to File (select location, enter file name, and click Save).
3. If an EDID was just read from an output (see page 200), select the input to which you want to write that EDID information.
Or
From the File menu, select Open File to select an .edid file to be written to the DXLink, DVI, HDMI, or 4K HDMI input connector.
4. Click Write to write the EDID information to the input connector.
5. If applicable – Repeat any of the steps that are necessary for any additional DXLink, DVI, HDMI, or 4K HDMI input connectors.
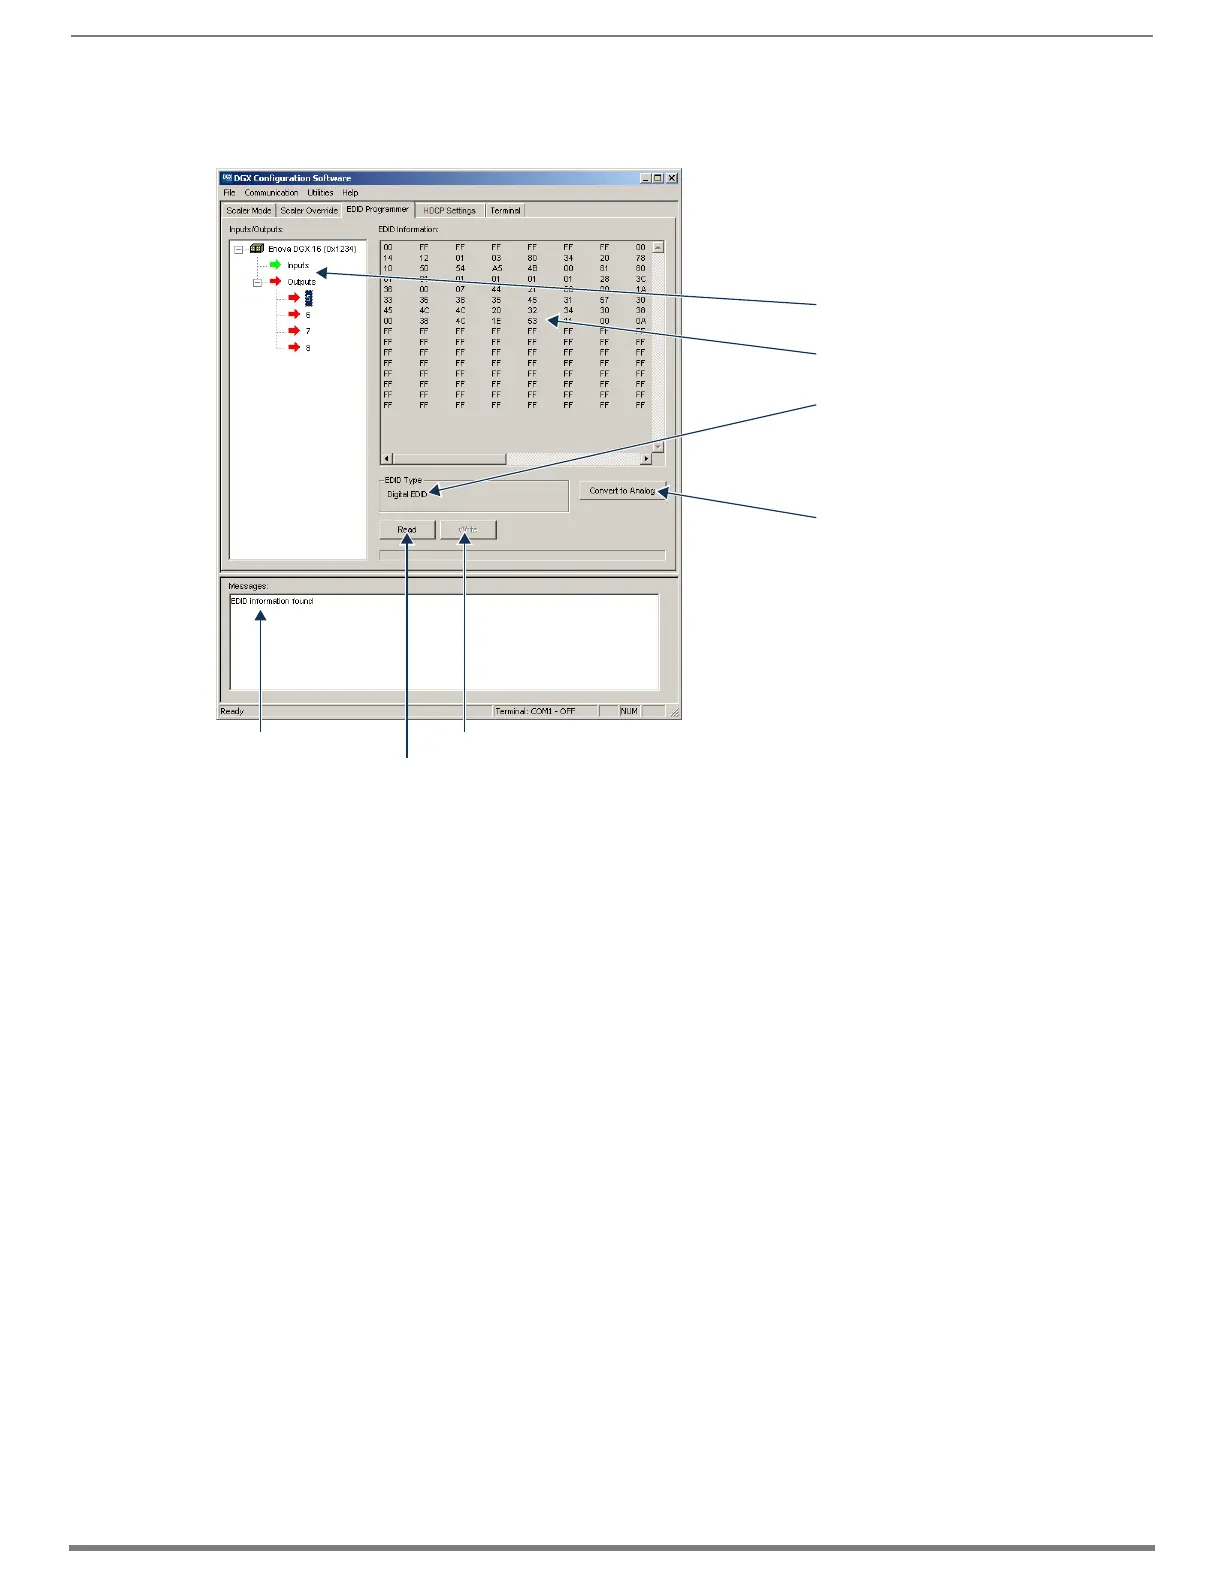
FIG. 149
EDID Programmer view
Device tree with Inputs/Outputs
Device tree with Inputs/Outputs
Device tree with Inputs/Outputs
Device tree with Inputs/Outputs
Write – writes EDID to input on boardMessages
Read – reads EDID from selected output which received the EDID from its attached destination device
 Loading...


