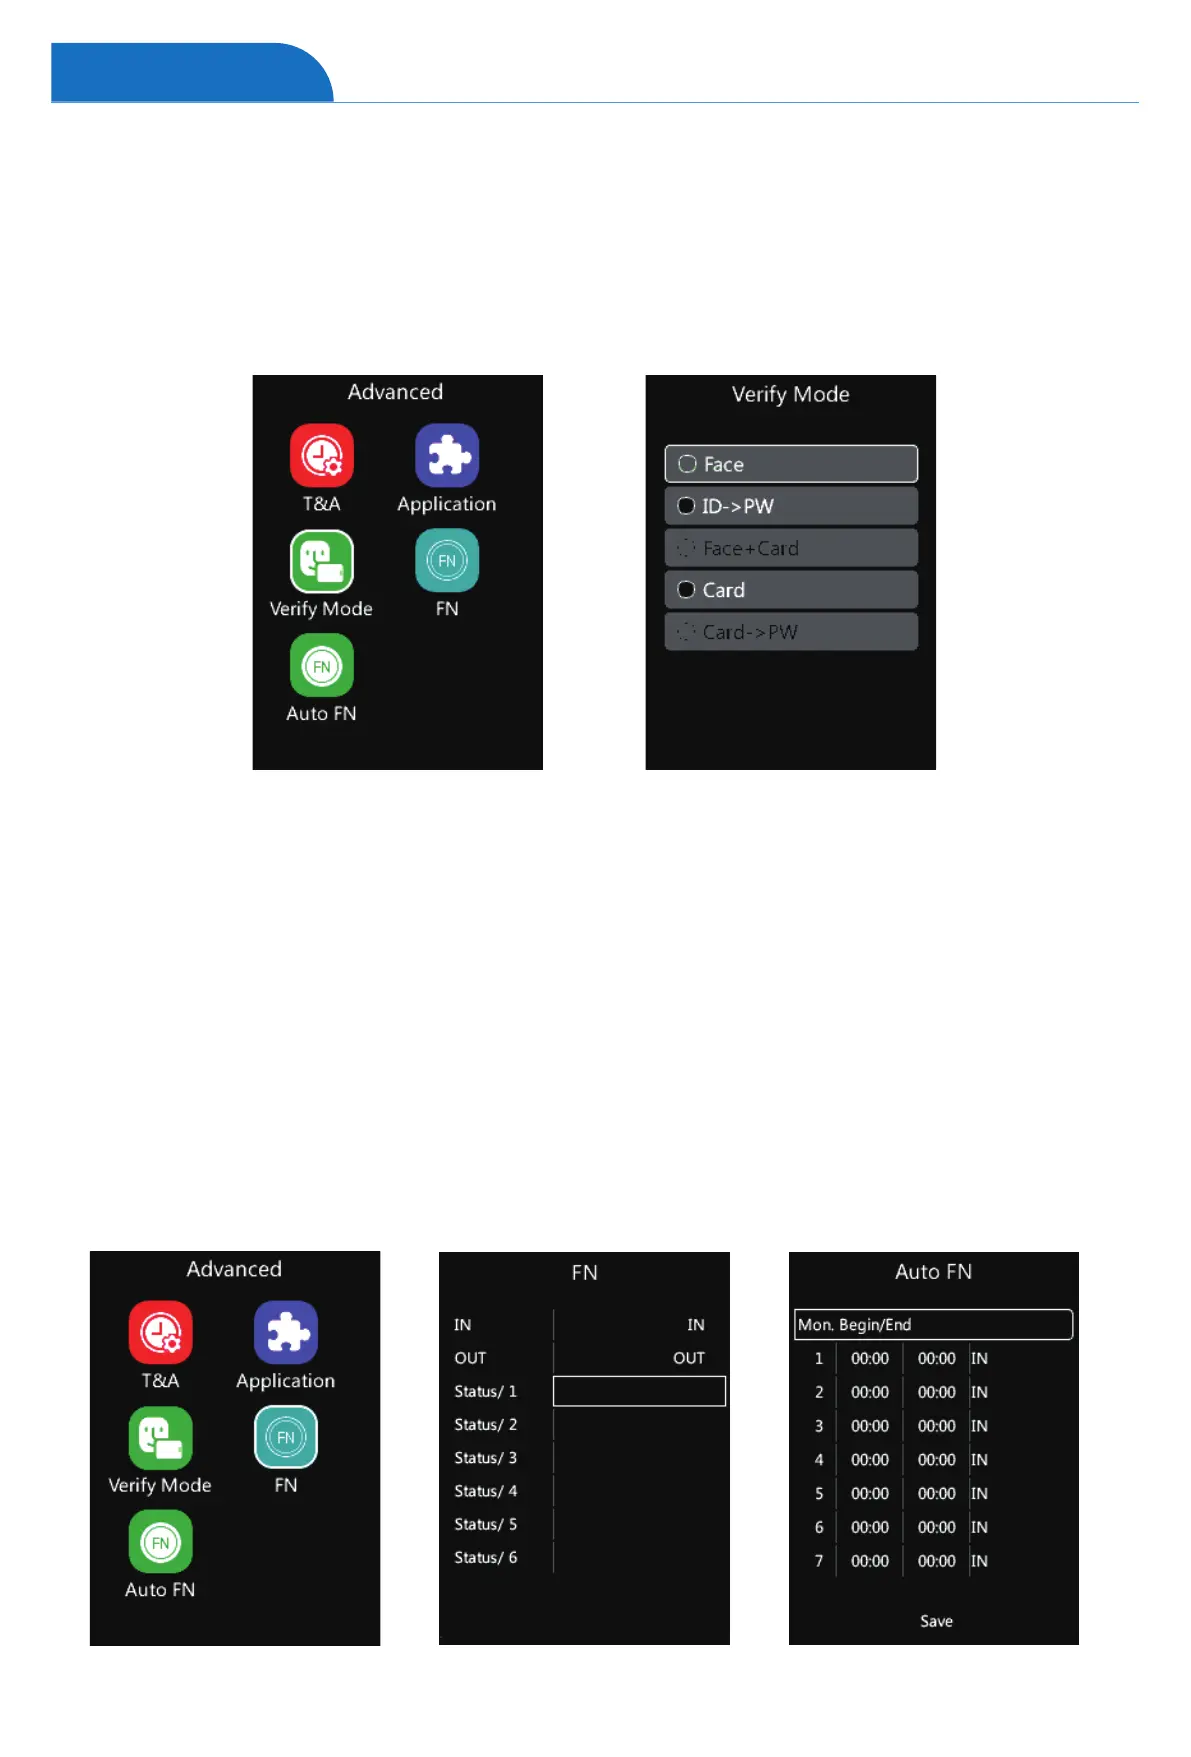
PW: Means password.
ID: Means User registered number.
Advanced
Verify Mode
1 On the Advanced page, tap number “4” to access the Verify Mode Settings interface.
2 Select the desired item and tap “OK” then change the settings by tapping “↑/IN” or “↓/OUT”.
3 Tap “OK” to save the configuration, and jump to the next row.
4 Tap “M” to reture to the previous page.
FN
On the Advanced page, tap number “5” to access the FN Settings interface.
At this Interface it’s possible to add or modify time attendance status and its names.
Auto FN
On the Advanced page, tap number “7” to access the Auto FN Settings interface.
At this Interface it’s possible to generate specific records according to date and time.
Example: Records from 07:00 am to 10:00 am on Monday will be always considered IN.


 To Next Page