Do you have a question about the AnyTone AT-D578UV and is the answer not in the manual?
Description of the built-in Bluetooth module located inside the radio.
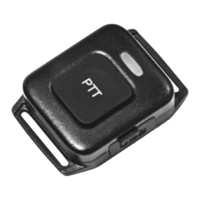
The Bluetooth Push-to-Talk (PTT) button accessory.
A Velcro strap included in the package contents.
The USB charging cable provided for the BT PTT button.
Details on the LED indicators for BT PTT button battery status.
Instructions on using the supplied Velcro for mounting the BT PTT button.
Enables or disables the Bluetooth function on the radio.
Options for seeking, viewing, and disconnecting Bluetooth devices.
Shows the radio's Bluetooth name and the names of paired devices.
Configures how long the Bluetooth connection stays active.
Options to enable/disable the radio's internal microphone and speaker.
Adjusts the volume levels for external microphones and speakers.
Allows input of a PIN code for Bluetooth pairing.
Functions for pairing the BT PTT button and viewing its status.
Step-by-step guide to pair the radio with the BT PTT button.
Guide to connect the radio to car audio systems or Bluetooth earpieces.
Explains how to transmit voice and receive audio via Bluetooth.
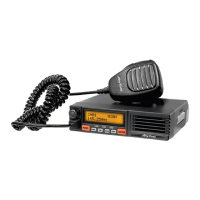
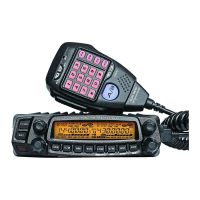
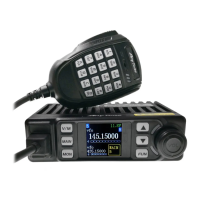
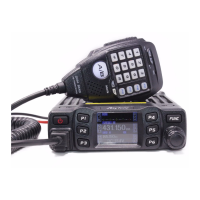
This document describes the AnyTone Bluetooth (BT) User Guide, focusing on the functionality, usage, and maintenance of a Bluetooth-enabled radio system, particularly its BT Push-to-Talk (PTT) button and integration with car audio systems or Bluetooth earpieces.
The core of the system is a radio with a built-in Bluetooth module, which allows for wireless communication and control. A key accessory is the BT PTT button, a separate, portable device designed to facilitate push-to-talk functionality remotely. This button is supplied with Velcro, enabling users to conveniently secure it to a car steering wheel or other accessible locations, enhancing ease of use during operation.
The AnyTone Bluetooth system primarily enables wireless communication through a radio, offering hands-free operation and integration with external audio devices. The main functions revolve around pairing, transmitting, and receiving audio via Bluetooth.
The BT PTT button serves as a remote trigger for the radio's push-to-talk function. When paired with the radio, pressing and holding this button activates transmission, allowing the user to speak. This is particularly useful for mobile environments, such as in a car, where reaching for the radio's built-in PTT button might be inconvenient or unsafe.
The system also supports pairing with external Bluetooth audio devices, specifically car audio systems or Bluetooth earpieces. This allows for a more integrated communication experience. When paired with a car audio system, the radio's audio (both transmitted and received) can be routed through the car's speakers and microphone, transforming the vehicle into a communication hub. Similarly, pairing with a Bluetooth earpiece provides a private and hands-free communication solution, ideal for discreet or personal use.
The Bluetooth menu on the radio provides comprehensive control over these functions. Users can turn Bluetooth on or off, initiate a search for available Bluetooth devices to pair with, view a list of previously paired devices, and disconnect current connections. The menu also allows for naming the radio's Bluetooth identity and viewing the names of paired devices. A "BT Hold Time" setting enables users to specify how long the Bluetooth connection should remain active, ranging from a few seconds to an infinite duration.
Audio input and output settings are also manageable through the Bluetooth menu. Users can enable or disable the radio's internal microphone ("BT + int mic") and internal speaker ("BT + int spk") for Bluetooth operations. This flexibility allows users to choose whether to use the radio's built-in components or rely entirely on external Bluetooth devices for audio. Furthermore, "BT Mic Gain" and "BT Spk Gain" settings are available to adjust the external microphone and speaker levels, respectively, ensuring optimal audio quality for both transmission and reception.
For security during pairing, a "BT Pin Code" option is provided, allowing the entry of a PIN code if required by the Bluetooth device being paired. This is particularly relevant for certain car audio systems that necessitate a PIN for connection.
The BT PTT button itself has dedicated menu options under "BT PTT Pair." Here, users can initiate the pairing process for the BT PTT button, view its name ("PTT Name"), and monitor its battery level ("PTT Bat Volt").
The system is designed for straightforward setup and operation.
Mounting the BT PTT: The included Velcro allows for flexible placement of the BT PTT button. Users can attach it to a car steering wheel for easy access while driving, or to any other convenient surface, ensuring the button is always within reach without obstructing other controls.
Charging the BT PTT button: The BT PTT button is rechargeable via a USB charging cable. An indicator light provides visual feedback on its battery status. A blinking red light signifies a low battery, prompting the user to charge the device. A solid red light indicates that the unit is charging but not yet full. Once fully charged, the indicator light turns off. A full charge from a completely discharged state takes approximately 1.5 hours and provides over 24 hours of talk time. For optimal performance, it is recommended to charge the PTT button when not in use.
Push-to-Talk functionality can be activated by:
The document highlights the importance of keeping the BT PTT button charged for best performance, recommending charging it when not in use.
It also includes an "Important Notice" regarding the Bluetooth system's compatibility and future improvements:
| Frequency Range | 136-174 MHz, 400-480 MHz |
|---|---|
| Channels | 4000 |
| Zones | 250 |
| GPS | Yes |
| Bluetooth | Yes |
| CTCSS/DCS | Yes |
| APRS | Yes |
| Roaming | Yes |
| VOX | Yes |
| Supply voltage | 13.8V DC ±15% |
| Waterproof | No |
| Power Output | 50W/25W/10W/5W (VHF), 45W/25W/10W/5W (UHF) |
| Modes | DMR Tier I & II |
| Display | Color TFT |
| Bandwidth | 12.5 kHz, 25 kHz |