Avid Pro Tools
To configure Avid Pro Tools to use Boom:
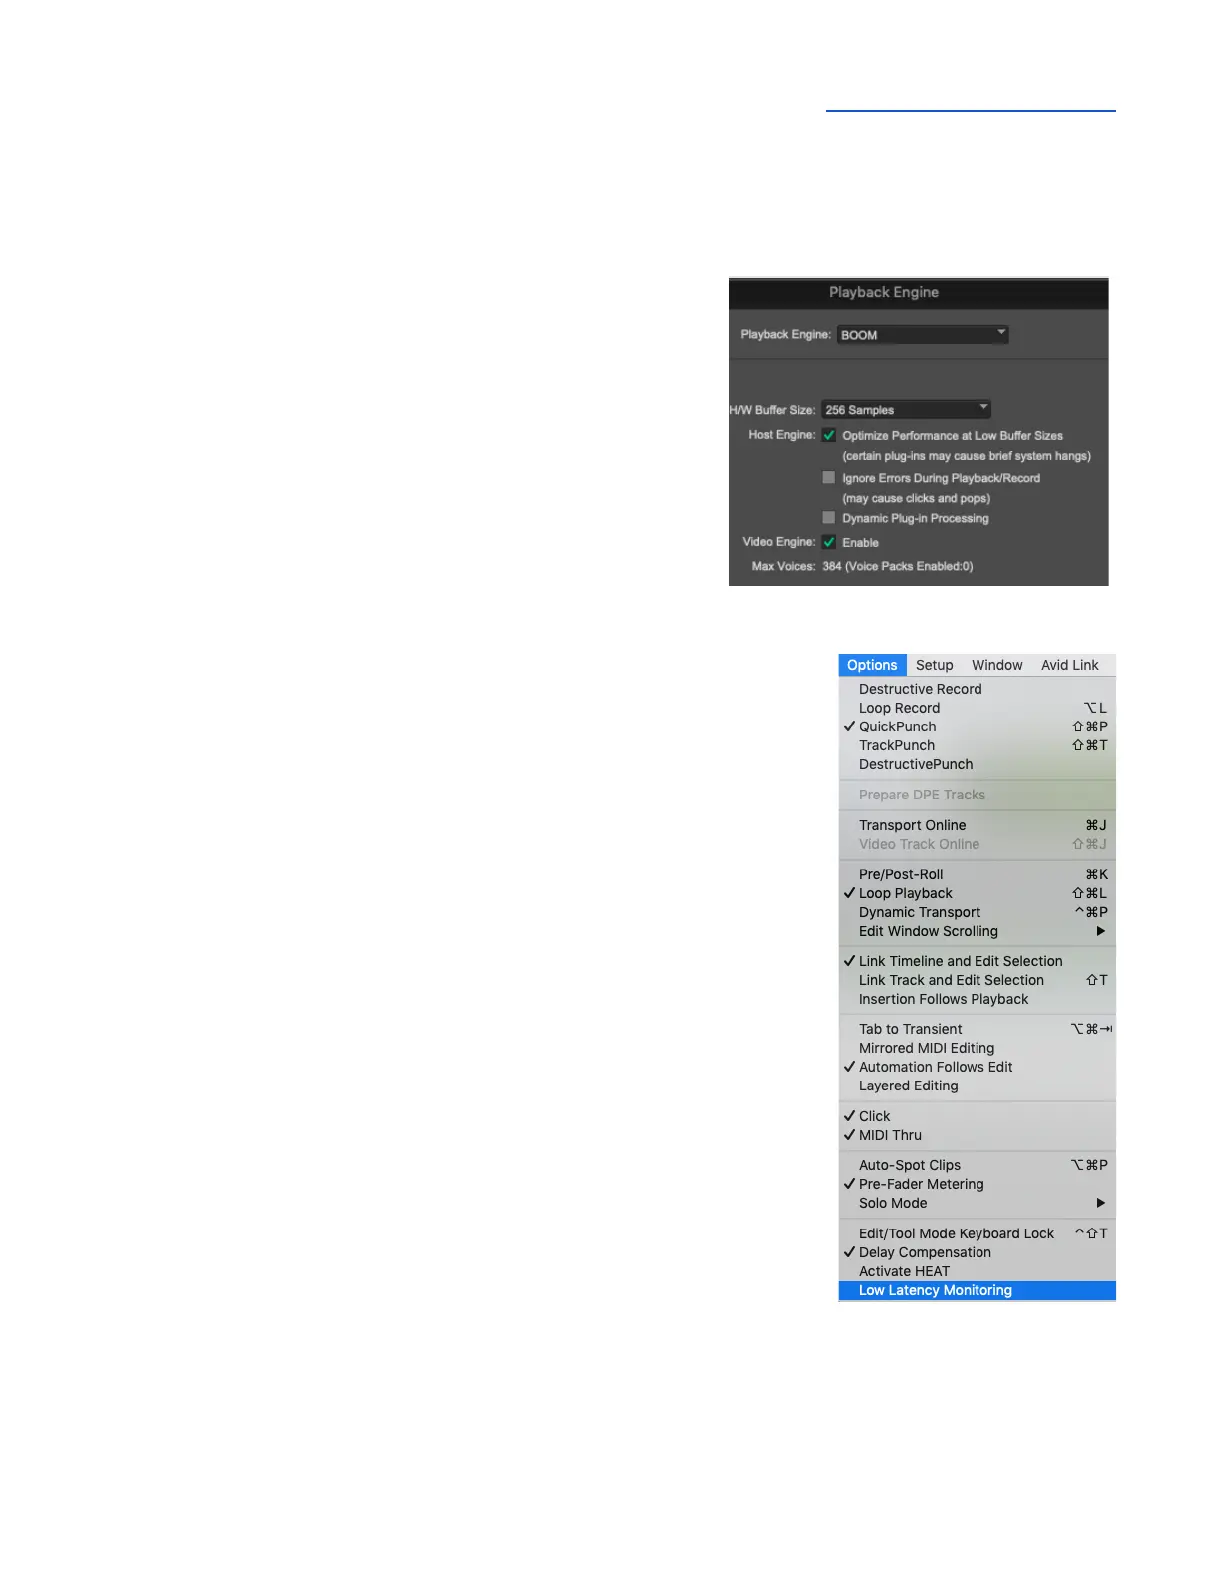
1. Open Pro Tools, then choose Setup > Playback Engine
in the menu bar.
2. Set Playback Engine to Boom.
3. Set H/W Buffer Size to 128 to start, adjust for lower
latency or more plugin power.
To configure Pro Tools for Direct or Software Monitoring
Workflow:
1. In the Pro Tools menu bar, set Options > Low Latency Monitoring.
● Uncheck Low Latency Monitoring for Software monitoring.
● Check Low Latency Monitoring for Direct monitoring.
2. In Apogee Control 2, set Mixer View in the System Settings
column.
● Set to Off for Software monitoring.
● Set to On for Direct monitoring.
3. In Apogee Control 2, set Main and Headphone Sources.
● Set to Playback 1-2 for Software monitoring.
● Set to Mixer for Direct monitoring.
To set channel Input & Output list labels:
1. In the Pro Tools menu bar, choose Setup > I/O.
2. In the IO Setup window, click the Input tab.
3. Select all inputs in the Name column, then click Delete Path. Then,
click Default to reset the Names to Desktop defaults.
4. Repeat in the Output and Bus tabs.
Pro Tools Preference Setting
1. To use native reverb while Direct monitoring, choose Pro Tools > Preferences to open the
Preferences window; click the Mixing tab, then check “Allow Sends to persist during LLM” under
Setup.