14
Overview
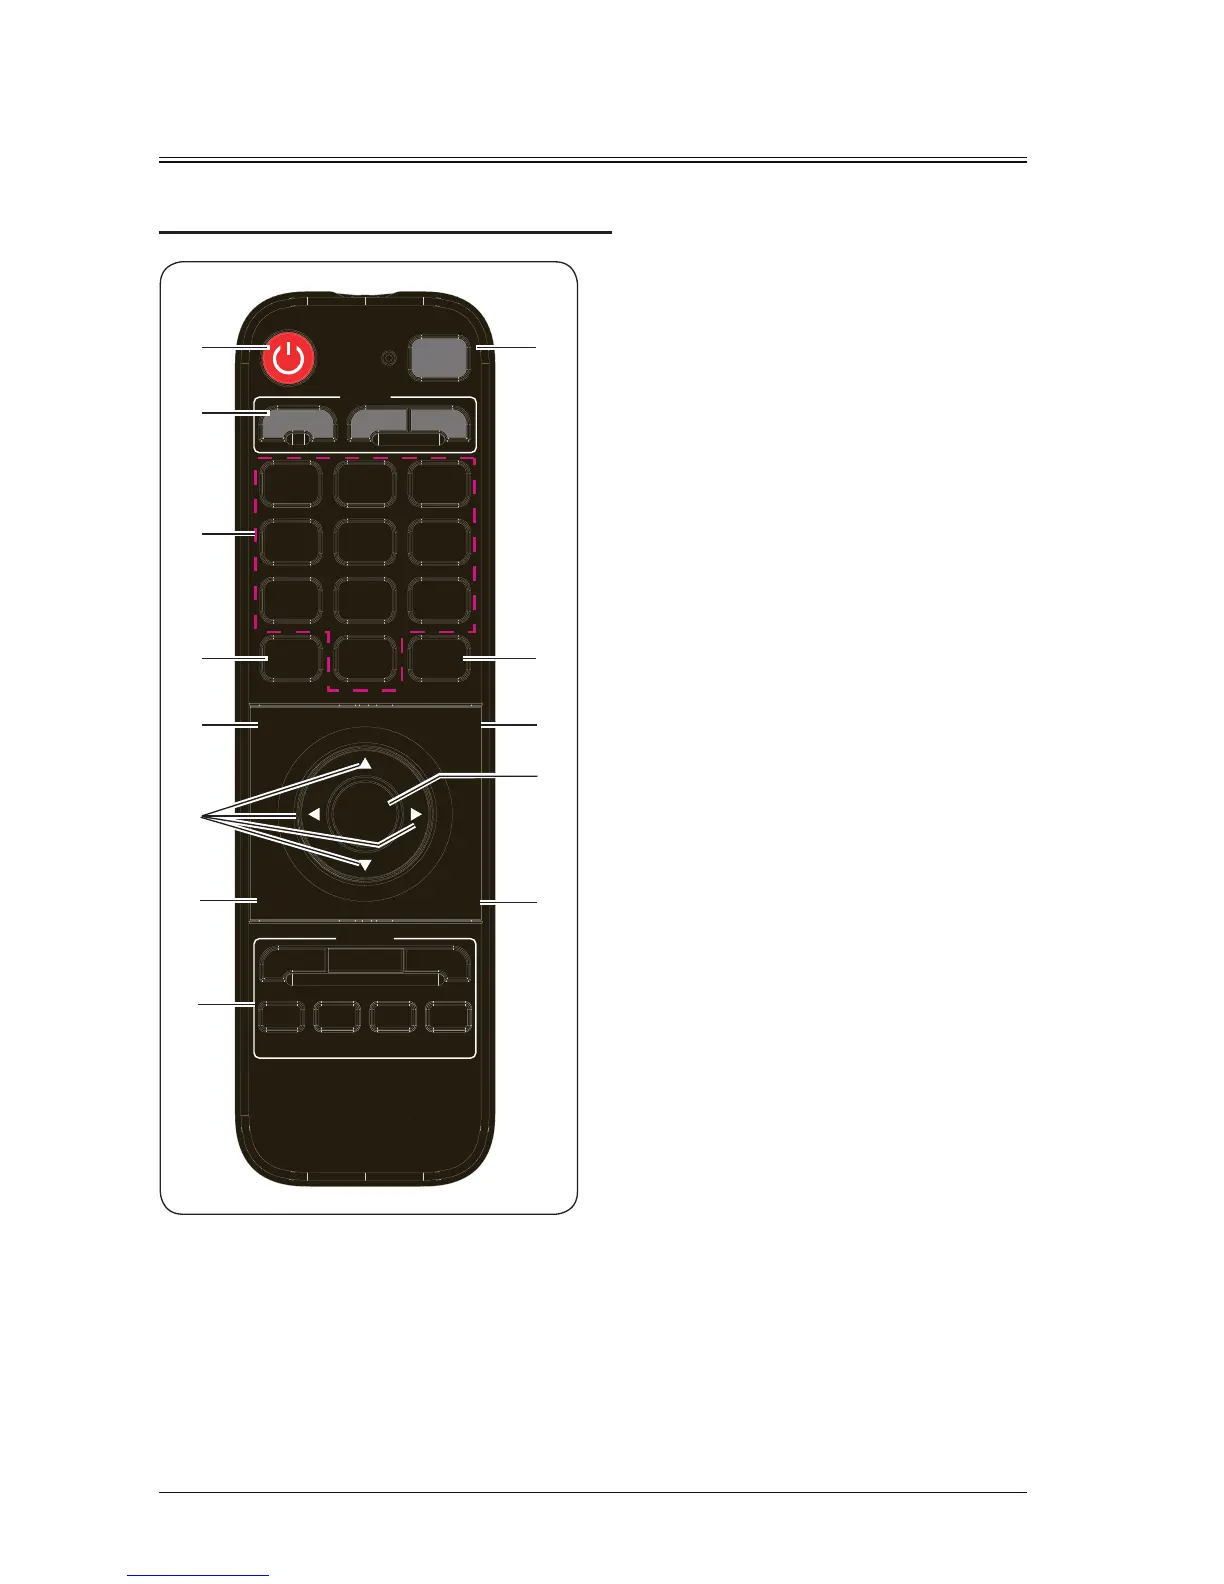
Remote Control
Image
Focus
Lens
Source
RGB1 Video
OK
RGB2 DP
HDMI
1 2 3
4 5 6
7 8 9
0
HDBaseT DVI
Douser
Menu
Blank
Return
Shift
Pattern
ID SET
Zoom
④
⑧
⑩
⑥
⑤
①
③
②
⑦
⑨
⑫
⑬
⑪
①
Power button
In standby mode, if you press this key, the device
is powered on; in power-on mode, if you press
this key, the screen prompts for the power-off
operation. Press the power button to shut down
the device.
②
Lens
Press Focus,Shift or Zoom button repeatedly to
enter the lens focusing, shifting or zooming menu.
③
1/2/3/4/5/6/7/8/9/0 (number key)
Press to enter the corresponding number.
④
Pattern
Press repeatedly to display internal test pictures
in a cycle manner.
⑤
Menu
Press to display the main menu. If you press
the key again, the main menu disappears or the
system returns to the previous-layer menu.
⑥
(Arrow key)
Scroll up or down to select the adjustment item;
move to the left to select an adjustment item or
decrease the value; move to the right to select an
adjustment item or increase the value.
⑦
Blank
Press to switch the picture to the blank screen.
⑧
Source
Set the input source to HDMI, HDBaseT, DVI,
RGB1, Video, RGB2 or DP.
⑨
ID SET
When multiple channels are spliced, set the ID
number of each remote receiver.
⑩
Image
Press to switch image modes among standard,
DICOM, picture, cinema, bright, REC709, video
and user.
⑪
Return
Press to exit the settings.
⑫
OK
Press to select or confirm the current value or
item.
⑬
Douser
When an picture is displayed, press to disable the
display, and press again to enable the display.