4 GETTING STARTED AquaLab
4.3 Preparing AquaLab for Operation
After finding a good location for your AquaLab, plug the power cord
into the back of the unit. The ON/OFF switch is located on the
lower left corner of the AquaLab back panel. When the AquaLab
is turned on, you should see a model name/number screen and then
the main Measurement screen.
Warning: Only use the supplied power cord or one rated for your
AquaLab 4 and certified for the country of use. The cord must be
minimum of 18 AWG and have a rating for 10 Amps or greater.
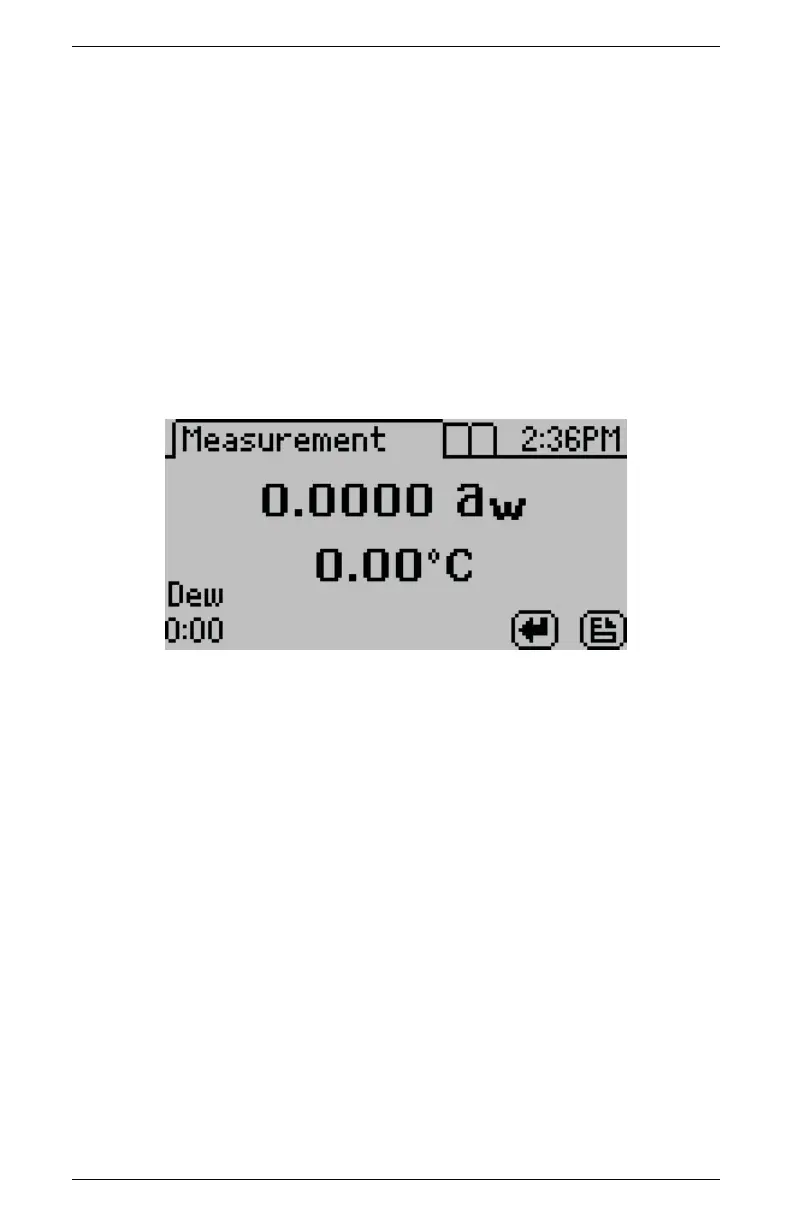
The main screen shows the water activity (a
w
) in the middle of the
screen and above the sample temperature. On the Series 4TEV
model you also see either DEW or CAP indicating whether you are
using the dew point or capacitance sensor respectively.
Note: Allow your AquaLab a 15 minute warm-up period to ensure
the most accurate readings.
If you have users set up, the User screen appears instead of the
main screen. (see Section 5 for more information on administrative
settings and user setup.) Select the appropriate user to begin.
16
 Loading...